Her Trees – Puzzle Dream: Full Walkthrough
Her Trees: Puzzle Dream is a surreal B&W point-and-click adventure game featuring plenty of logic puzzles set across a mysterious dream world. Explore strange monochrome environments and align objects to reveal hidden letters of the English alphabet. As you progress, the puzzles become more challenging. Here’s a complete walkthrough of all five stages:
If you’re looking for solutions to an earlier game in the series, be sure to check out my Her Trees: Puzzle House walkthrough. While PUZZLE DREAM features an entirely new set of puzzles, both games share the same surreal black-and-white style and observation-based gameplay that fans of the series will recognize.
Quick Access
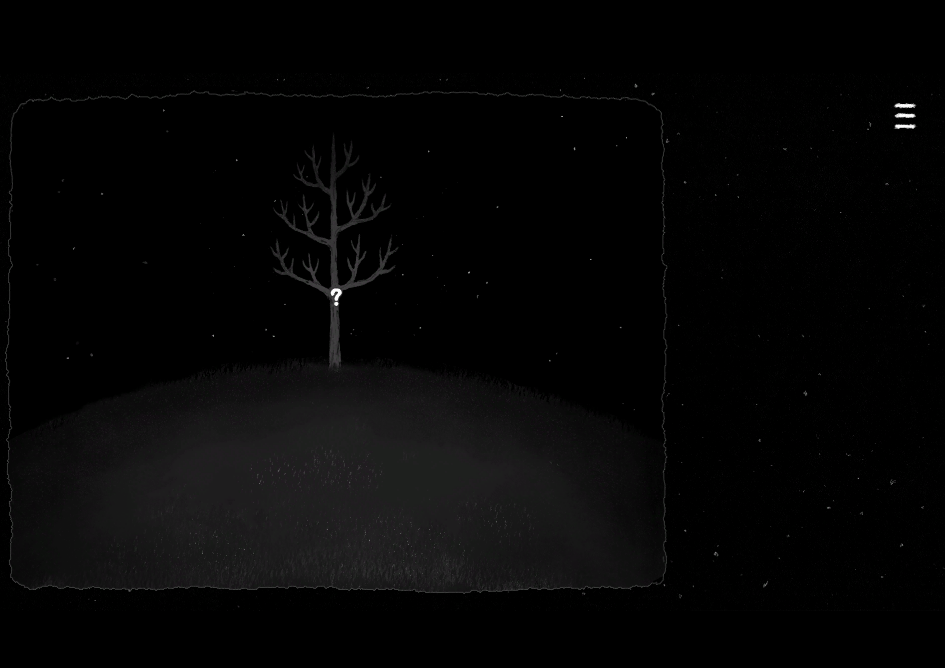
Click on the withered tree:
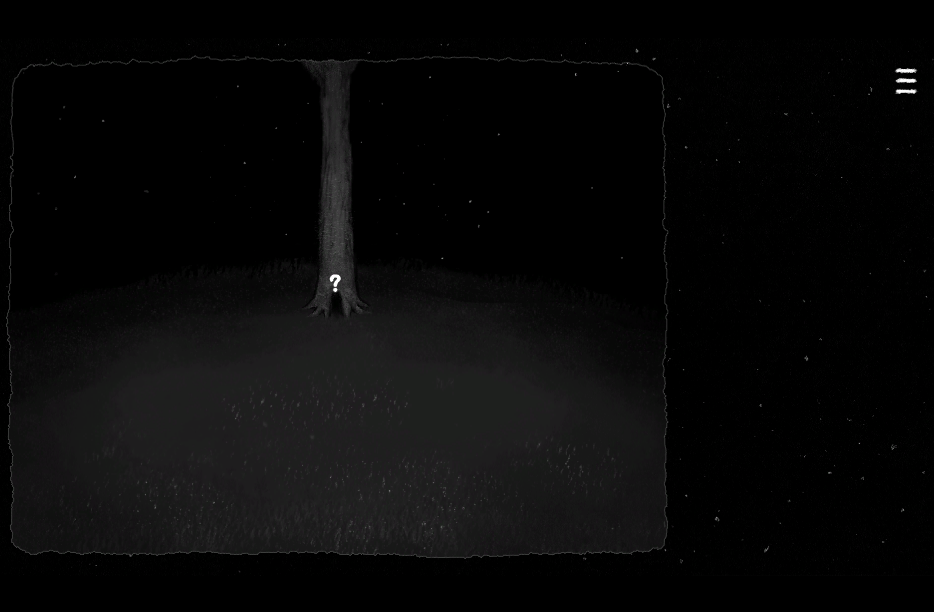
Click on the tree root hollow:
Click on the broken door piece and fit it back into place like a puzzle piece to reveal three letters: H D A
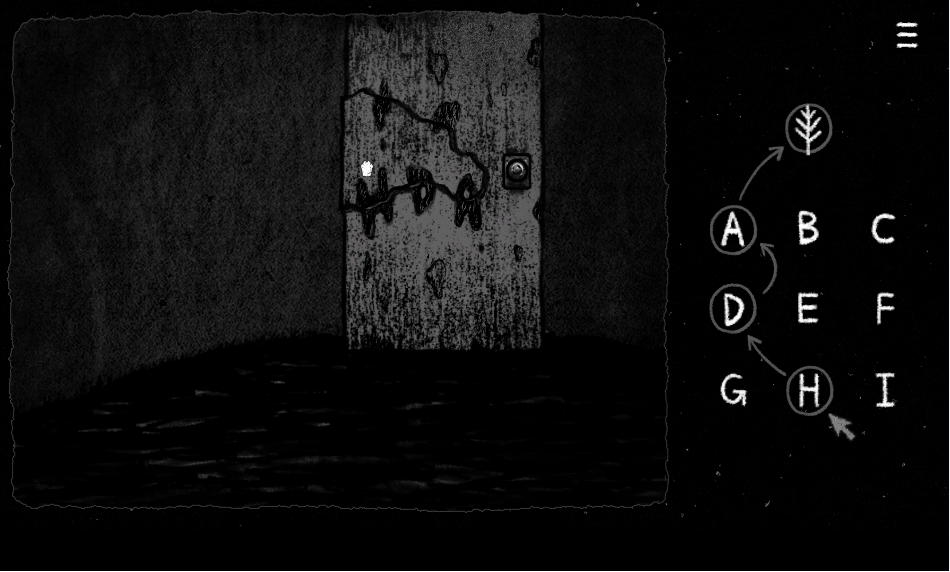
Select the corresponding letters from the grid on the right, then click on the tree icon to complete the puzzle.
From this point onward, most puzzles follow a similar pattern. Your objective is to solve each puzzle to find hidden letters of the English alphabet and then select those same letters on the grid. The letters are often cleverly concealed within objects, patterns, and shapes. Carefully align, rotate, or position the puzzle elements to reveal the hidden letters and progress further.
The door opens. Step through it.
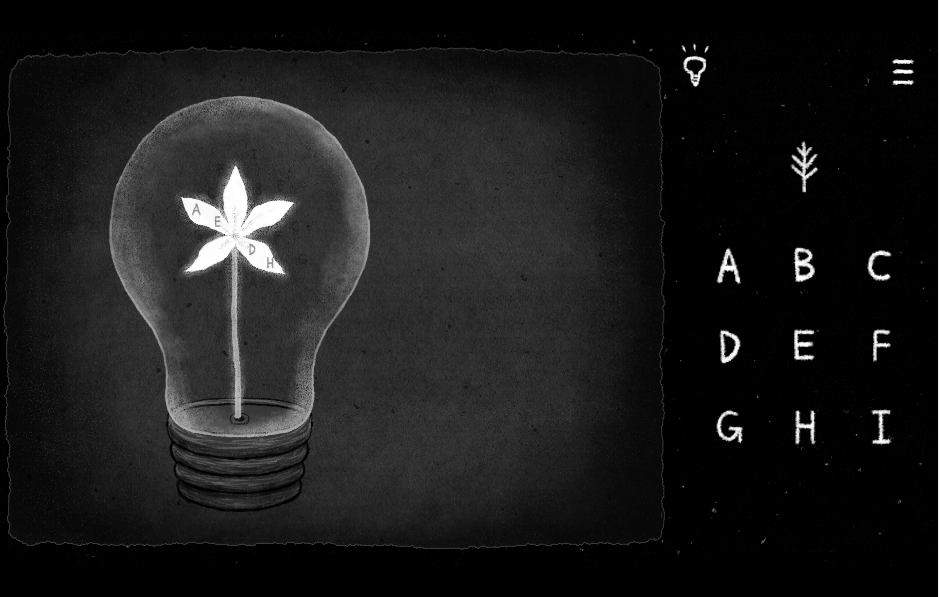
1. Interact with the glowing flower. Drag it inside the light bulb and place it into the hole at the base of the bulb.
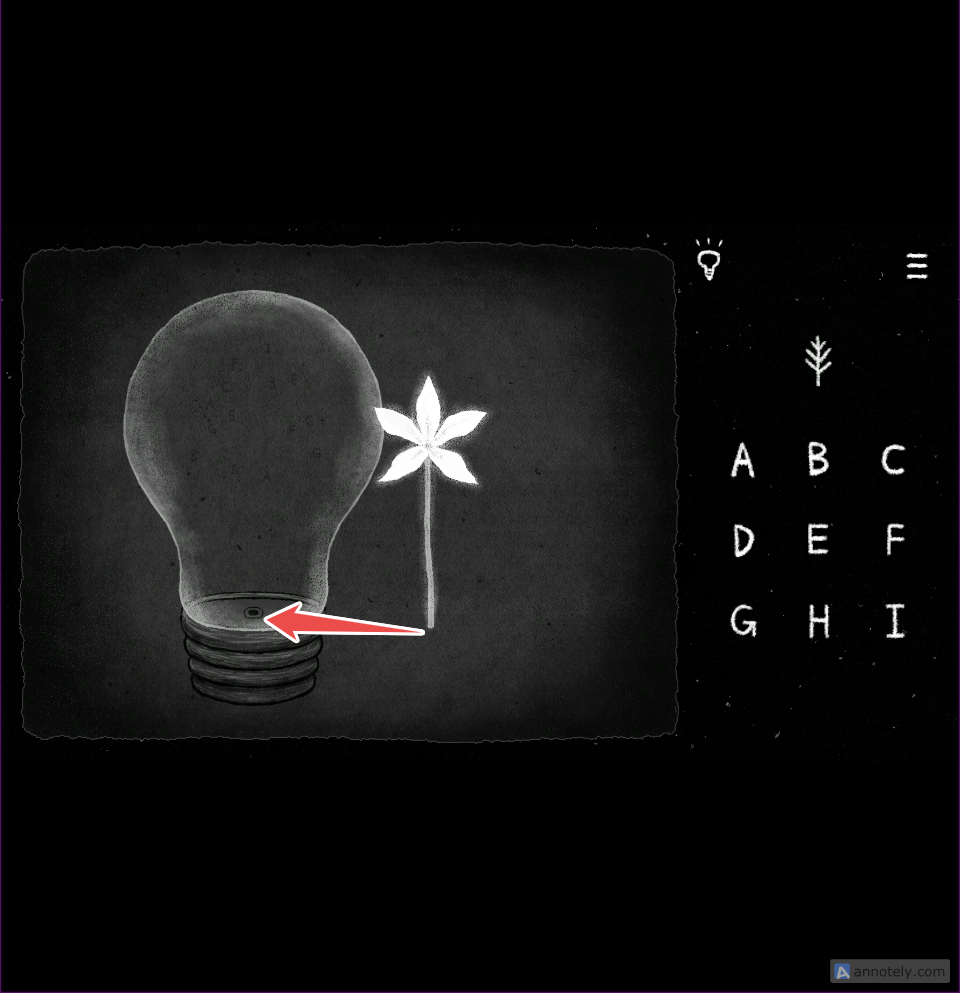
Doing so will reveal the four letters: A, E, D, and H. Then click on the matching letters in the grid on the right. Completing this puzzle unlocks level 0.
Level 0
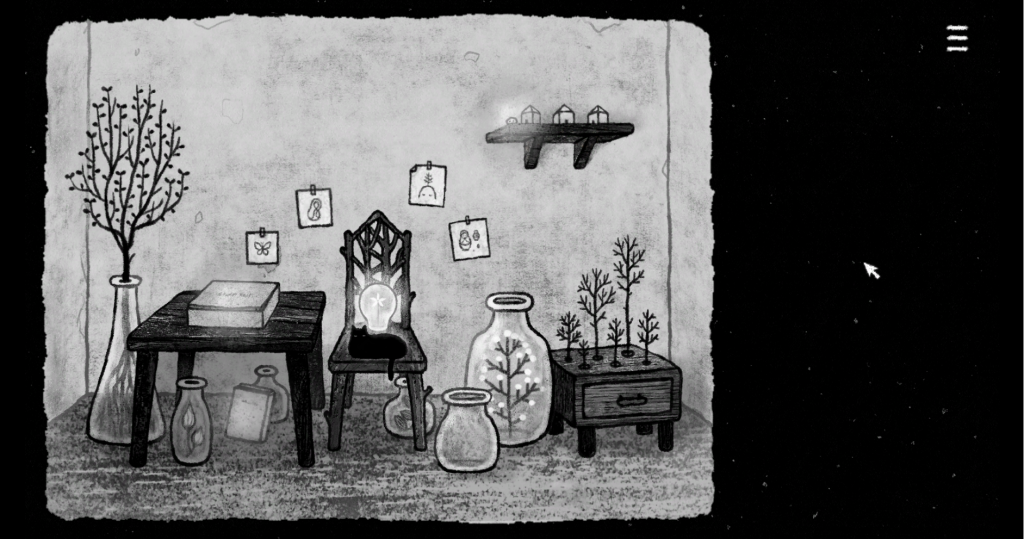
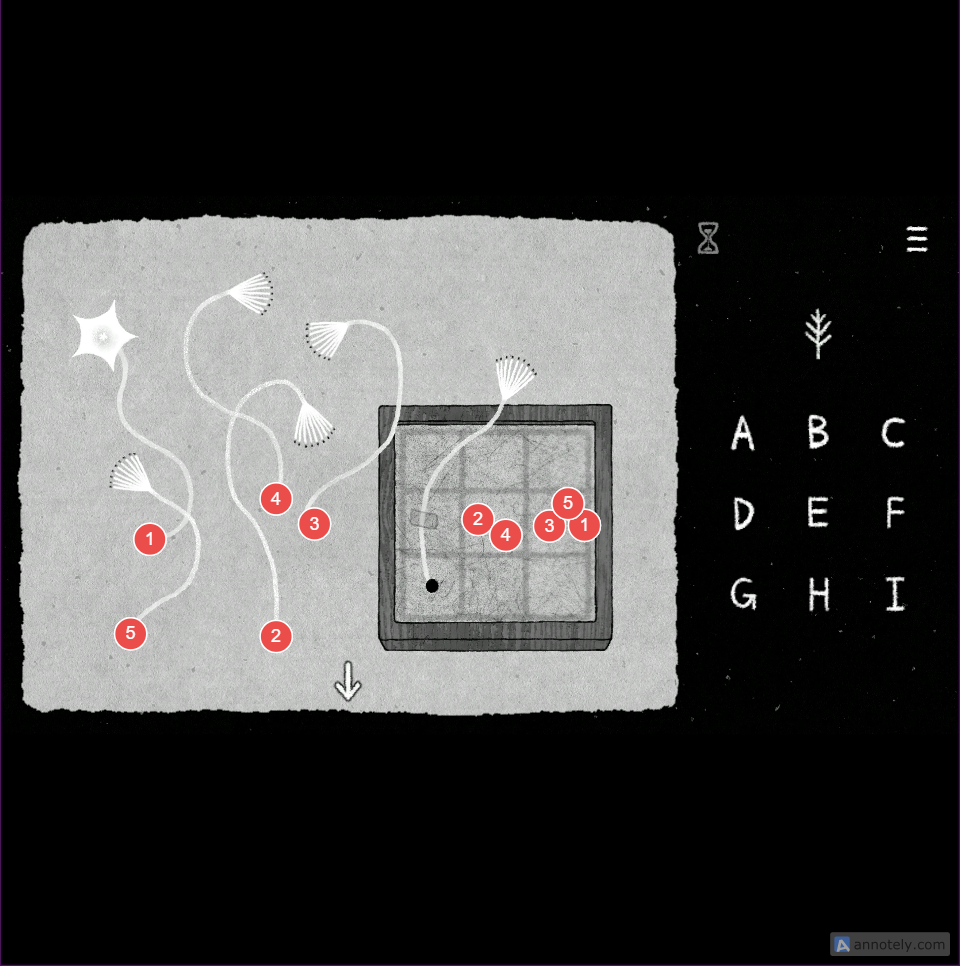
To make the puzzle solutions easier to follow, each puzzle on the screen has been numbered in the screenshot below. The same numbers are used in the Solutions section, allowing you to quickly find the solution for any puzzle:
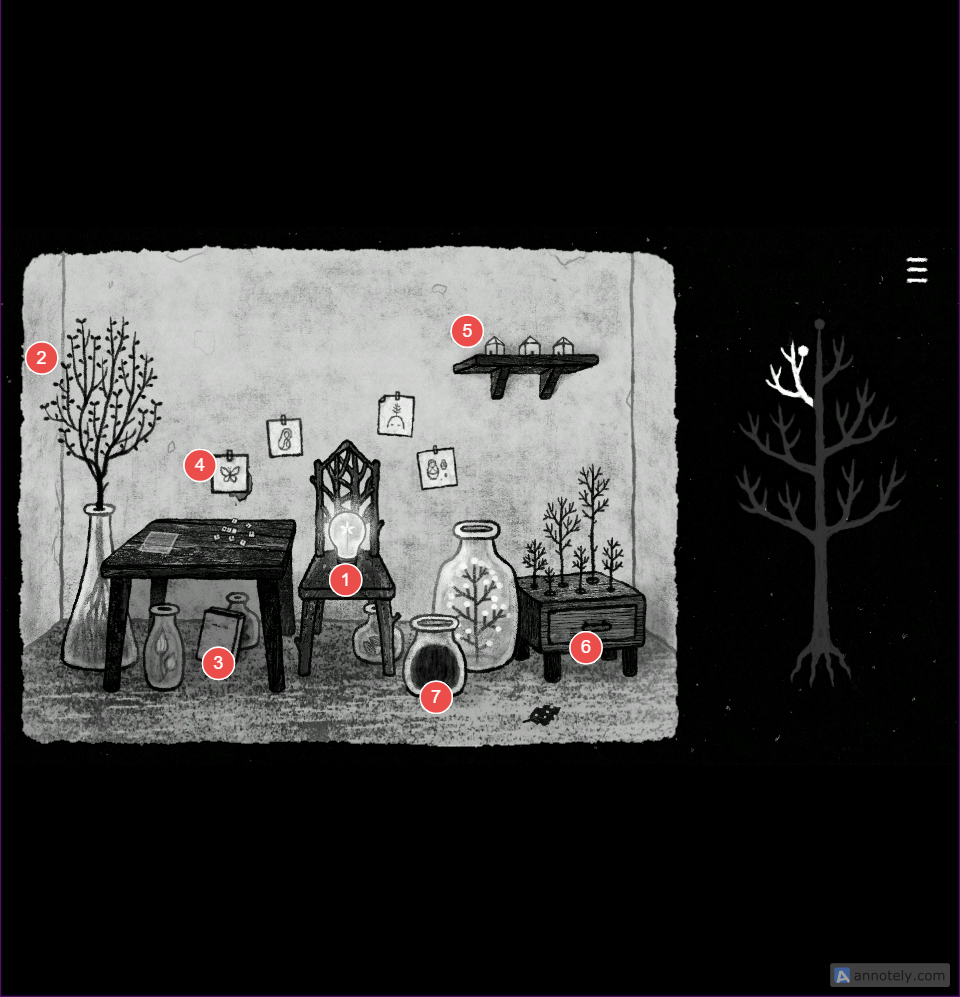
2. Click on the tall decorative plant on the extreme left side of the screen. A few flower petals will fall on the tracing paper kept on the table.
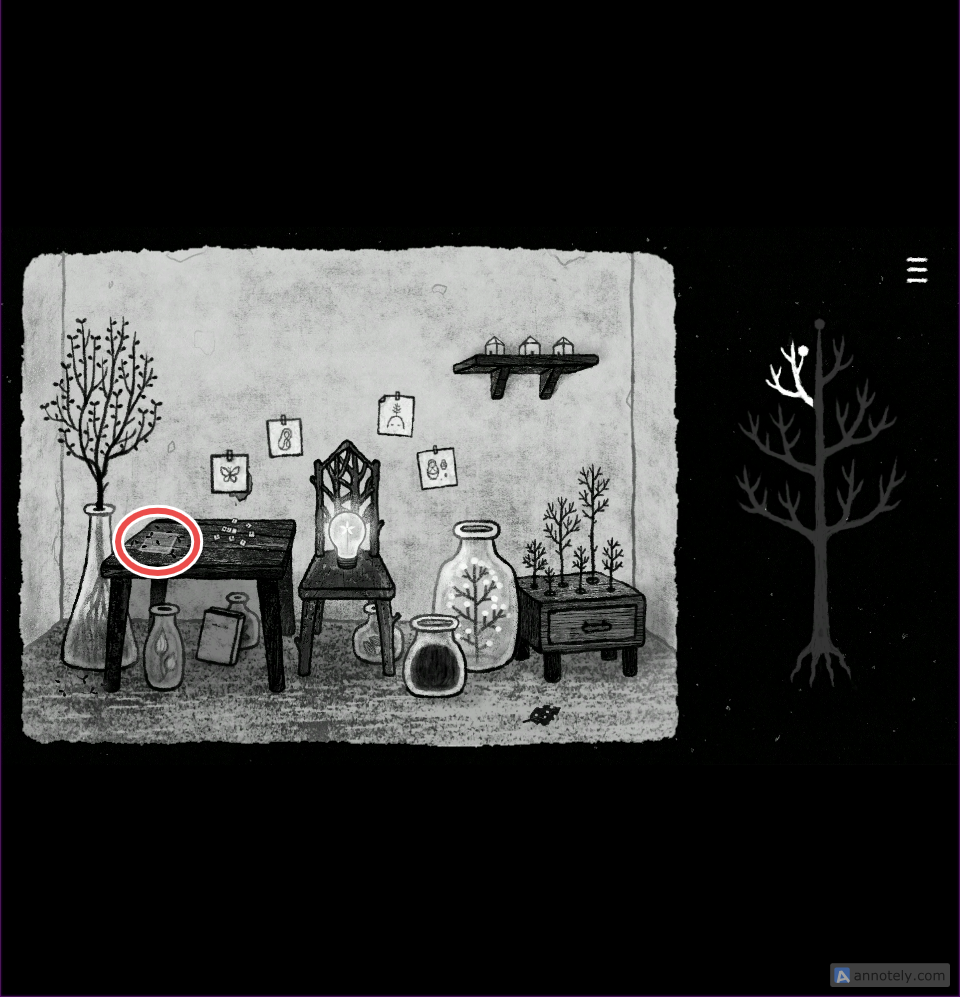
Click on the note to begin the next puzzle:
Drag the tracing paper onto the petals on the right to reveal a number grid that looks similar to the letter grid on the right.
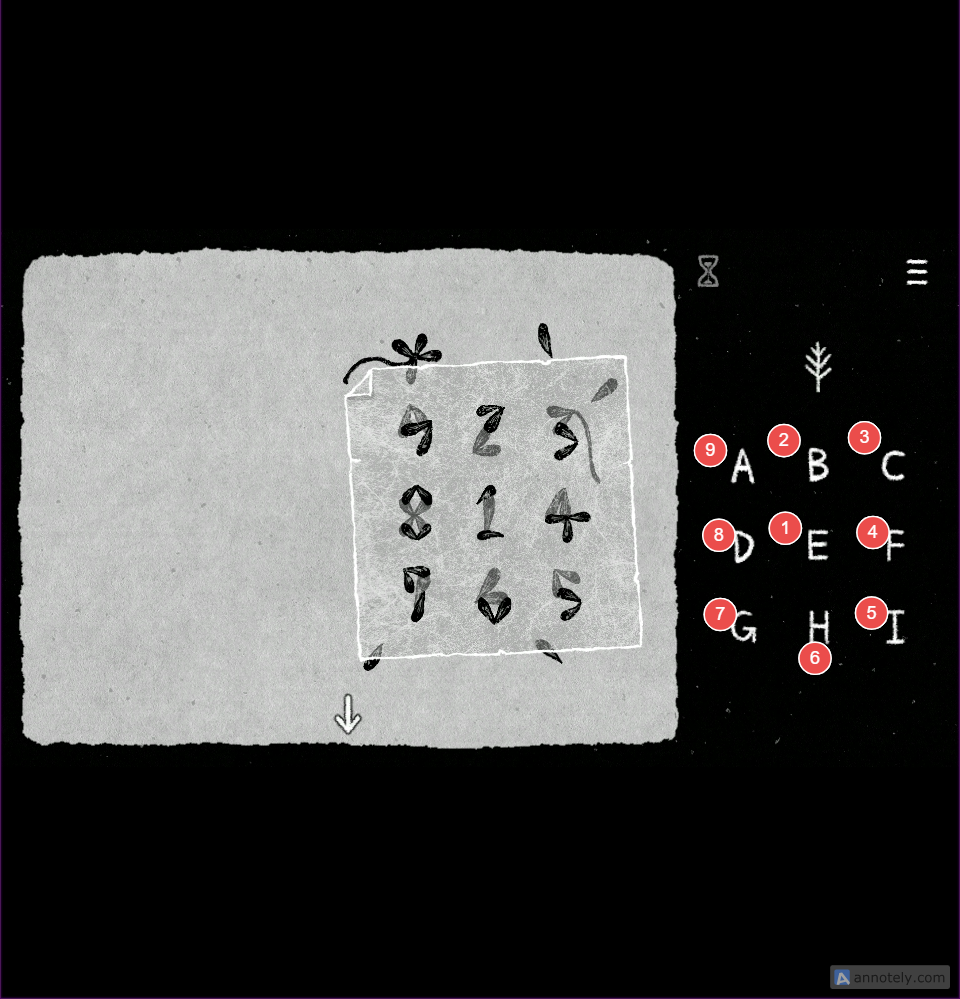
Using the number grid as a guide, follow the sequence from 1 through 9 and click the letters in the corresponding order shown below:
1 = E
2 = B
3 = C
4 = F
5 = I
6 = H
7 = G
8 = D
9 = A
3. Click on the book under the table to open it. Click on it once again to start a new puzzle.
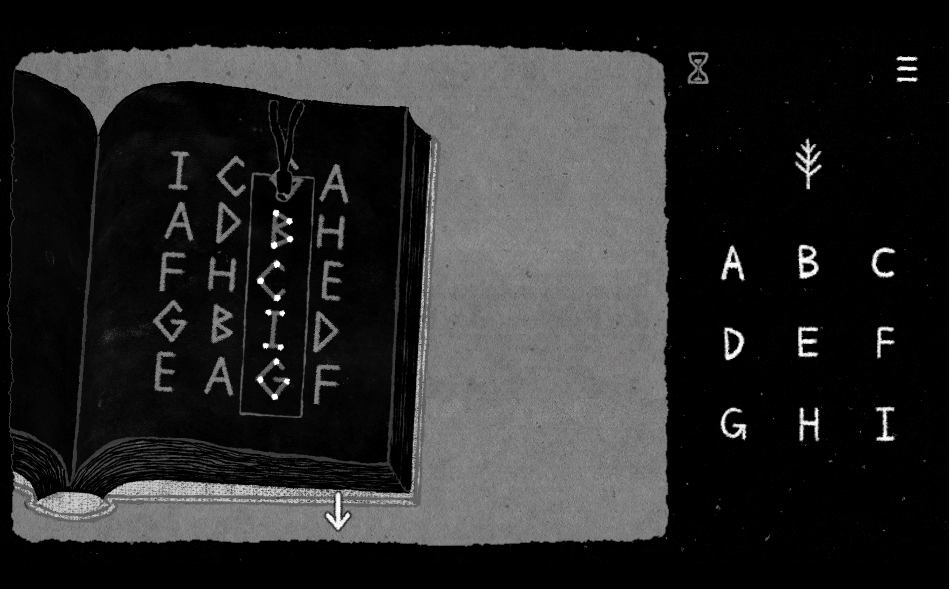
Drag the bookmark onto the third column from the left to make the dots perfectly aligned with the letters B, C, I, and G. Click on the same letters on the letter grid to complete the puzzle.
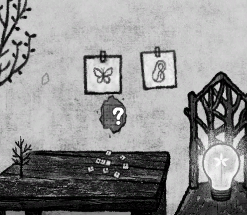
4. Click on the butterfly portrait on the wall to reveal a hidden grid. Click on the grid to start the puzzle:
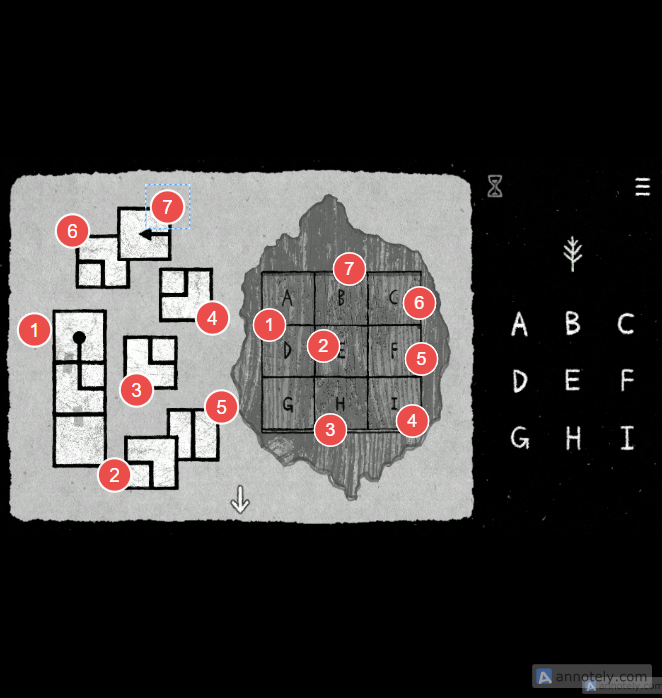
Move the blocks on the wall’s letter grid to create a complete path. Refer to the screenshot below for the correct placement of each block:
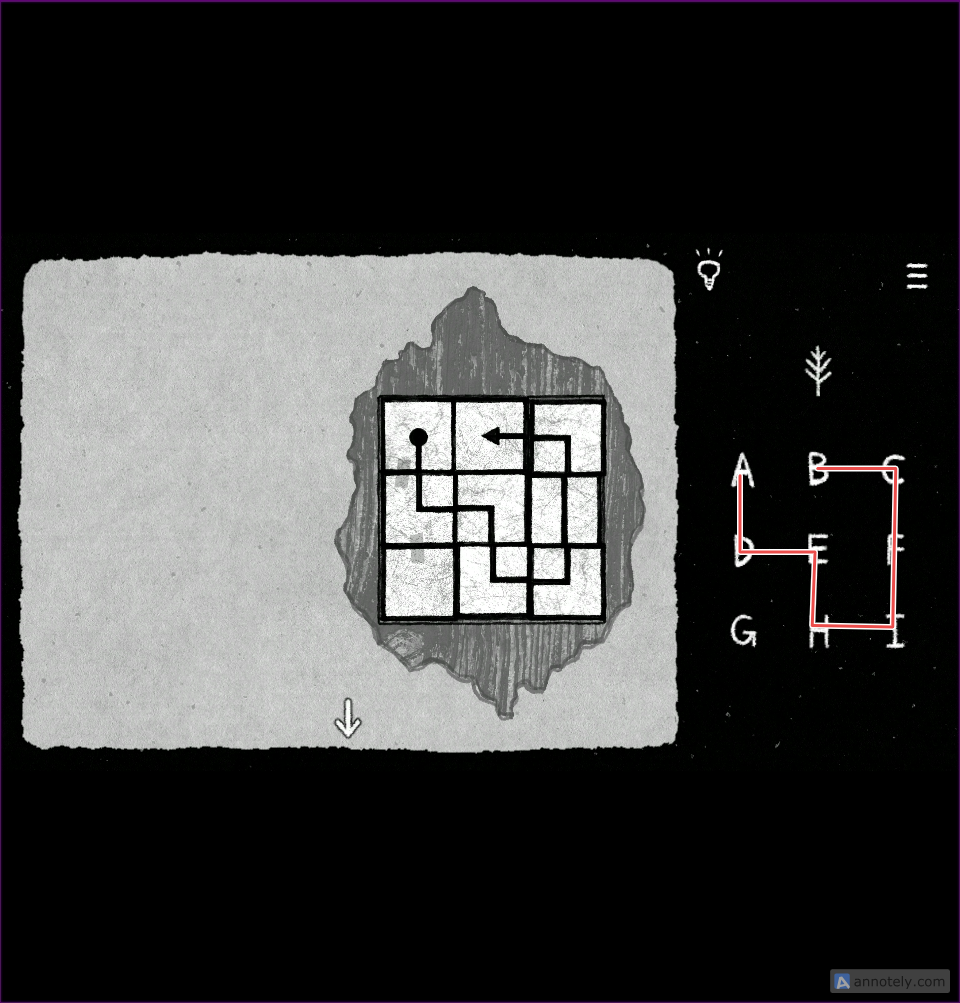
Then trace that path by selecting the matching letters on the grid to complete the puzzle:
The solution to this puzzle is: A D E H I F C B
5. Click on the first miniature house displayed on the wall shelf at the top-right side of the room. It falls on the floor and breaks into pieces. Click on the pieces to begin the next puzzle.
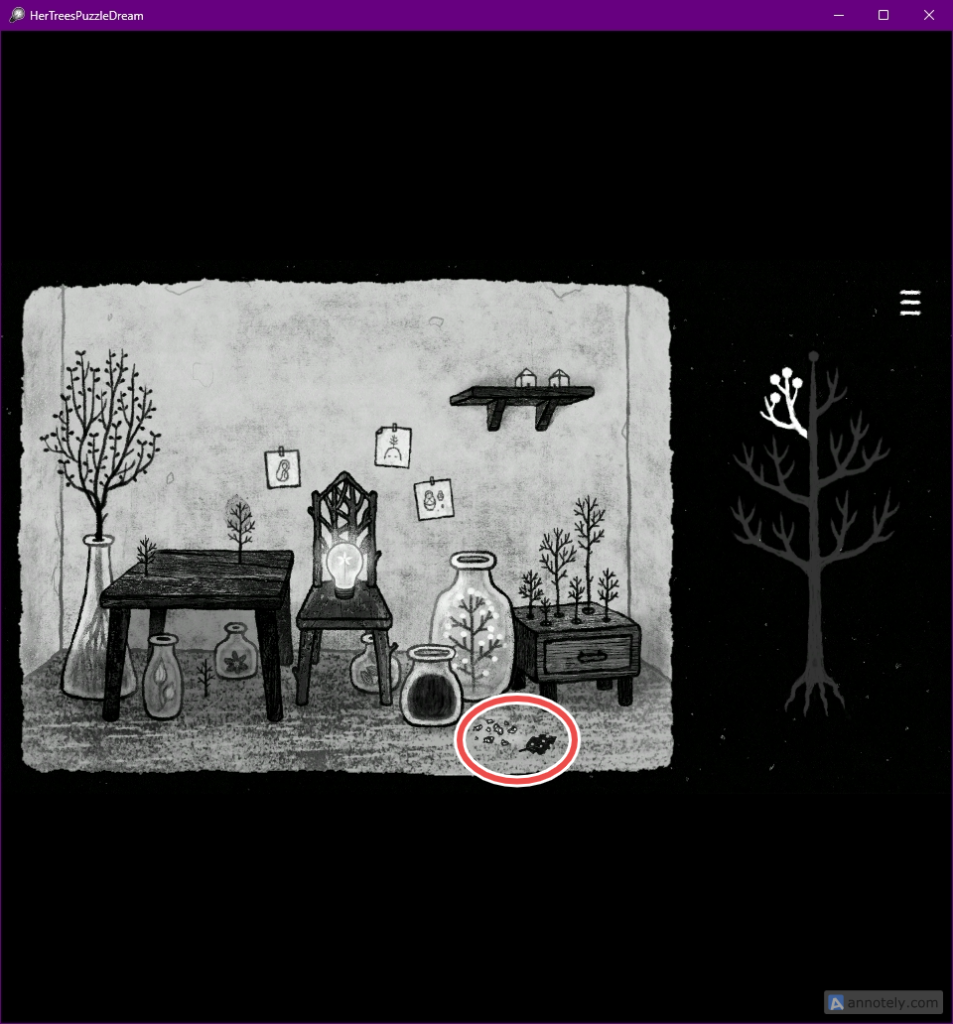
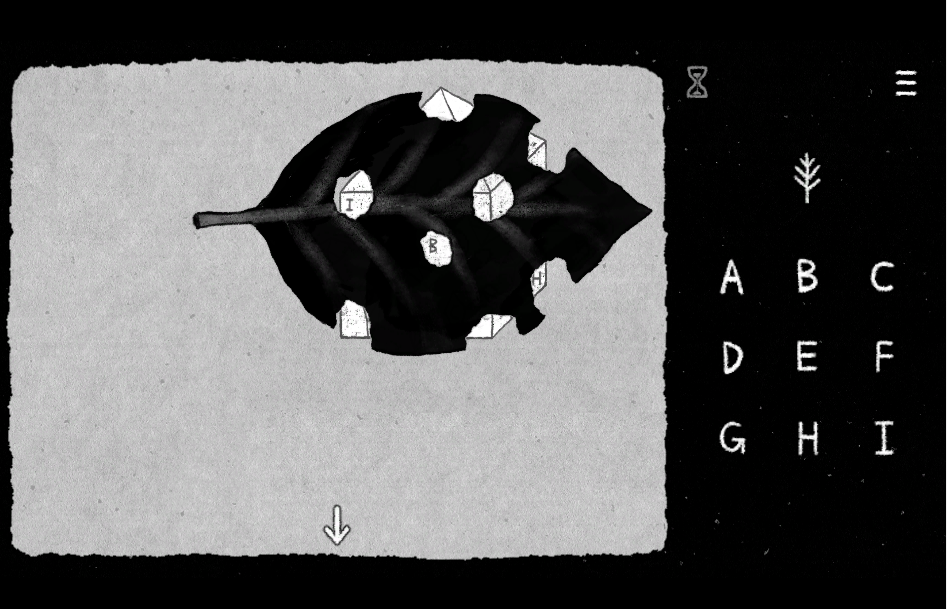
Move the leaf with holes over the broken pieces to reveal the miniature house in its complete form, along with the three letters: I, B, and H.
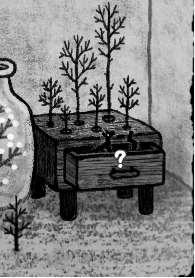
6. Open the desk drawer and click on the miniature animal figures to begin a new puzzle:
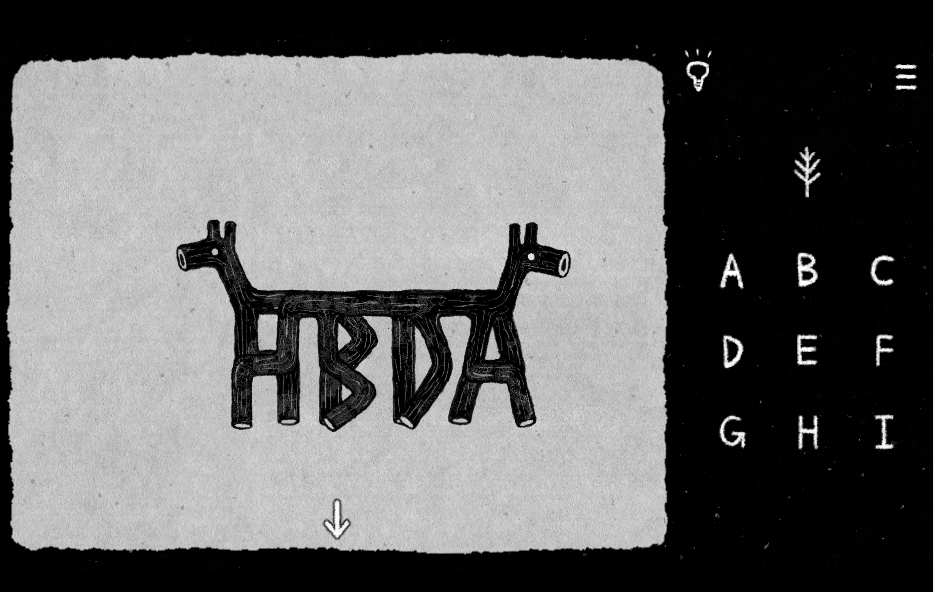
Drag and align the top animal figure with the bottom one so that their heads face in opposite directions. Doing so will create 4 letters: H B D A
7. After completing all the puzzles, interact with the black cat.
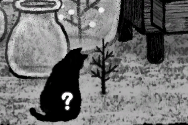
In the next screen, move the torn leaf aside to reveal an intact miniature house. This is from puzzle no. 5. Click on the door twice to enter a corridor with two archways on the left and right and a large door in the middle:
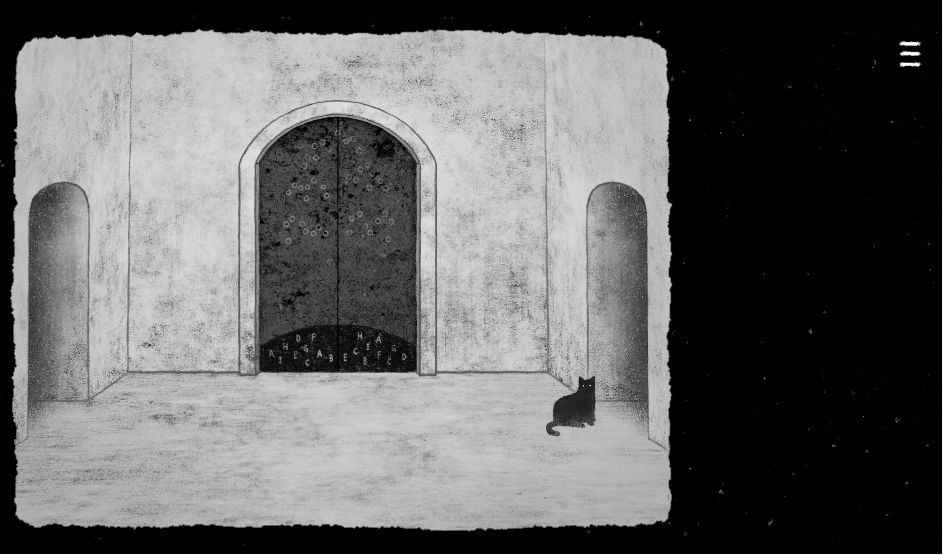
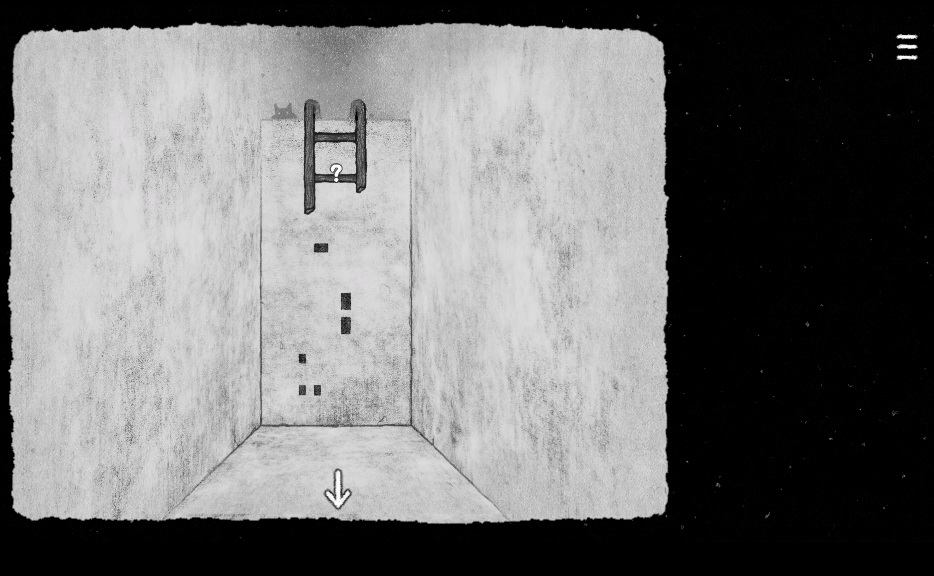
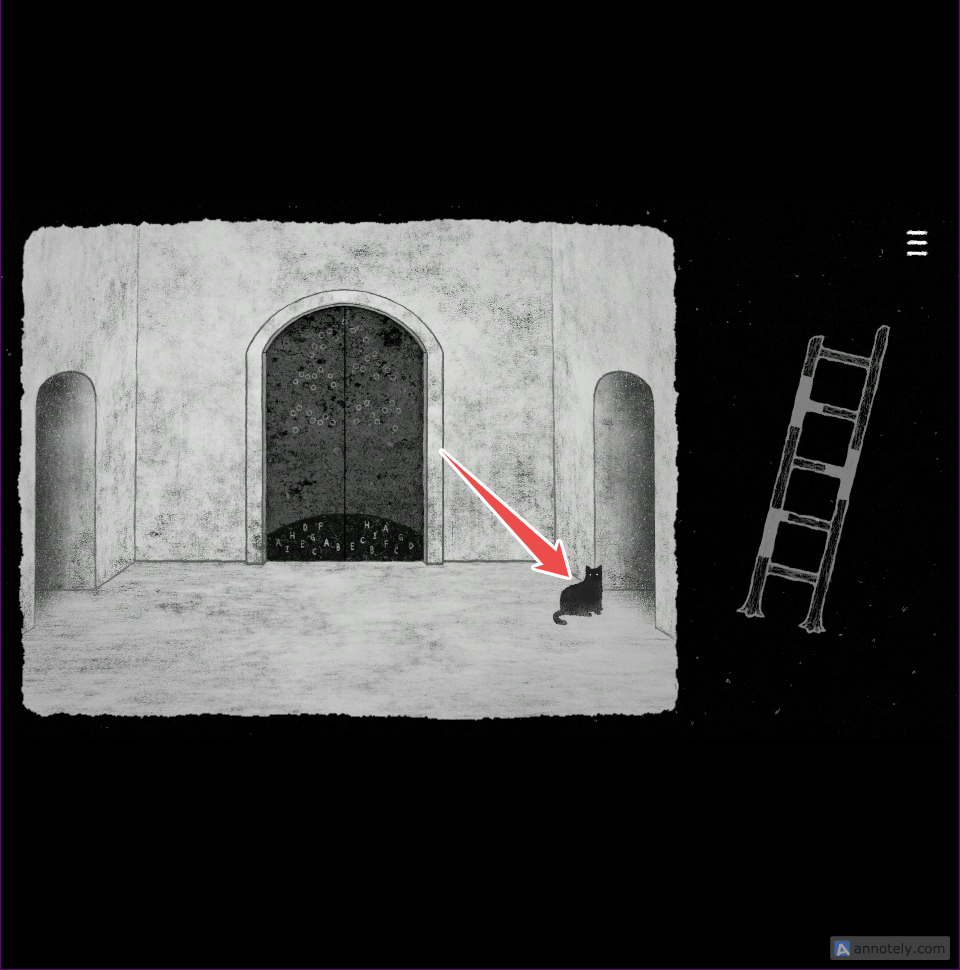
In the corridor, you will spot the same black cat near the right archway. Interact with the cat, and she will walk through the archway. Click on the right archway to discover a broken ladder along with a few strange symbols beneath it. To proceed, you will need to find the missing half of the ladder and repair it.
Level 1
Click on the left archway to enter a room containing a small house.
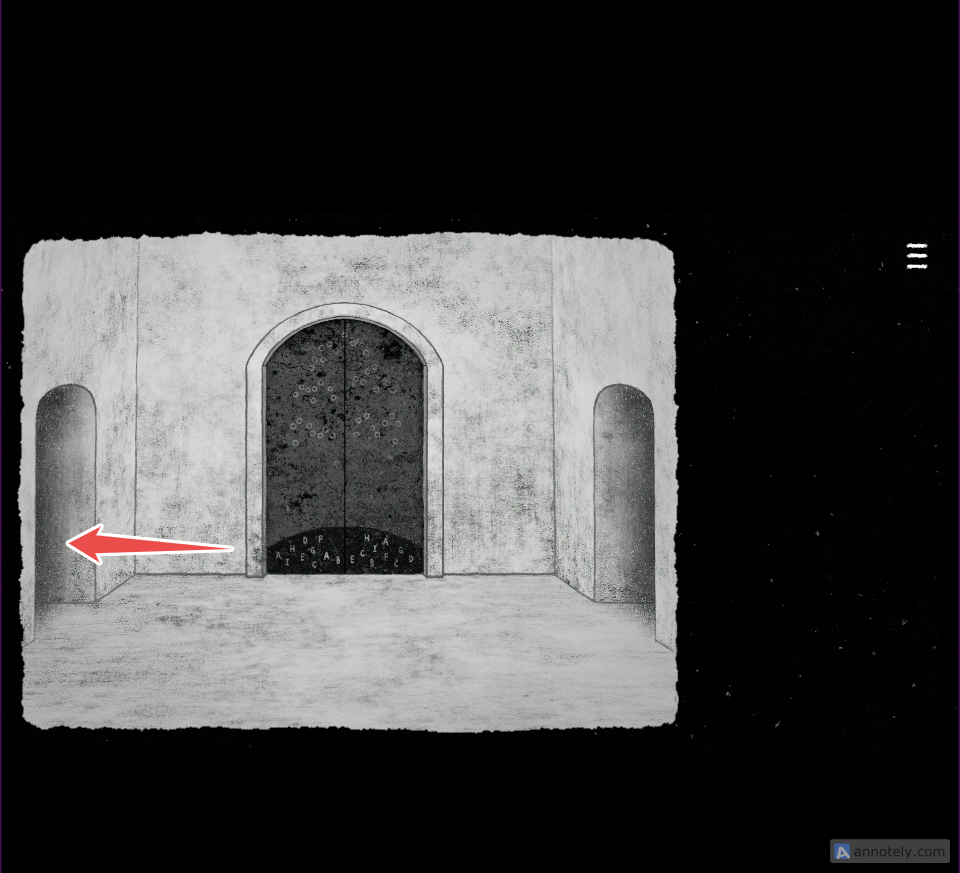
You will enter a large white room with a big house surrounded by vines. Click on the tiny pebble/walnut near the house, on the left side, to begin Level 1.
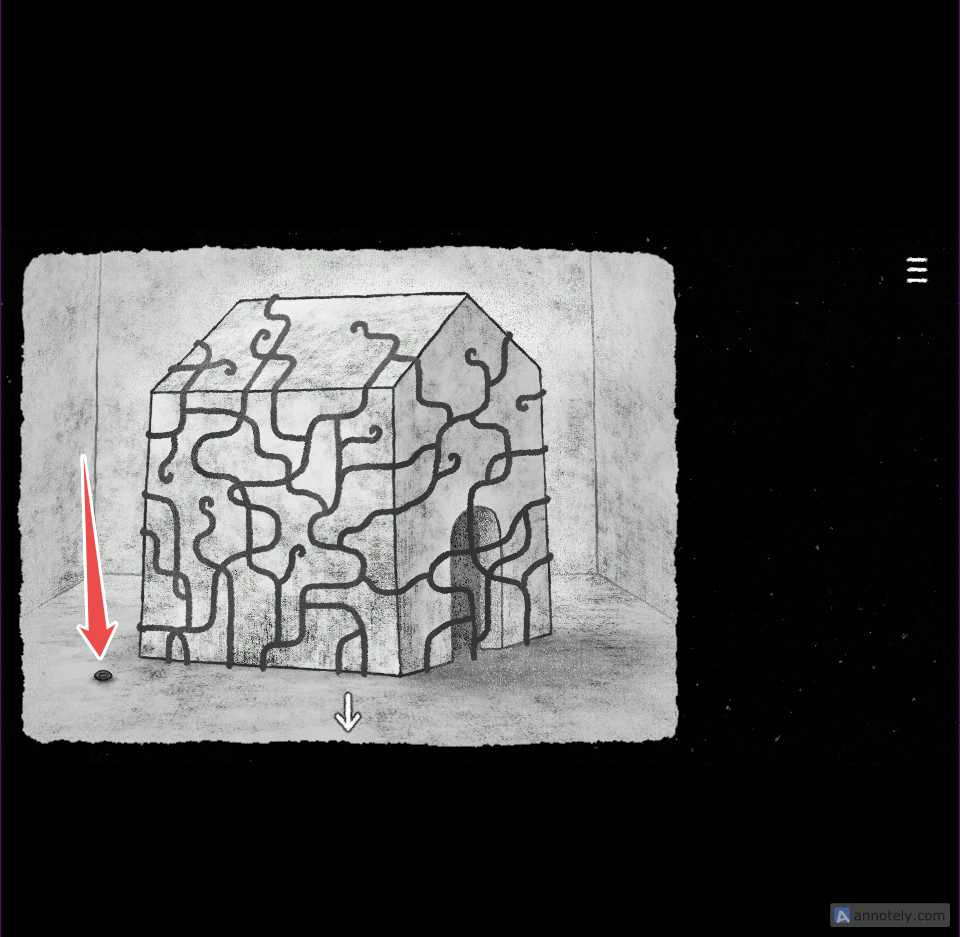
Interact with the middle section of the walnut, then pick up the ladder.
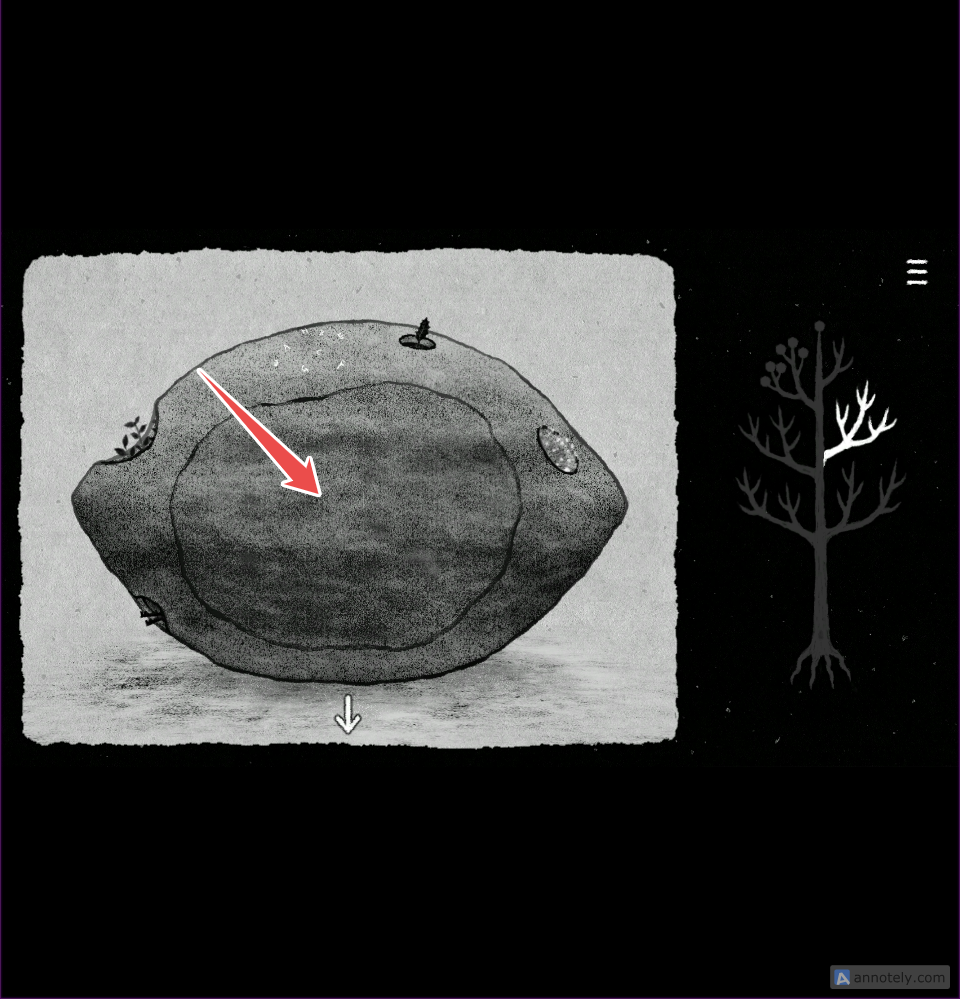
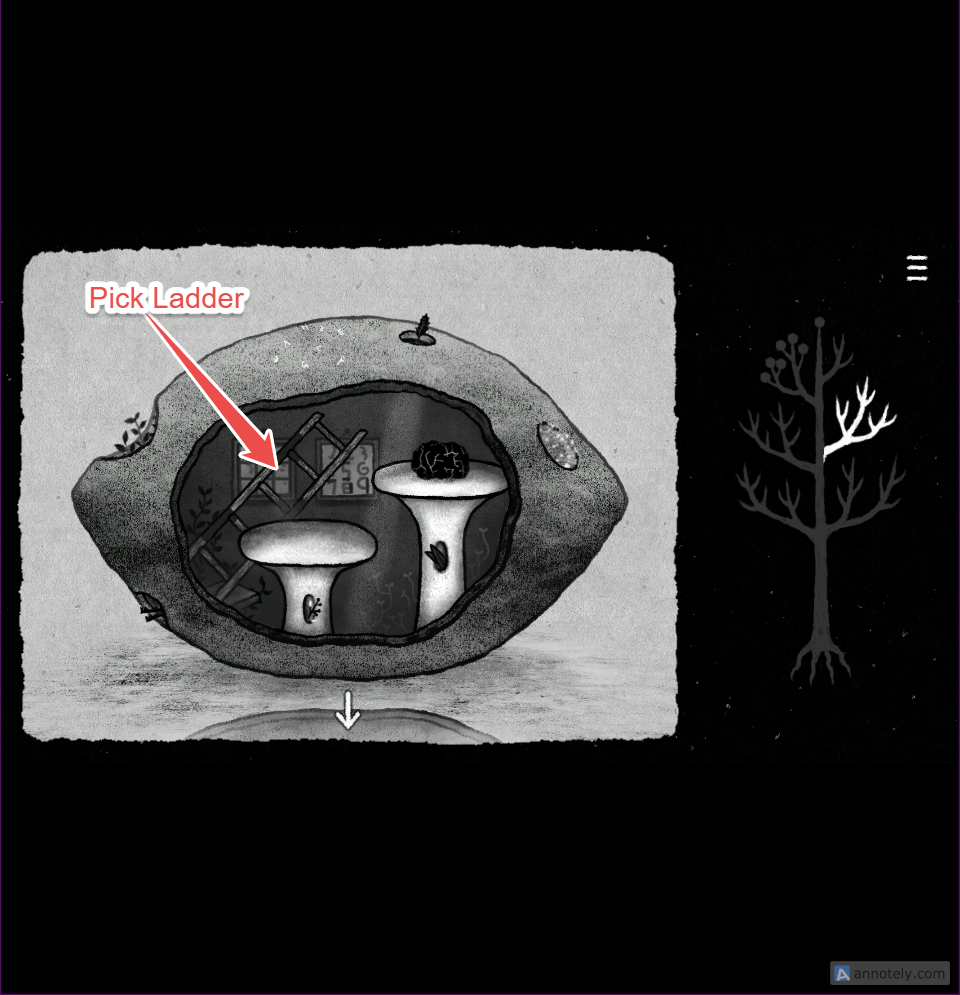
After that, interact with the numbered wall portrait to begin the first puzzle of Level 1.
To make the puzzle solutions easier to follow, each puzzle in the screenshot below has been assigned a number. The same numbers are used in the Solutions section, allowing you to quickly locate the solution for any puzzle:
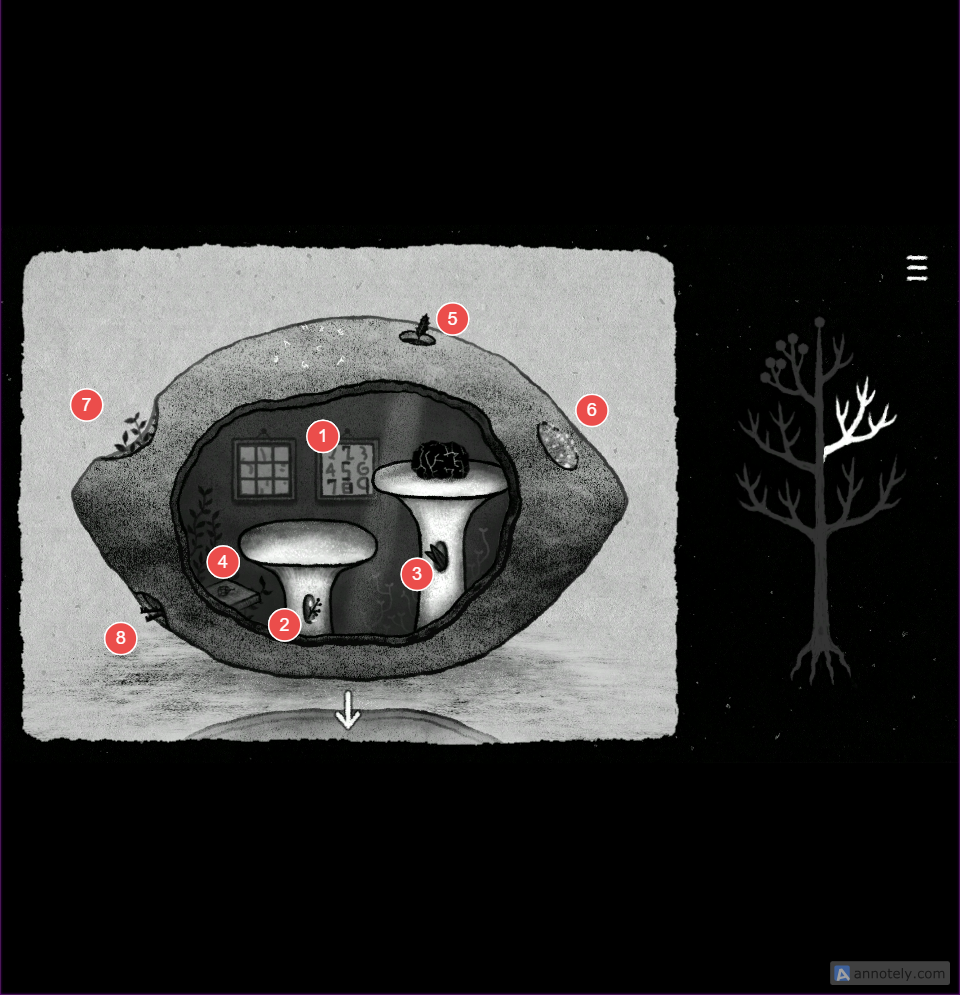
1. Insert the numbers 1–9 into the empty grid on the left. When placed correctly, the markings will form letters of the English alphabet. Drag each number onto the grid squares so that the markings form a letter. The incomplete lines on the grid serve as hints for the correct placement. Use the dark lines on each number as guides to match them with the edges of the grid squares.

Next, drag the white sheet of paper onto the letter grid to reveal only numbers:
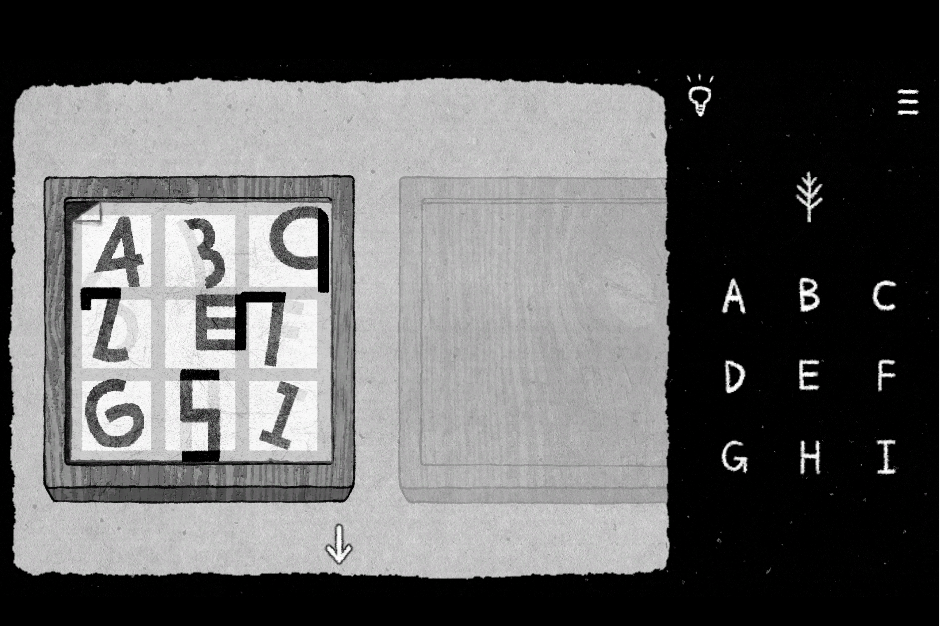
The grid on the left is similar to the letter grid on the right-hand side. Using the number grid on the left as a guide, follow the sequence from 1 through 9 and click the letters in the corresponding order shown below:
1 = I
2 = D
3 = B
4 = A
5 = H
6 = G
7 = F
8 = E
9 = C
2. Interact with the hole on the short mushroom’s stem to push aside a tiny berry sprig. After that, click on the sprig to start the next puzzle.
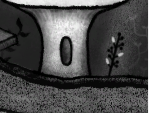
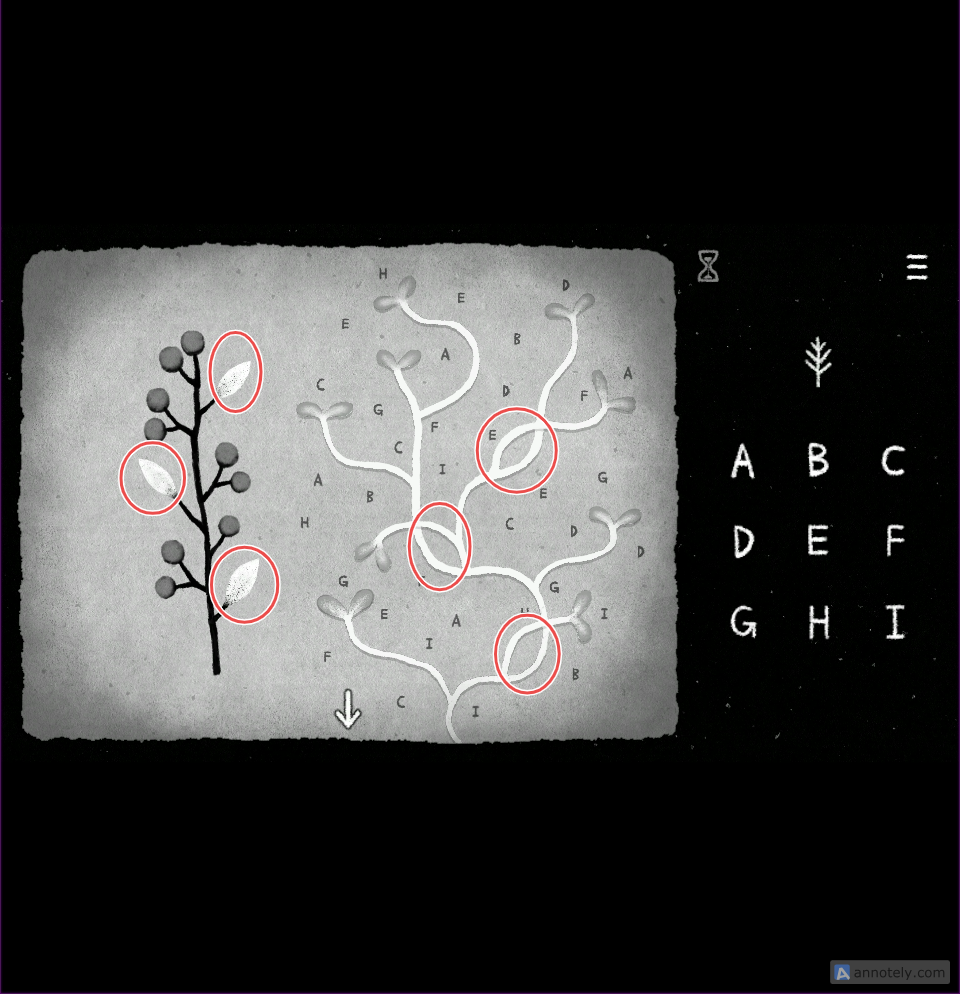
Pay attention to the three white leaves of the berry sprig. Now move the sprig to place the white leaves on top of their cutouts formed by the branching plants.
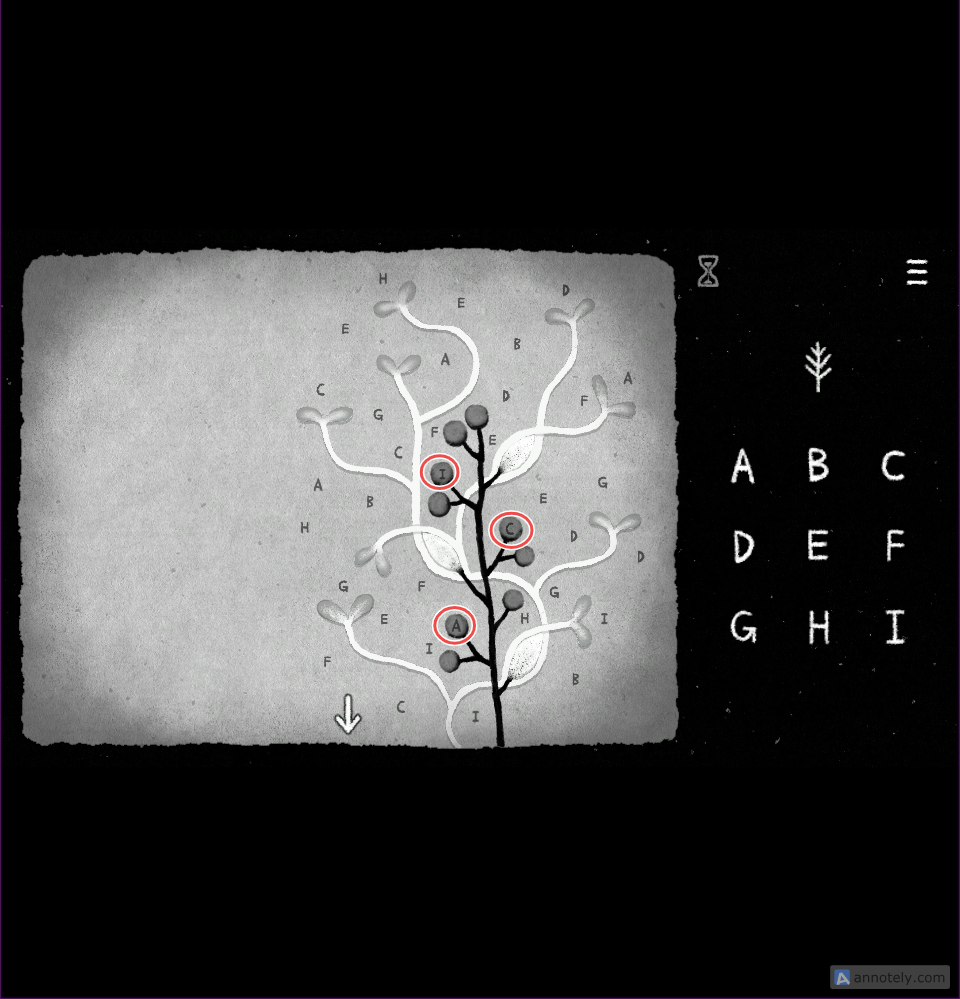
Note down the letters covered by the berries from top to bottom: I, C, and A. Click on the same letters on the grid on the right to complete the puzzle.
3. Interact with the hole of the tall mushroom’s stem. Two large leaves will fly up to the same mushroom’s cap. Click on the leaves to begin the next puzzle:
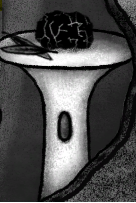
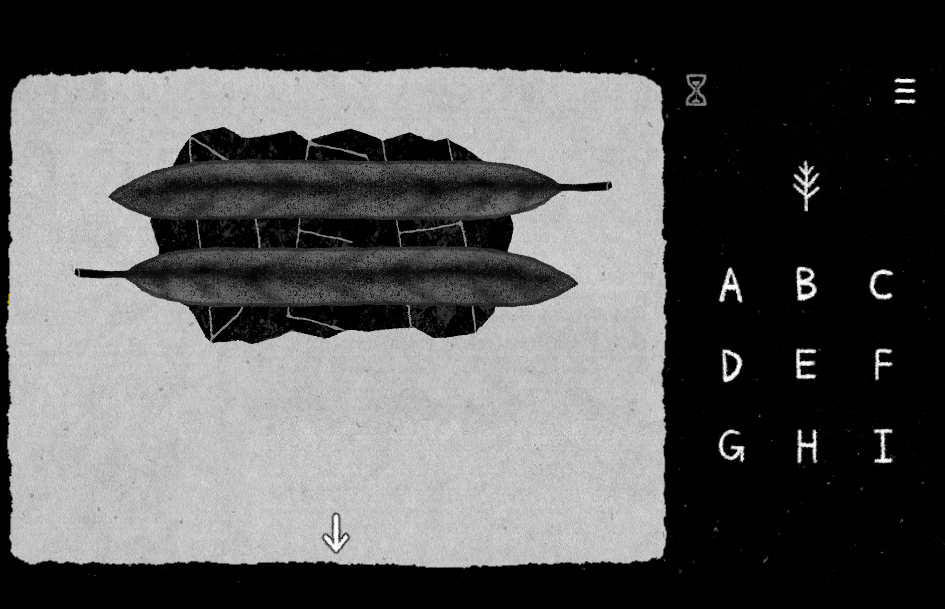
Arrange the leaves across the cracked stone slabs in a parallel formation to reveal the hidden letters D, E, and H.
4. Interact with the tiny miniature house in the lower-left corner of the walnut room. It is located to the left of the short mushroom. When you click on the miniature house, a board displaying three miniature houses will appear on top of the mushroom’s cap. Click on the board:
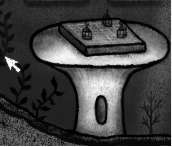
This is a “Gotcha Puzzle.” At first glance, it may seem like the miniature houses with antennas should be placed directly on the numbered or dotted tiles, but that’s actually not how the puzzle works. Instead, place each miniature house on a tile so that the dot on its antenna lines up perfectly with the matching dot on the board. See the screenshot below:
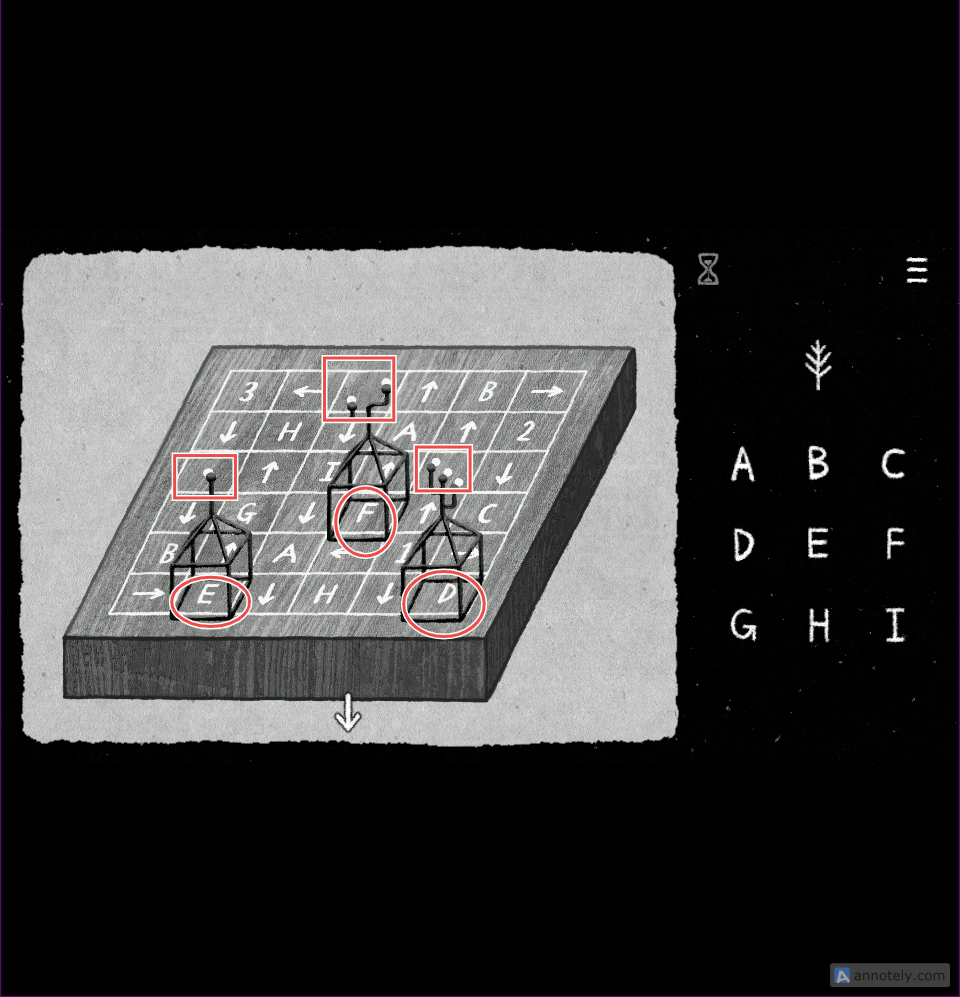
– To align the house with the single-dot antenna to the single-dot marker on the board, place the house on the letter E tile.
– Next, place the house with a double-dot antenna on the letter F tile to line up with the two-dot tile on the board.
– Place the house with a triple-dot antenna on the letter D tile so it lines up with the three-dot tile on the board.
This way, you get three letters: E, F, and D
In the next series of puzzles, you will need to interact with the outer edges of the walnut. Objects/leaves are sprouting from these edges, and clicking on them will start the puzzles.
5. Click on the leaves sprouting from the top-right corner of the outer edges of the walnut. The leaves will fall on the letters scribbled on the top of the walnut. Click on the leaves to start the next puzzle.
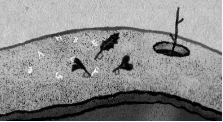
Observe the shapes of the leaves carefully. Hidden within their outlines are cutouts that form the letters D, A, and B.
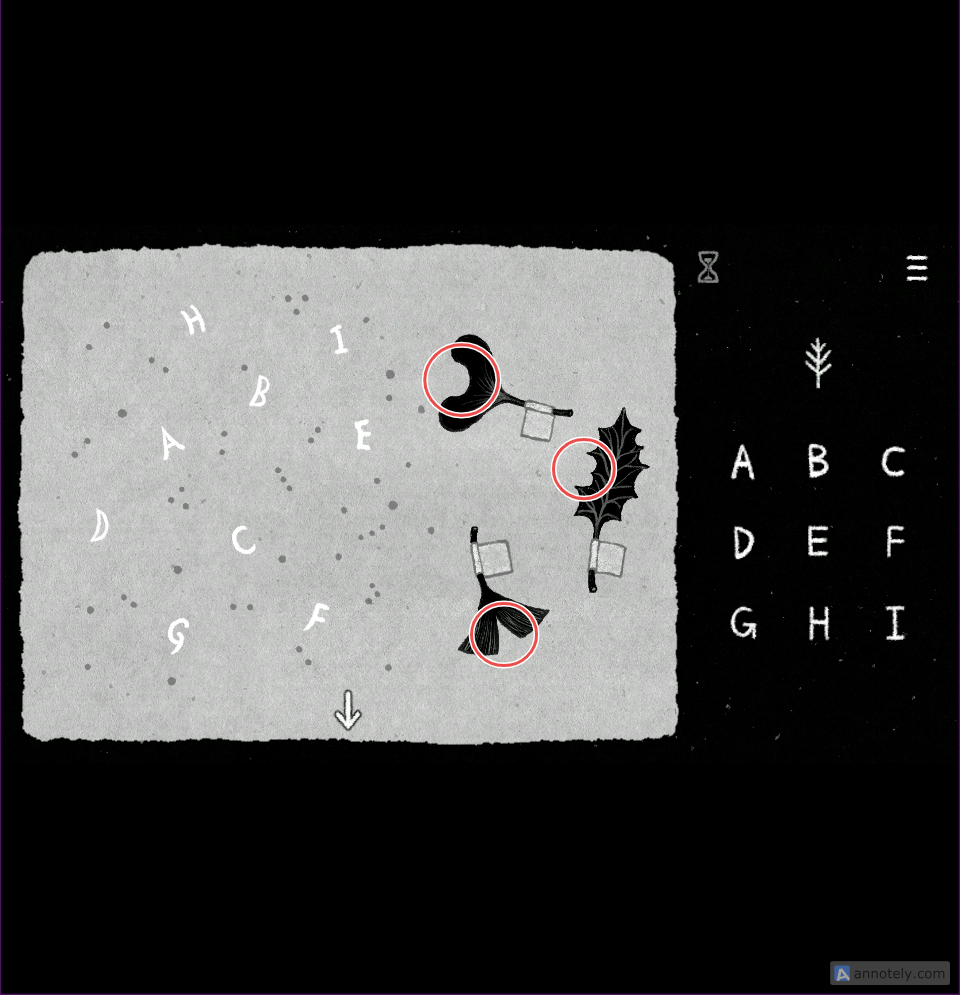
When you position the leaves next to these letters, the cutouts align perfectly with the shapes of the letters. When doing this, pay attention to their transparent tags. They will be positioned over dots.
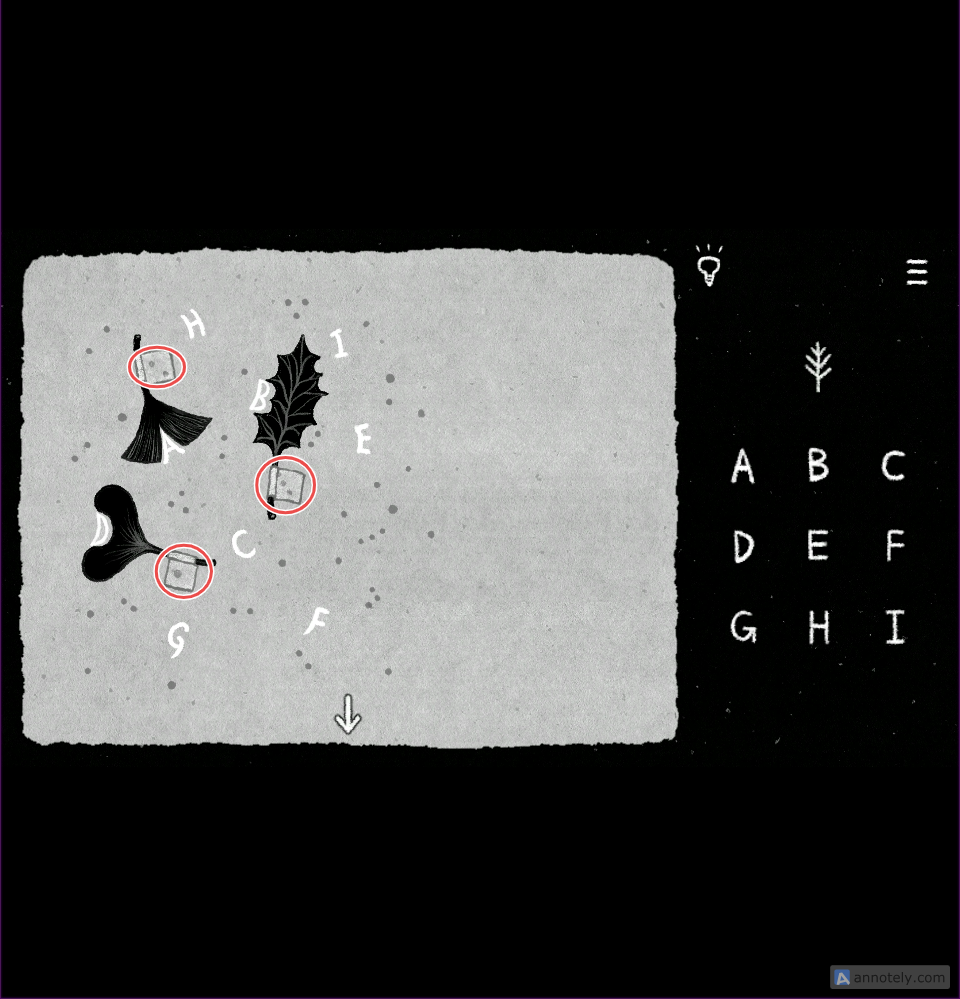
The dots suggest the order of the letters you will be clicking on the grid. While doing this, pay close attention to the transparent tags attached to the leaves. These tags will line up over certain dots, and the dots indicate the order in which you should click the letters on the grid.
• D
• • A
• • • B
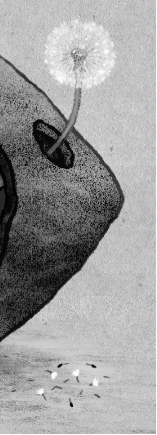
6. Click on the glowing object inside the hole along the walnut’s right outer edge. A giant dandelion puff will pop out of that hole.
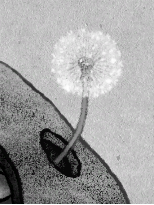
Click on the dandelion puff, and a few more puffs and leaves will fall on the ground. Click on them to start the puzzle.
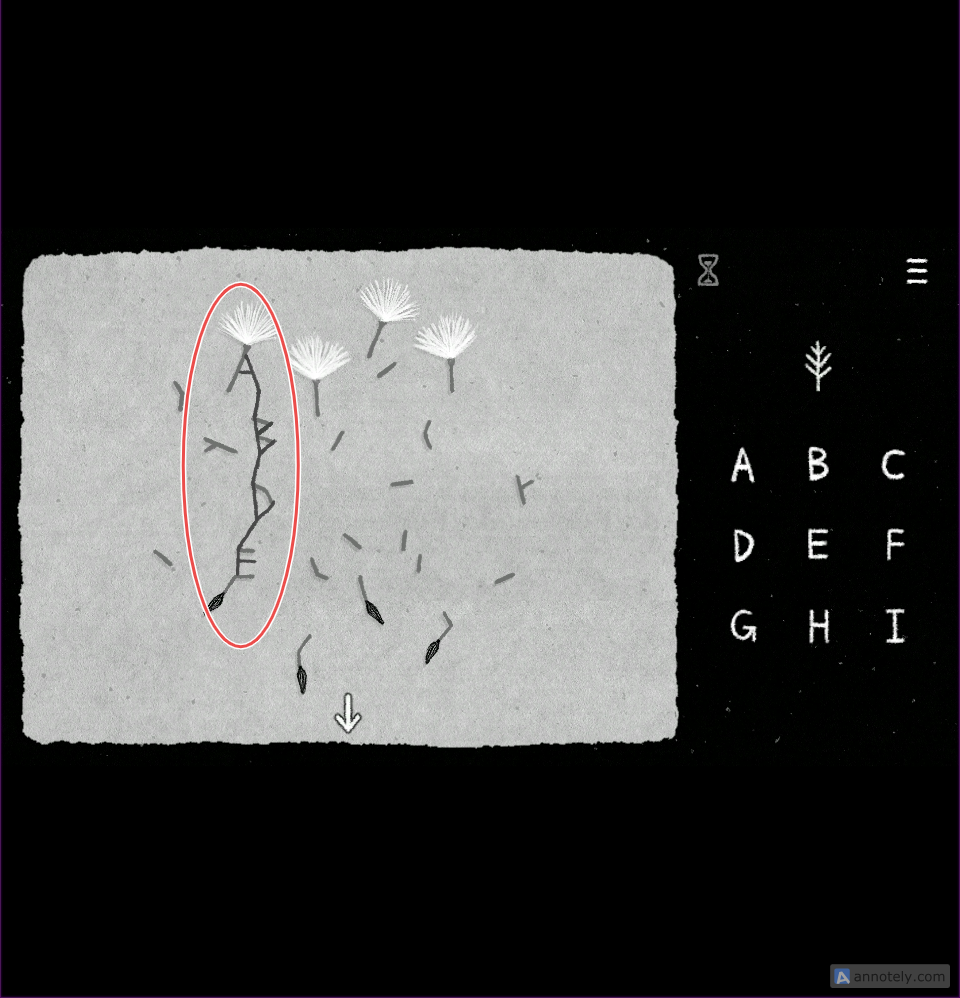
Move the twig towards the fourth dandelion puff on your left-hand side and place it in such a way that it reveals four hidden letters – A, B, D, and E.
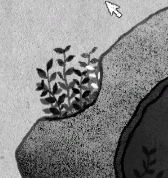
7. Click on the leaves sprouting from the upper-left corner of the walnut’s outer edges. When you interact with them, they will grow bigger. Click the white leaves within them to start the next puzzle:
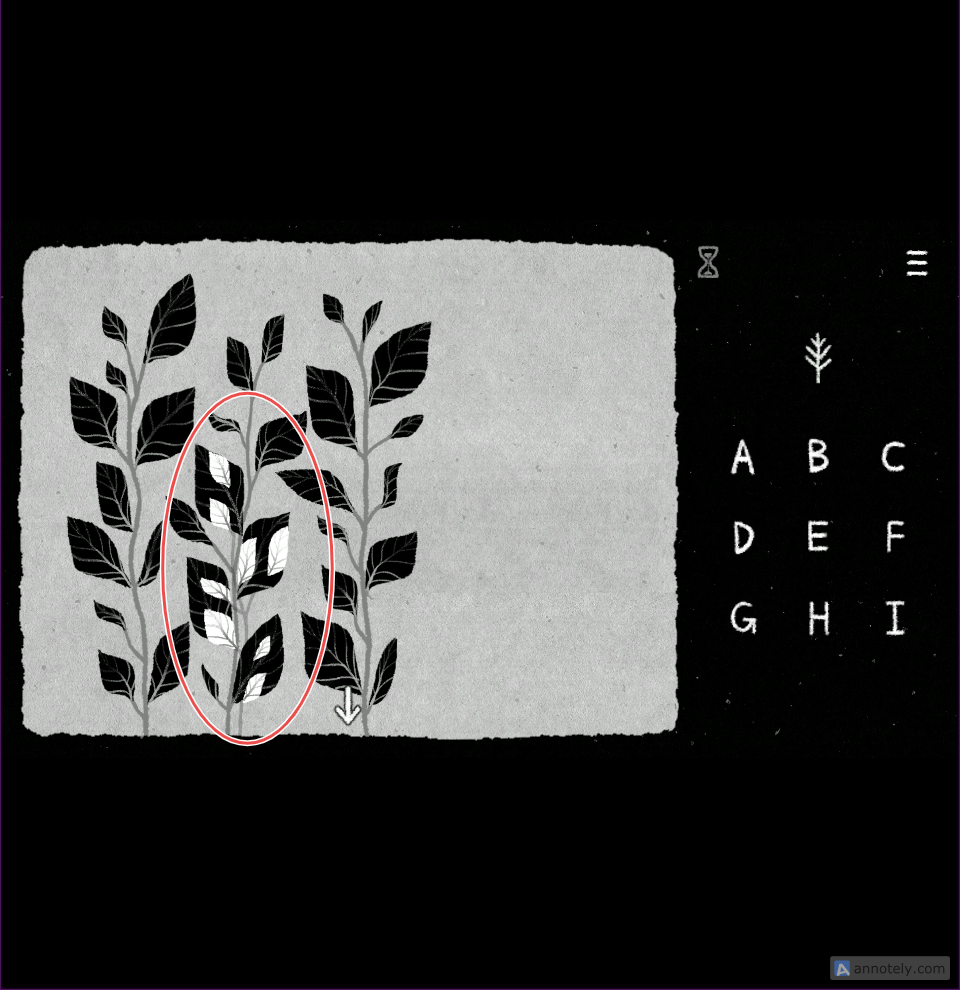
Align the branch with white leaves with the bottom four leaves of the middle branch to reveal letters H, I, F, A
8. On the lower-left corner of the screen, you will see two keys protruding from a hole on the outer edge of the walnut. Interact with them, and they will fall on the ground. Click on them to start the puzzle:
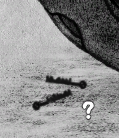
Place the serrated edges (the key teeth) of both keys close together so they form the letter “I” along with three arrows. Align them so that the right key is positioned lower than the other, and only then can the letter I and the other arrows be seen.
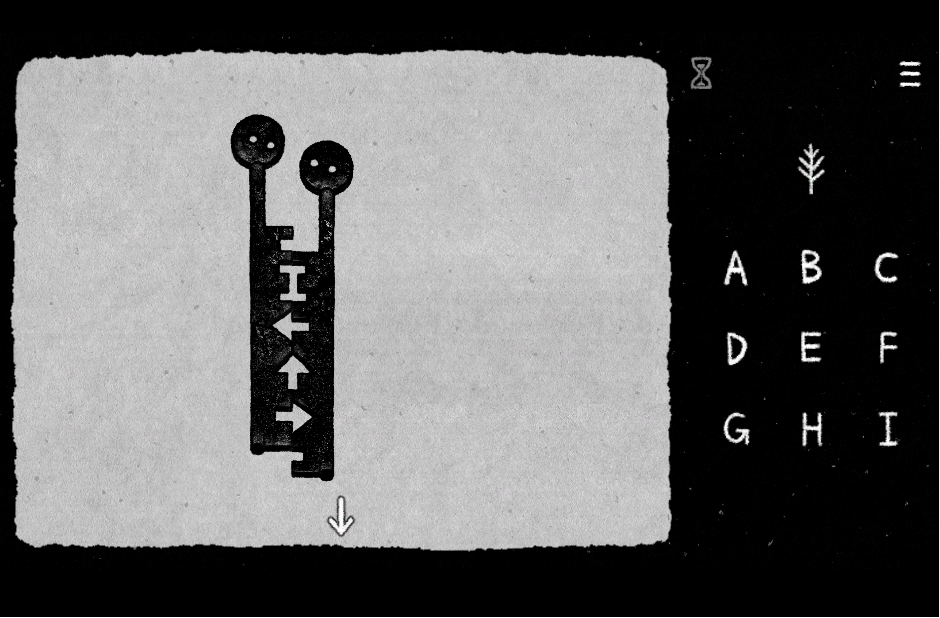
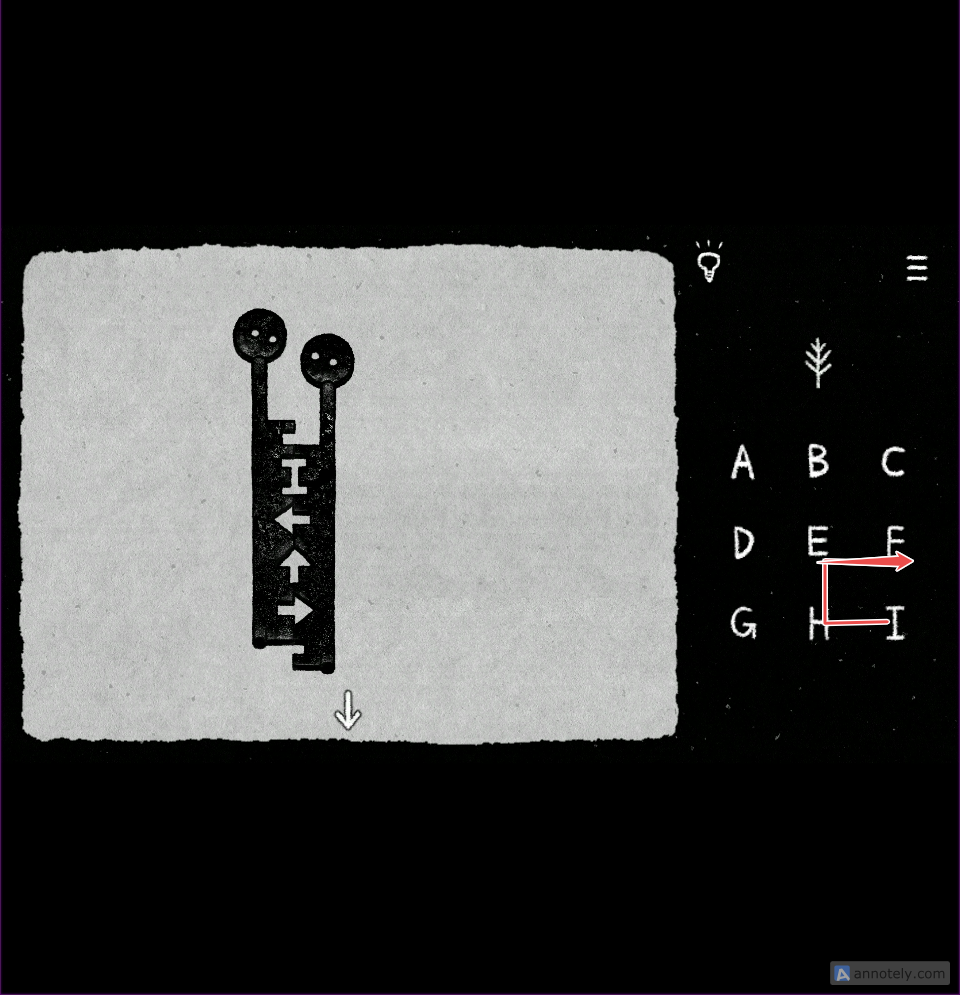
We have now found the first letter, I. Next, follow the arrow sequence revealed by the keys to uncover the remaining three letters needed to complete the puzzle. (See screenshot.)
After solving all puzzles in level 0, the black cat’s tail will appear dangling from the hole. Interact with the dangling tail and the cat will suddenly dart away.
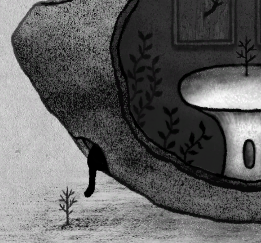
Exit the walnut room and then the room with the large white house surrounded by vines.
You are now back in the corridor. Click on the black cat near the right archway, and she will slip through the passage. Follow her by interacting with the right archway.
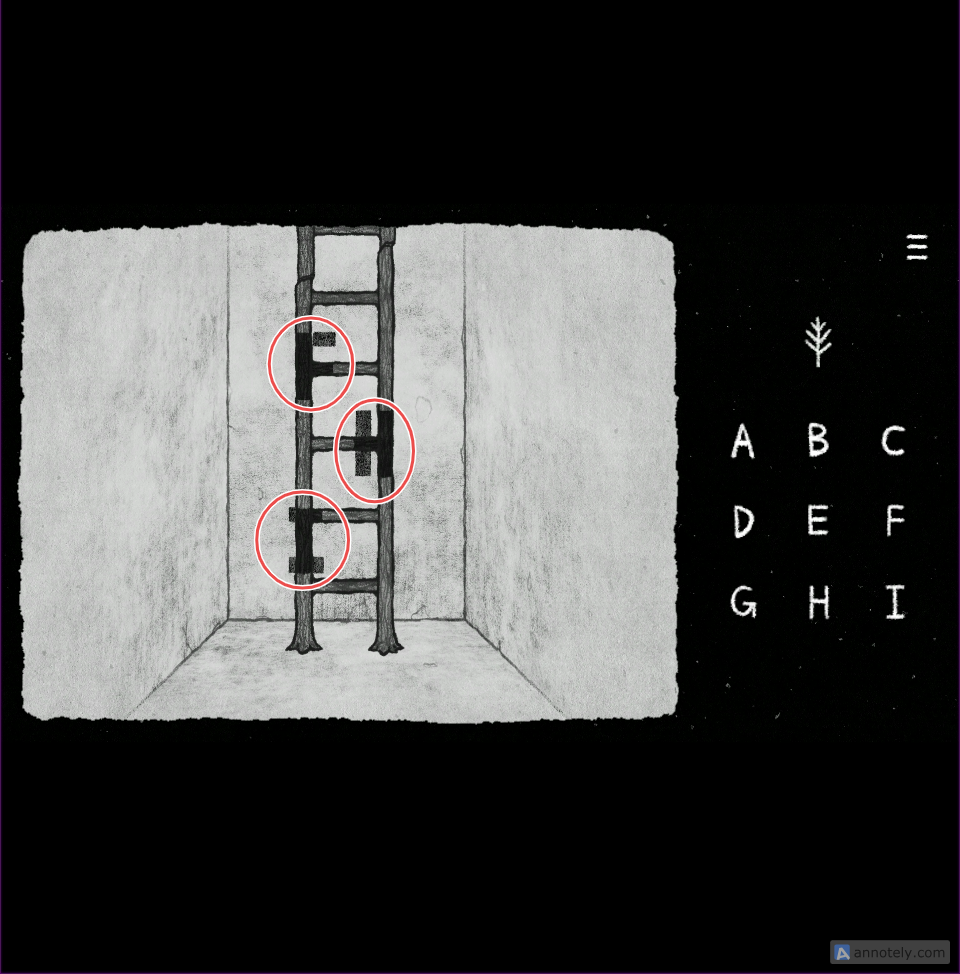
Click on the broken ladder to place the ladder you retrieved from the walnut room. Drag the ladder onto the broken one to reveal three letters: F, H, and I. Click the same letters on the letter grid to complete the puzzle.
Level 2
Next, click on the top section of the ladder to climb up and enter a new area.
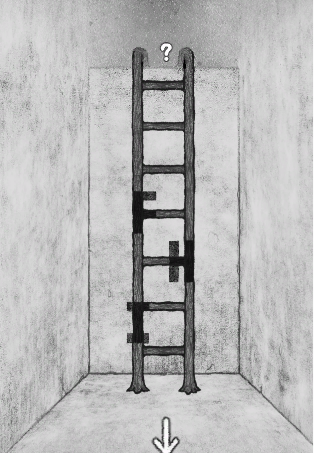
Click on the dark entrance to enter level 2.
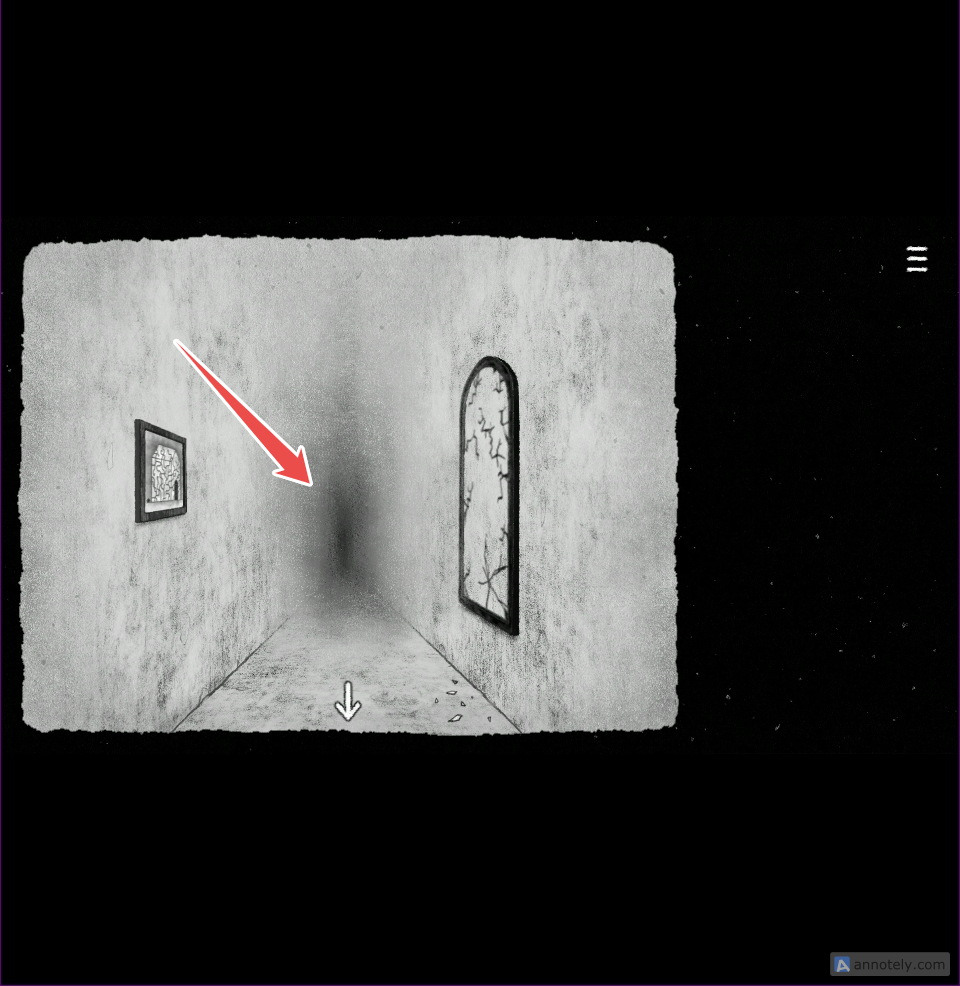
You will now enter a new area dominated by a large tree with sprawling branches.
Click on the house portrait perched on top of one of the tree’s branches. The house painting leans slightly away from the portrait.
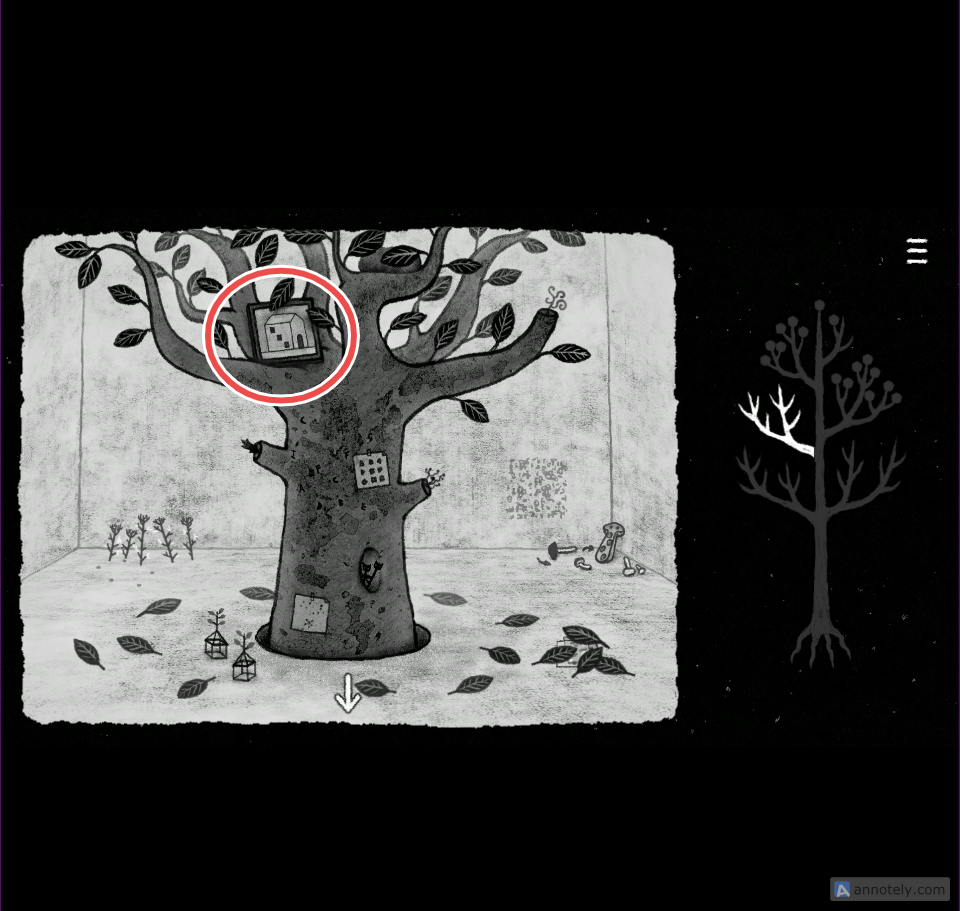
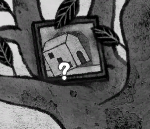
Interact with the house to pick it up. You will need it to solve future puzzles.
For easier reference, each puzzle in the screenshot below has been numbered. Simply match the puzzle number with the same number in the Solutions section to find its solution.
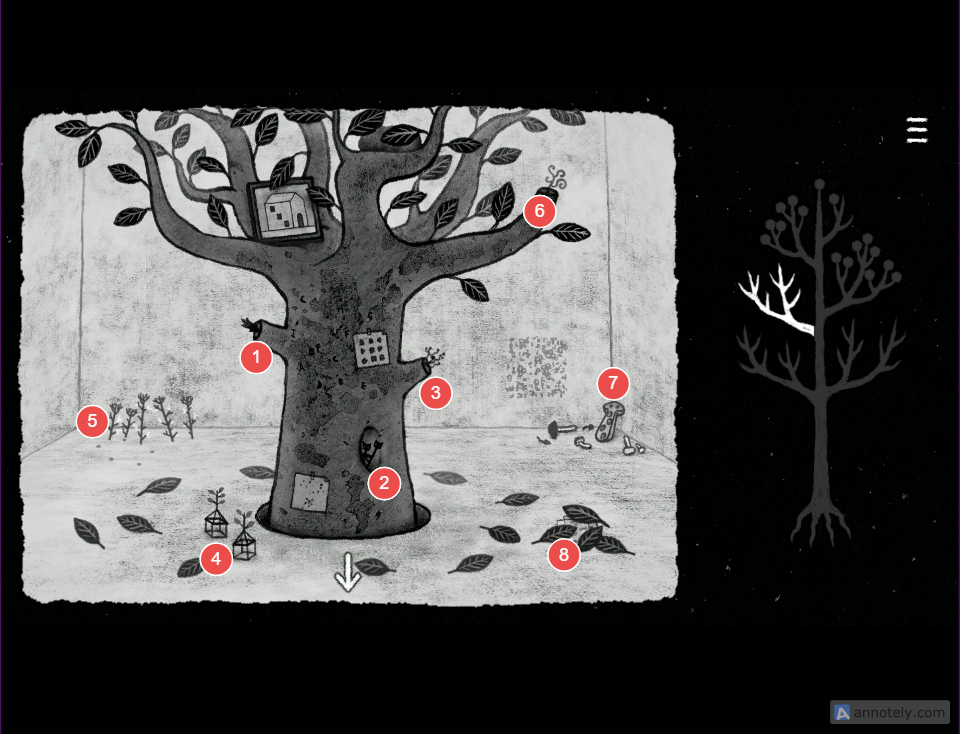
1. Click on the small branch stub on the left side of the tree trunk to make three leaves sprout from it. Interact with the leaves, and they will attach themselves to the tree trunk.
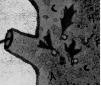
Once the leaves are stuck to the trunk, click on them again to begin the puzzle.
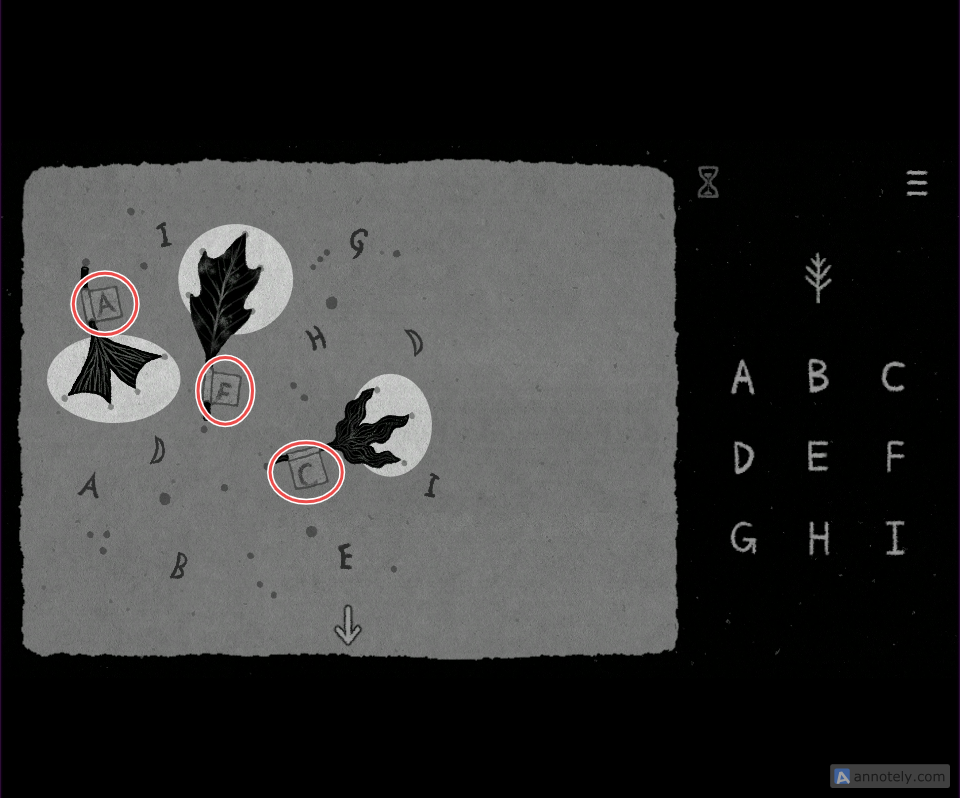
This puzzle works similarly to Puzzle #5 in the Walnut Room. However, instead of focusing on leaf shapes and hidden letter cutouts, this time you need to pay attention to leaf tips. Align a leaf so its tips line up perfectly with the dots. Do this for all three, and you will see their transparent labels automatically cover the three letters: A, F, and C
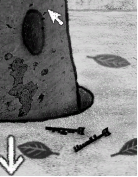
2. Click on the two keys peeking from the hole in the tree trunk. When you interact with the keys, they will drop on the floor. Click on the keys on the floor again to start the puzzle:
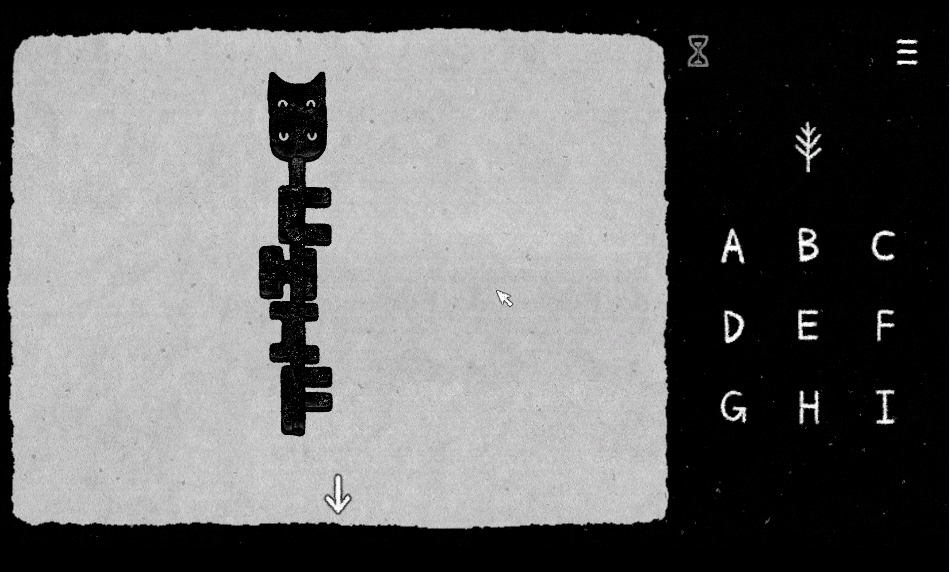
Place the two cat-emblem keys back-to-back, ensuring that one cat’s head is positioned directly over the other. Doing this will make the key teeth align and reveal four letters: C, H, I, F.
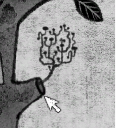
3. Click on the small branch stub on the right side of the tree trunk to make a small plant sprout from it.
In the puzzle screen, the plant on the right side has a unique circuit-like design. On the left side, there is a piece of paper with cutouts shaped like letters of the English alphabet. The paper resembles the letter grid on the extreme right, where you enter the final answer.
Place the paper over the plant so that it reveals a hidden maze with a starting point (dot) and an endpoint (arrow). Follow the maze beginning from the dot, then click on the letters on the grid that correspond to the cutouts to solve the puzzle.
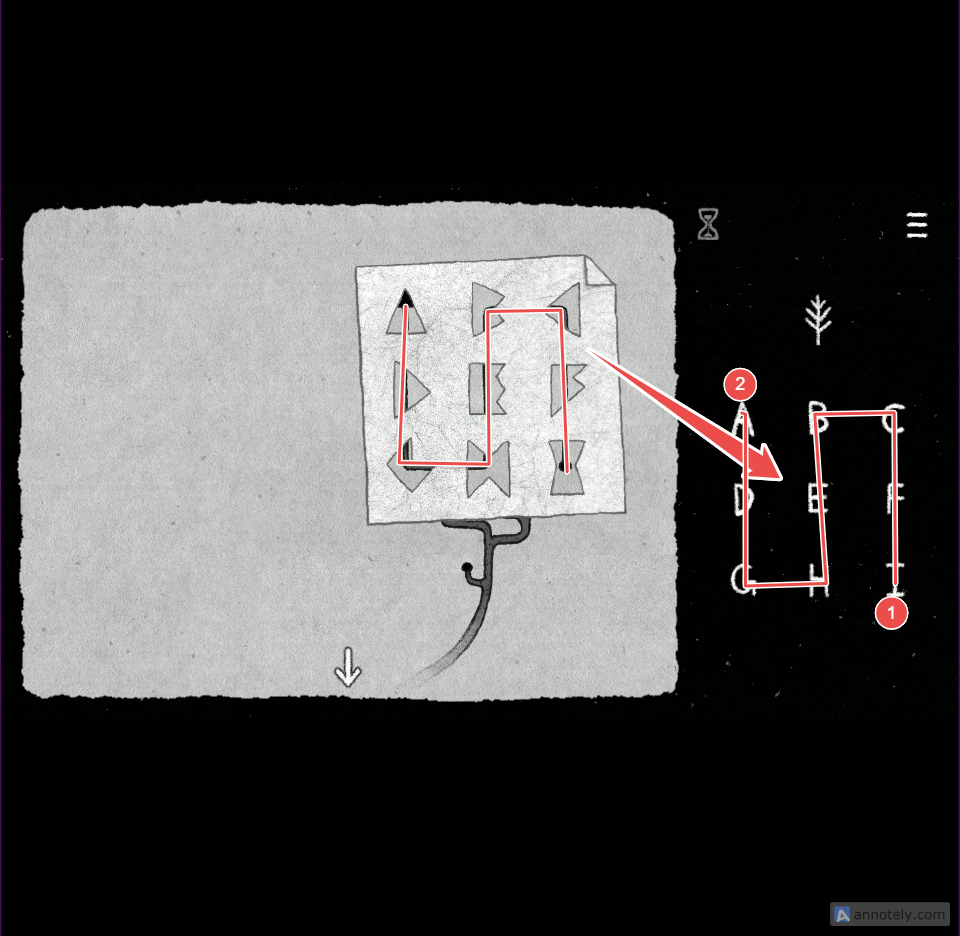
I > F > C > B > E > H > G > D > A
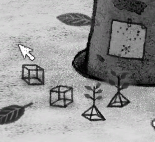
4. Interact with the two small miniature houses with plants sprouting from their roofs. You will find these miniature houses on the ground, on the left side of the tree. When you click on the miniature houses, their roofs fall apart. Click on their roofs to begin your next puzzle:
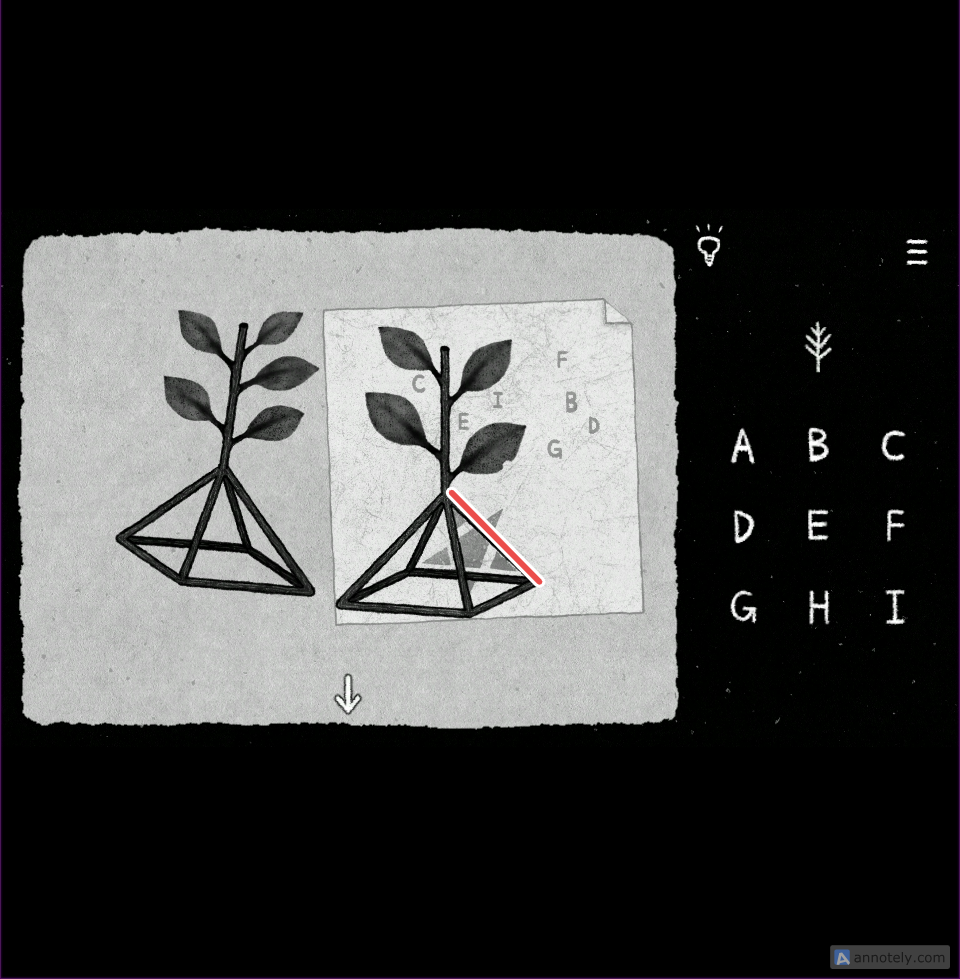
This puzzle requires you to align the roofs of the miniature houses with the star-shaped symbol on the paper. Position the houses so that the roof lines perfectly fill the gaps within the star pattern. See screenshots 1 and 2:
Screenshot 1:
Screenshot 2:
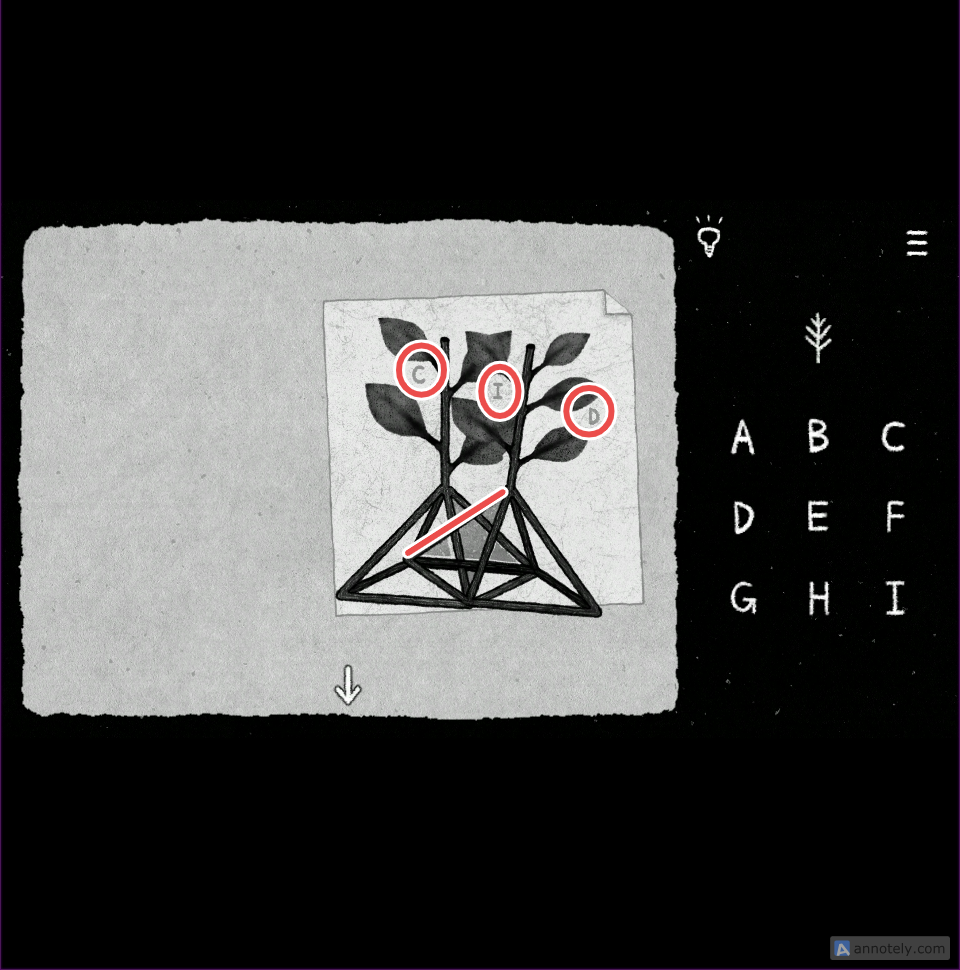
Once aligned correctly, the overlapping shapes will reveal the hidden letters needed to solve the puzzle.
The letters are C, I, D
5. Click on the dry plants in the background on the left side to arrange them in order.
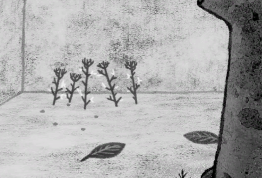
Now click on them once again to begin the puzzle.
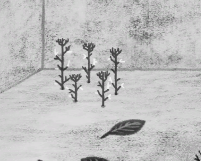
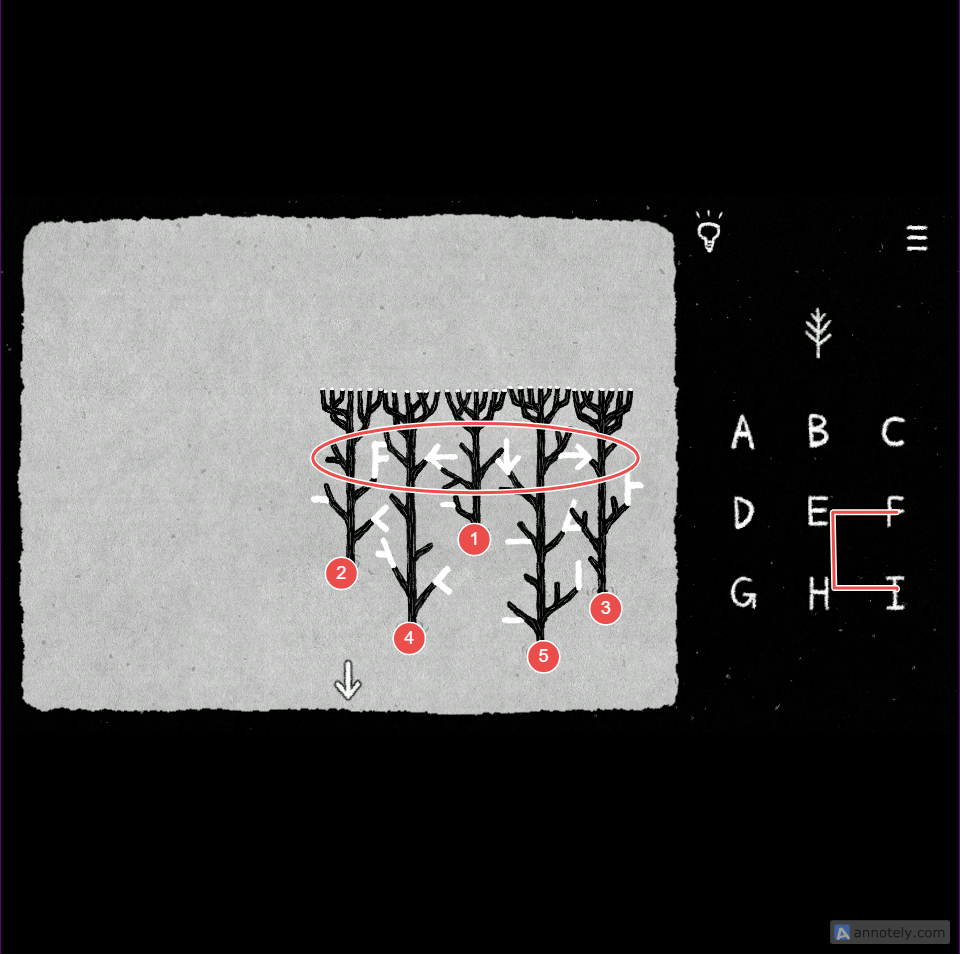
Pay close attention to the top sections of each plant. Arrange them so that all of their tops align evenly at the same level. First, take them out of the holes, one by one, and place them according to their height, from the shortest to the longest:
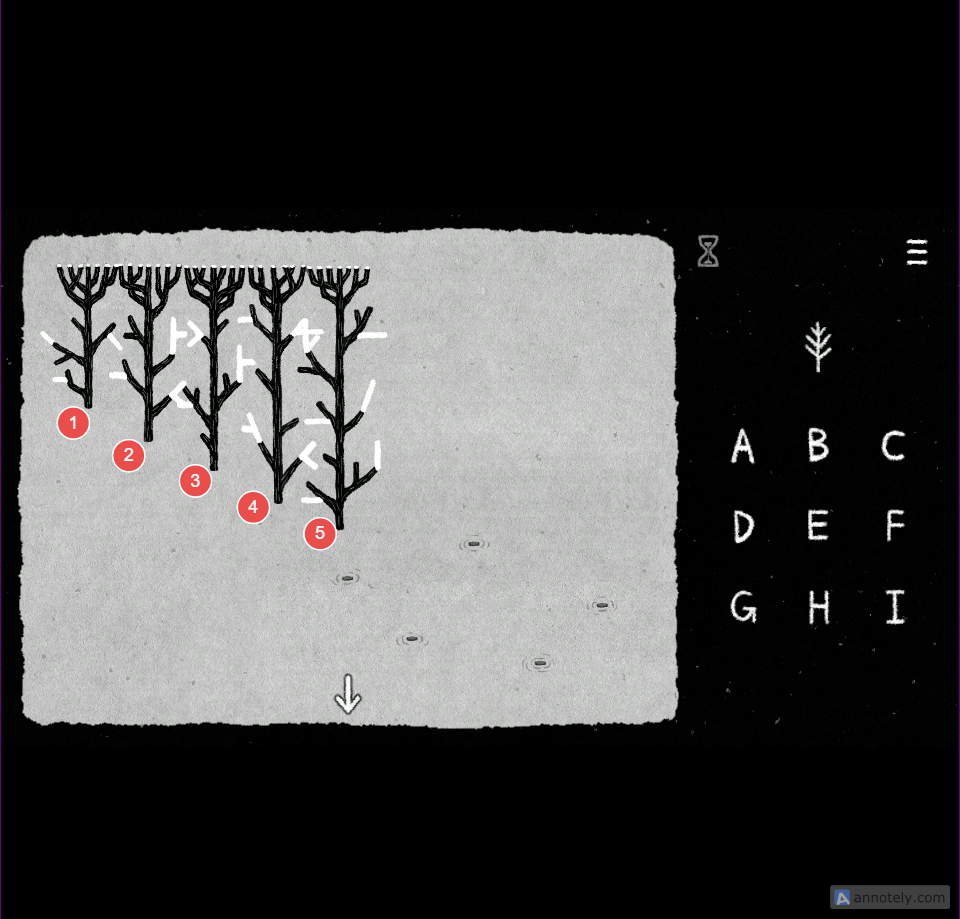
Next, place the plants back in the holes as shown in the screenshot below. Make sure that all their tops align evenly:
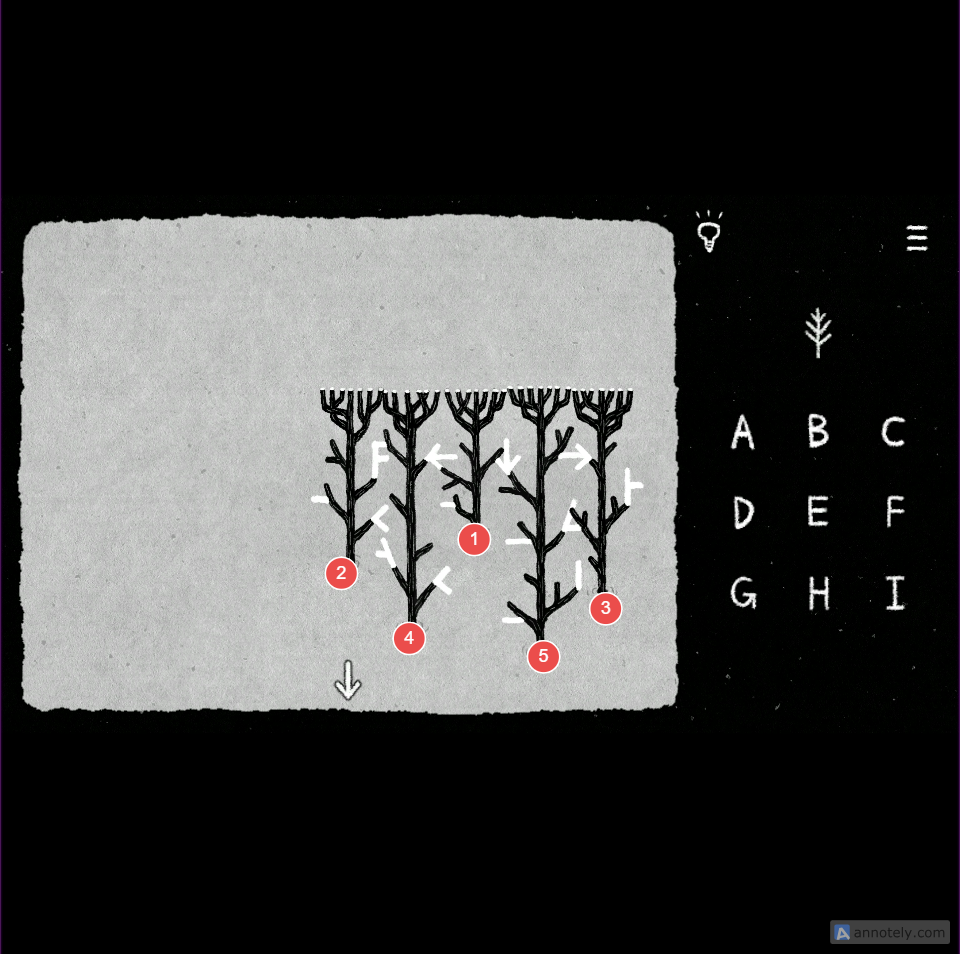
As you do this, you will notice a letter F and a few arrows. Click on the letter F in the letter grid, and then follow the arrow sequence to get the next three letters: E, H, I
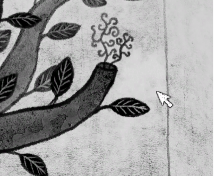
6. Interact with the curly twigs on the top-right branch. The curly twigs become larger when you click on them. Click on the larger twigs to start the puzzle:
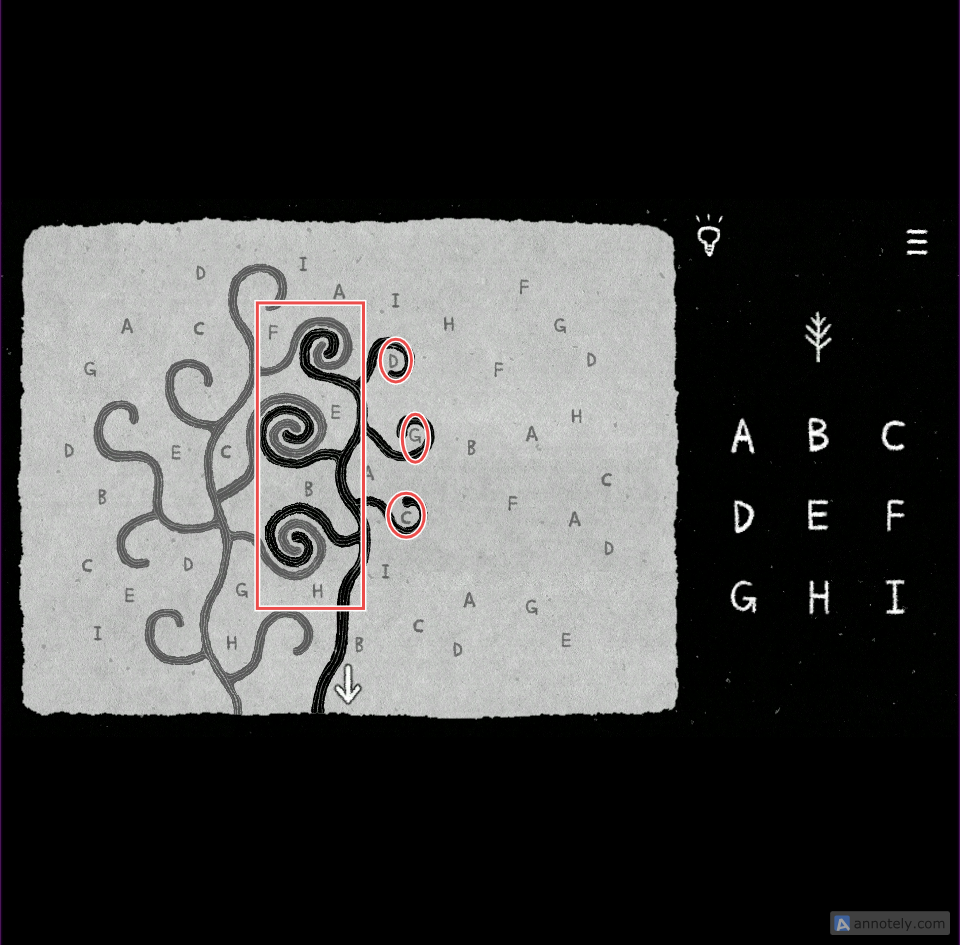
Drag the darker twig toward the lighter one and align their curled ends so that the left dark curls fit neatly inside the right light curls. (See screenshot.) When aligned correctly, the outer curls of the dark twig will automatically hug the three letters: D, G, and C. Click on those same letters in the grid to solve the puzzle.
7. Click on the mushroom in the background in the corner to leave its imprint on the wall. Now click on its imprint to start a new puzzle:
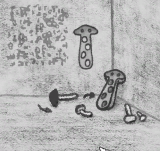
Align the mushroom so that the two circles etched on the top of the mushroom are positioned directly over the two dots on the wall art. This will reveal four hidden letters: H, C, F, and I
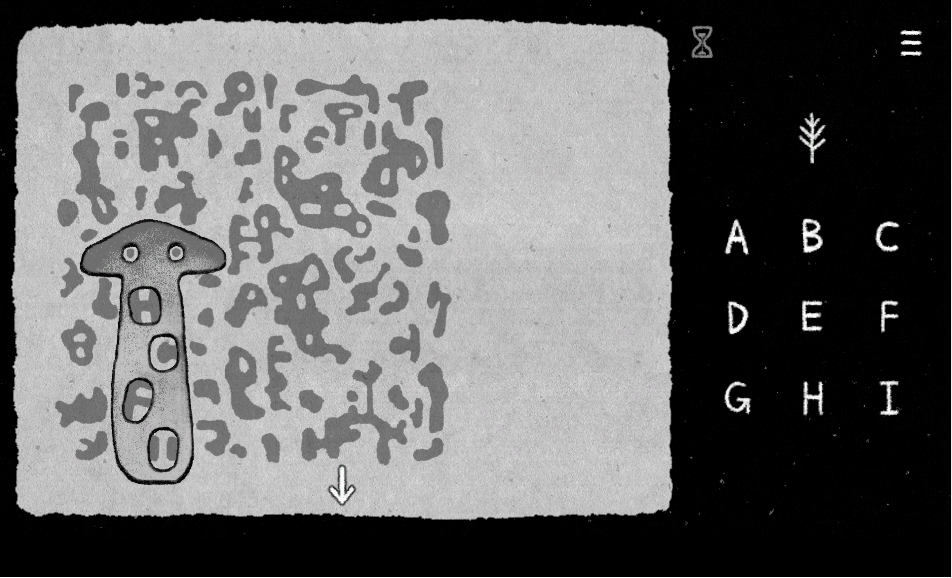
8. Interact with the pile of leaves to start the final puzzle:
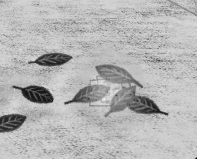
Position the lighter tracing paper against the gray one until the white circle touches the upper white rectangle. Doing this will reveal a hidden maze, where the circle represents the starting point and the arrow marks the endpoint.
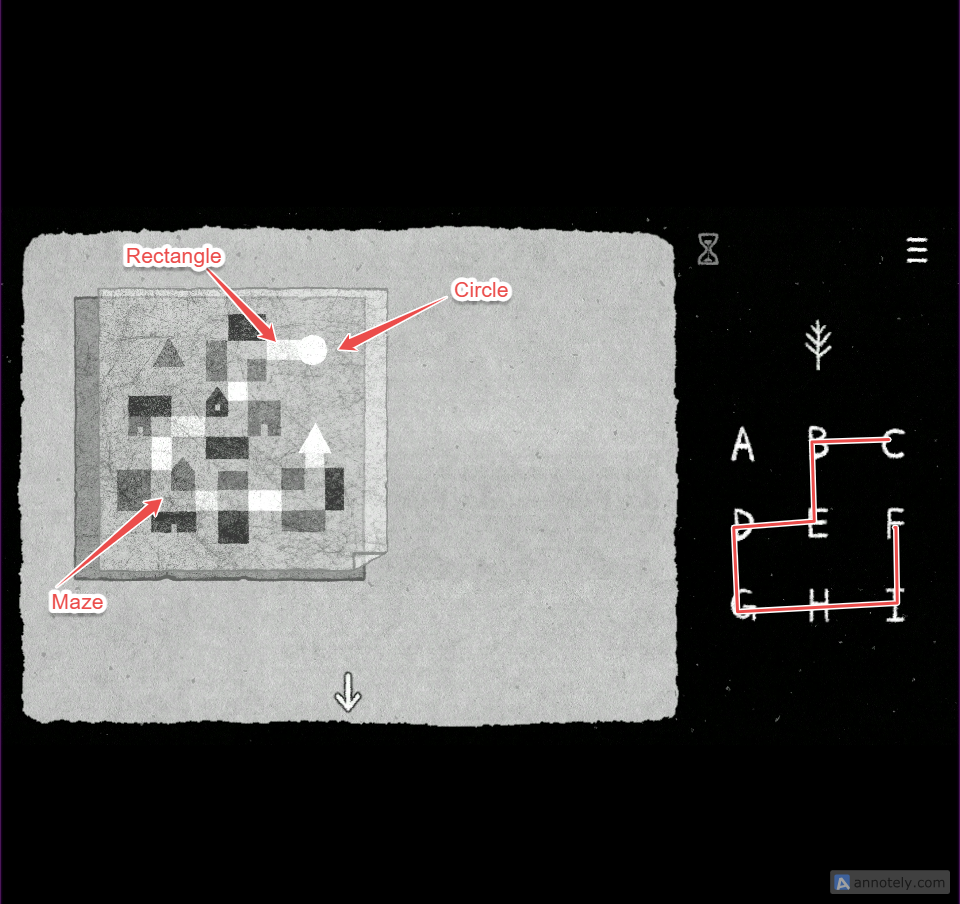
Following the maze path, click on these letters on the grid:
C, B, E, D, G, H, I, F
C is the starting point, and F is the endpoint.
After solving all the puzzles in Level 2, click on the downward-pointing arrow to return to the white painted corridor. Then interact with the portrait on your left.
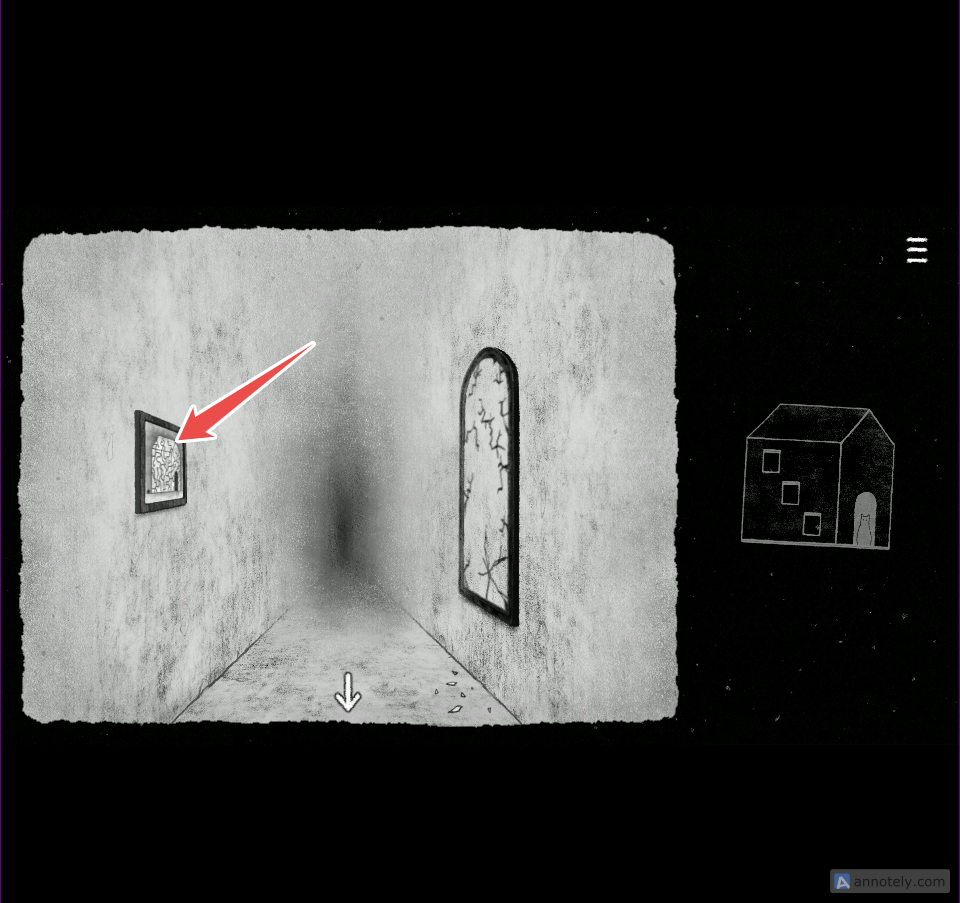
Drag the miniature house obtained from the tree in Level 2 onto the house depicted in the portrait. When positioned correctly, it will reveal three hidden letters: C, D, and F
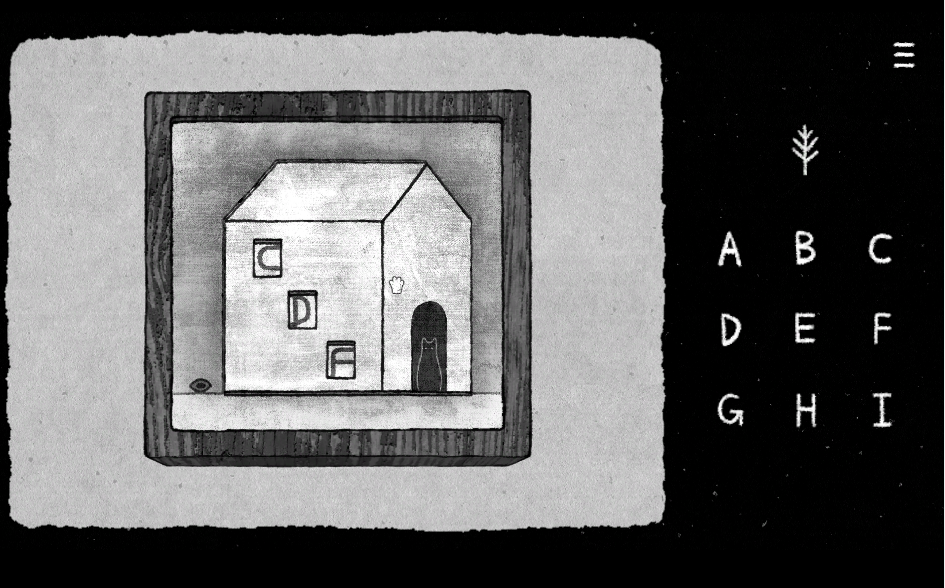
Level 3
Go back to the first room (Level 0) through the left archway.
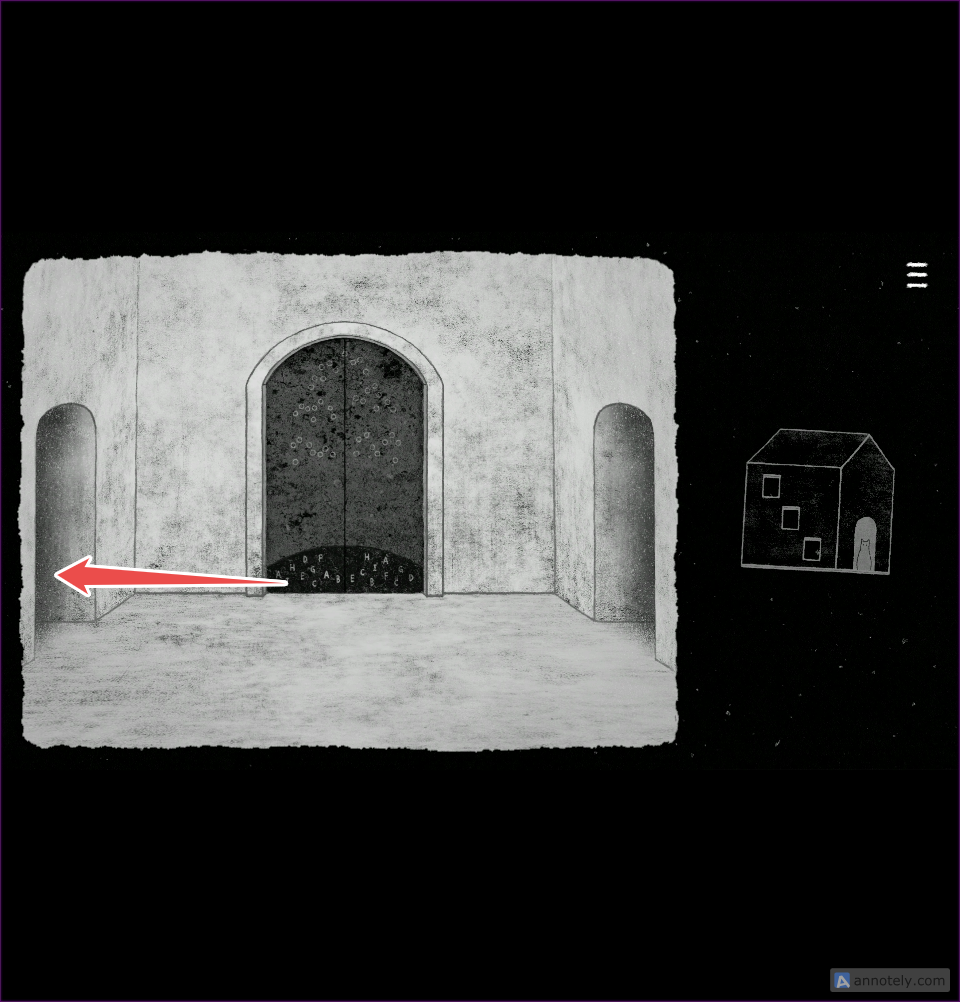
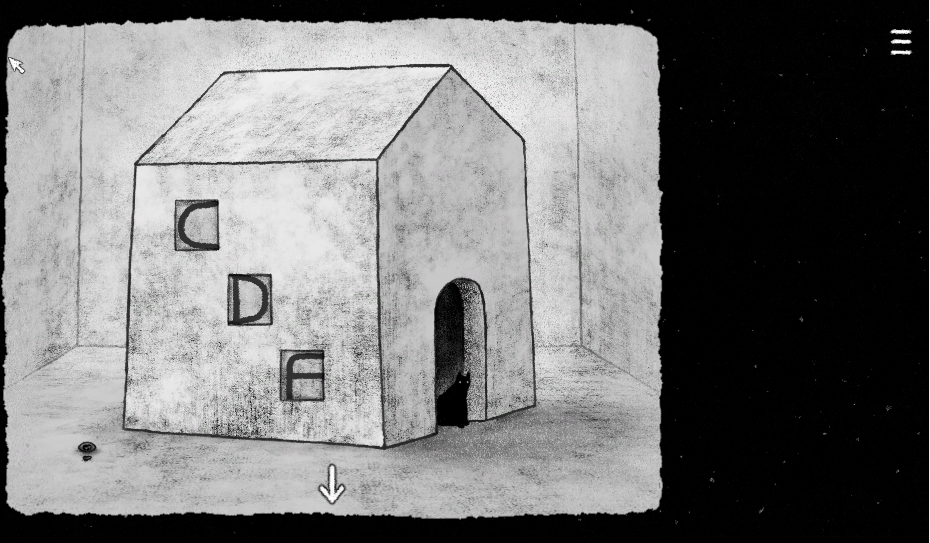
You will find the same house, but bigger, with the letters C, D, and F on it. Click on the black cat sitting near the front door. Follow him by clicking the front door to start Level 3 puzzles:
Each puzzle in the screenshot below has been numbered for easy identification. Refer to the matching number in the Solutions section to find the corresponding solution.
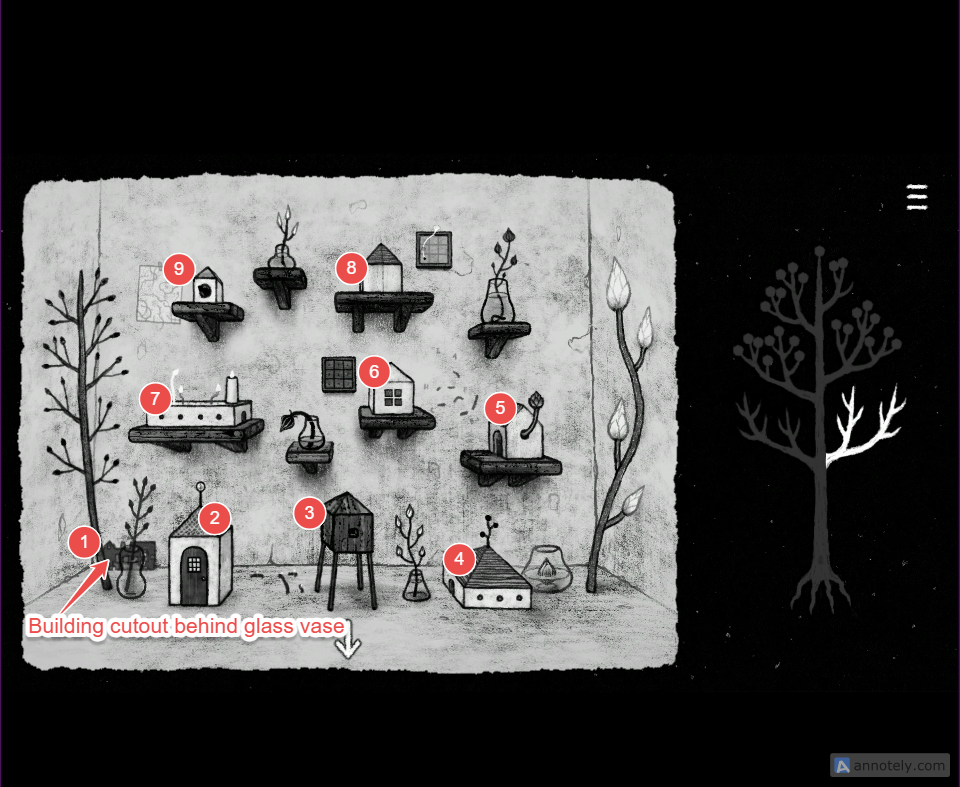
This level features a variety of miniature houses.
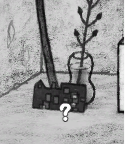
1. Before examining the floor-mounted ones, interact with the building cutout behind the glass vase. When you click on it, the cutout drops onto the floor. Click on the building cutout on the floor to begin a new puzzle:
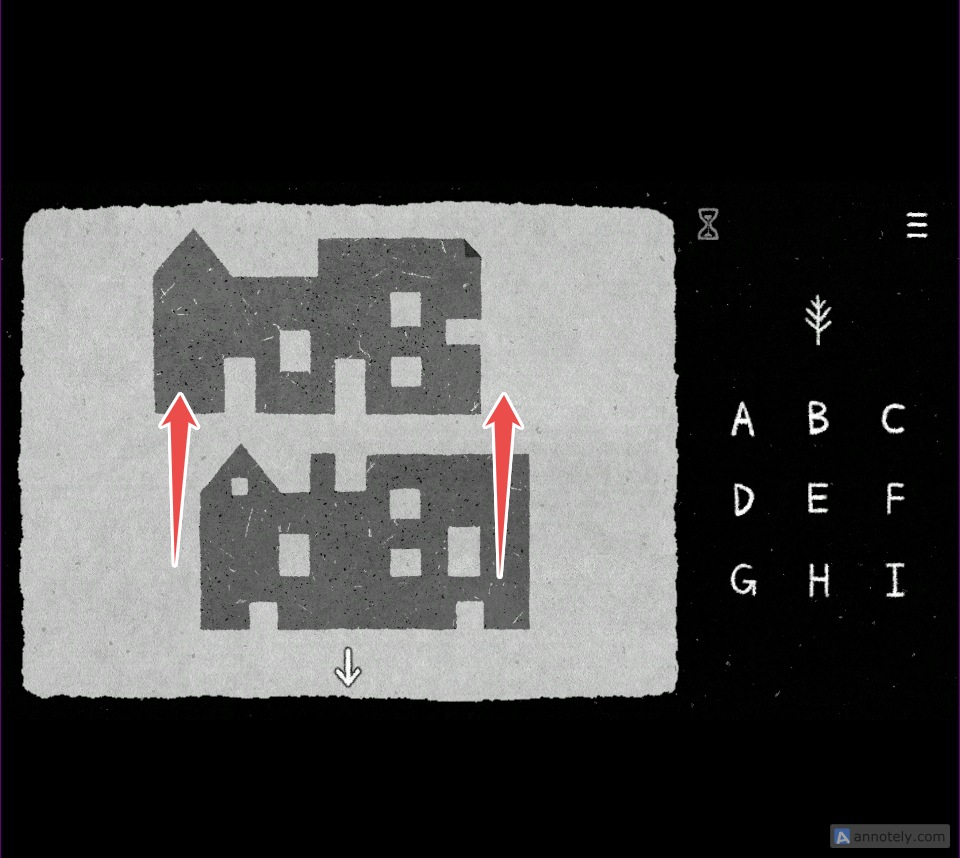
There are two building-shaped cutouts in this puzzle. Arrange them parallel to each other, with one positioned above the other. The roof of the building with the chimney should point upward toward the entrance of the second building.
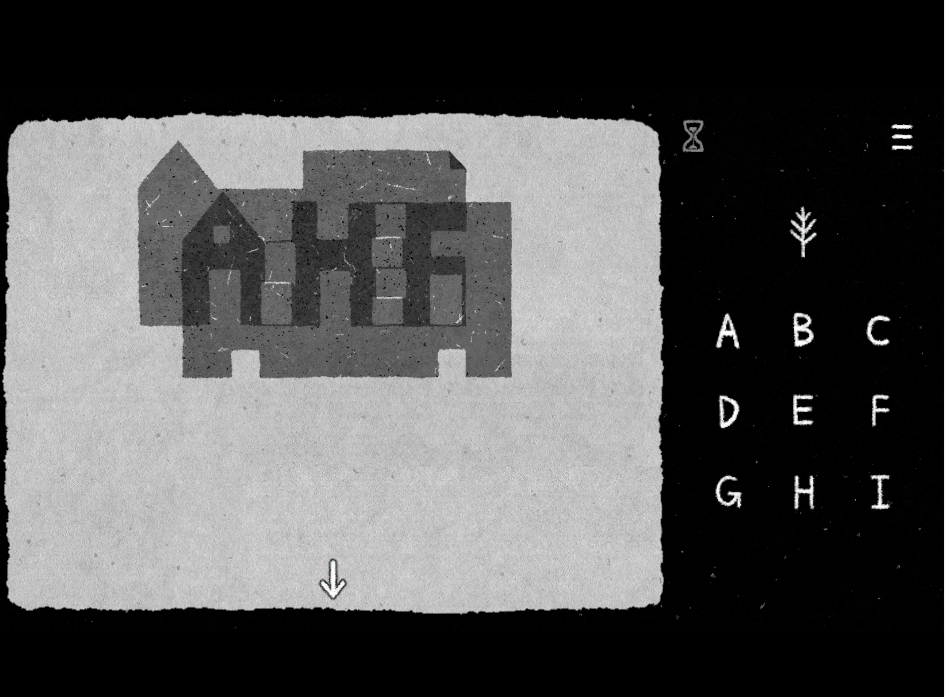
Slowly drag the chimneyed building toward the other cutout’s entrance until they align correctly, revealing the three letters: A, H, and F.
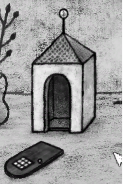
2. When you click on the white miniature house, its door falls flat on the floor. Click on the door to pick it up. This door will be used to unlock level 3.
3. Click on the miniature stilt house. A part of the house opens up. Click on the hanging ribbon from the opening.
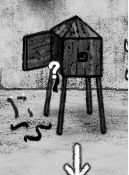
Arrange the bottom ribbons with the pinned ribbons to discover hidden letters: E, H, F
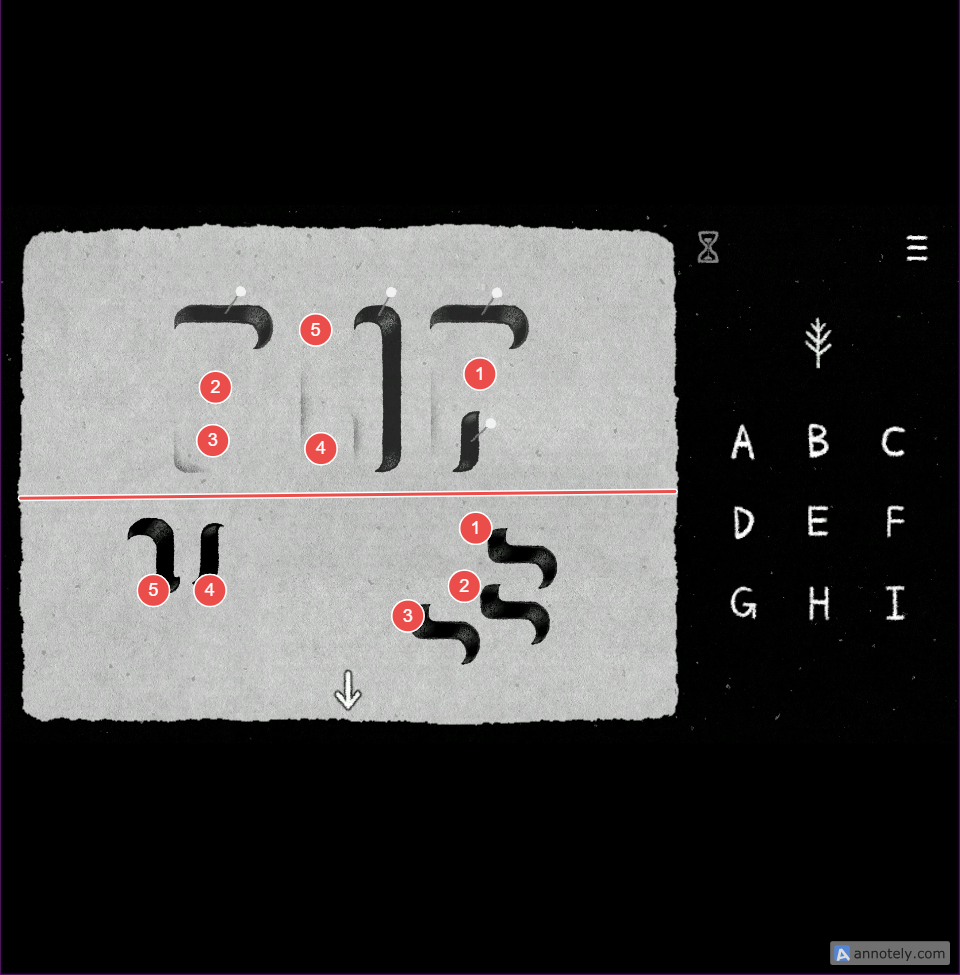
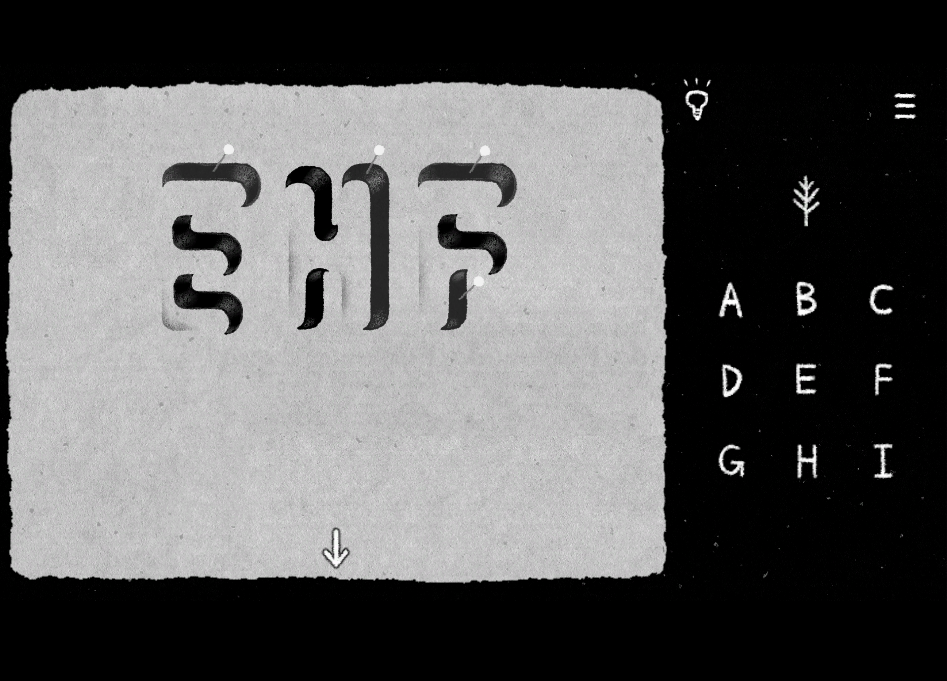
4. Next, interact with the low-roofed white house. Clicking on it will remove the roof and reveal the interior. Once the roof has been dismantled, click inside the house to begin the next puzzle:
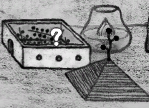
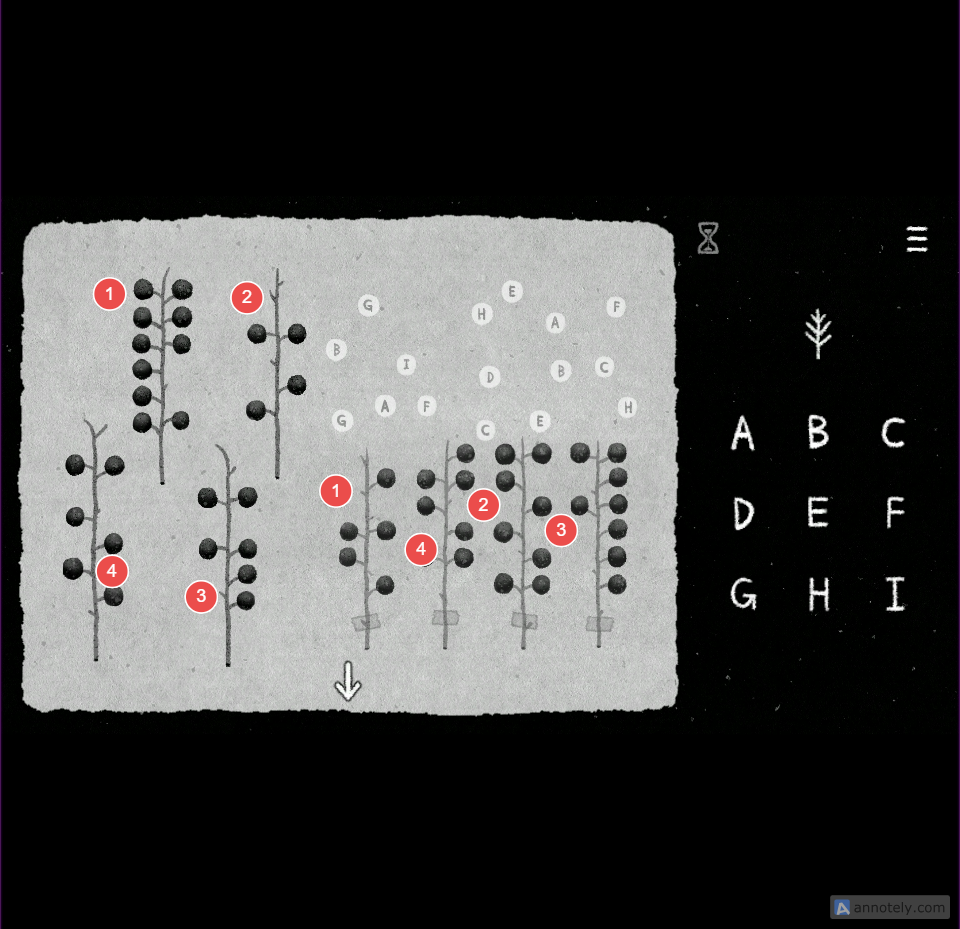
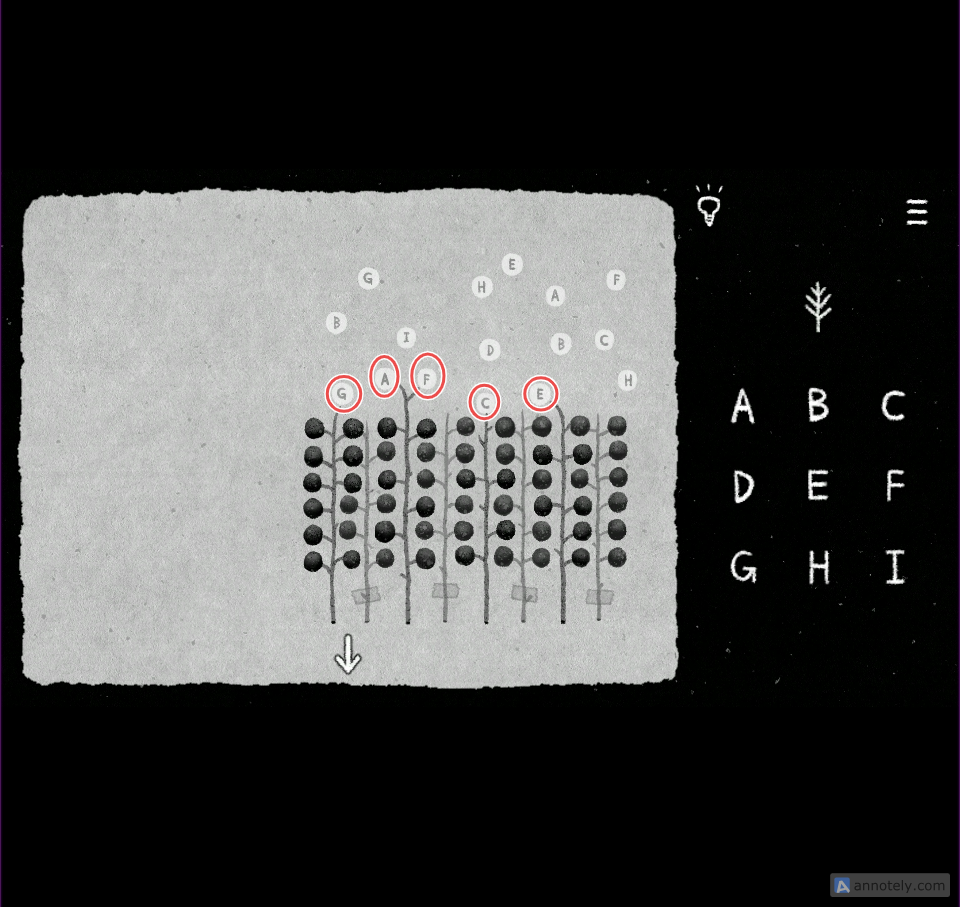
Four Berry sprigs are taped on the right side, and four more movable berry sprigs are on the left. Pay attention to the gaps in the berry sprigs on the left. Position each sprig so that the taped berries fill the missing spots. See the screenshot for correct positioning:
When you do this, pay attention to the top stems pointing at certain letters: G, A, F, C, and E
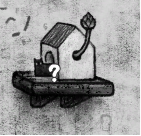
5. Interact with the miniature house with a lotus stem sprouting from its tiny window. A cat will pop out from its door. Click on the cat to start a new puzzle:
On the left side are several letters of the English alphabet along with a few strange black markings. On the right are four cats. Take a close look at the shapes of their tails. Your goal is to position each cat so that its tail connects with one of the black markings, forming a number.
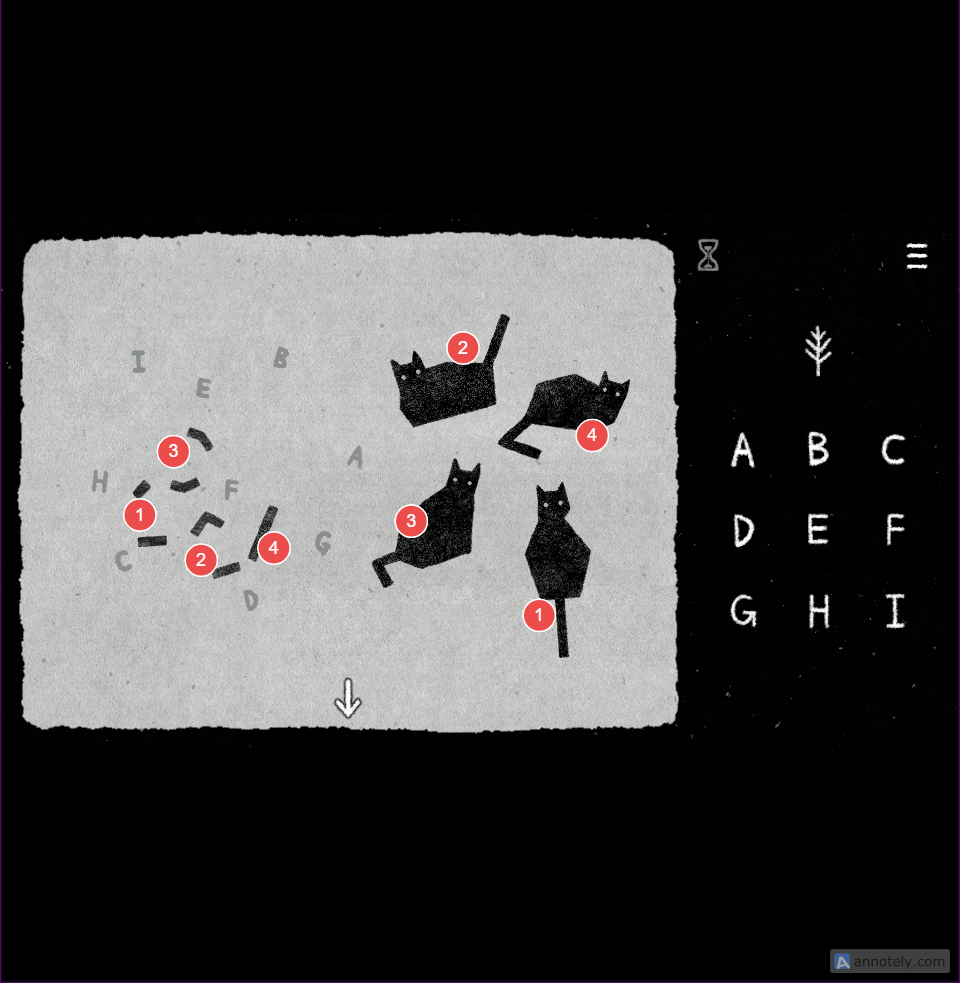
When a cat is paired with the correct marking, a letter will end up positioned between its ears. The letters are already on the board; you’re using the cats to identify the correct ones.
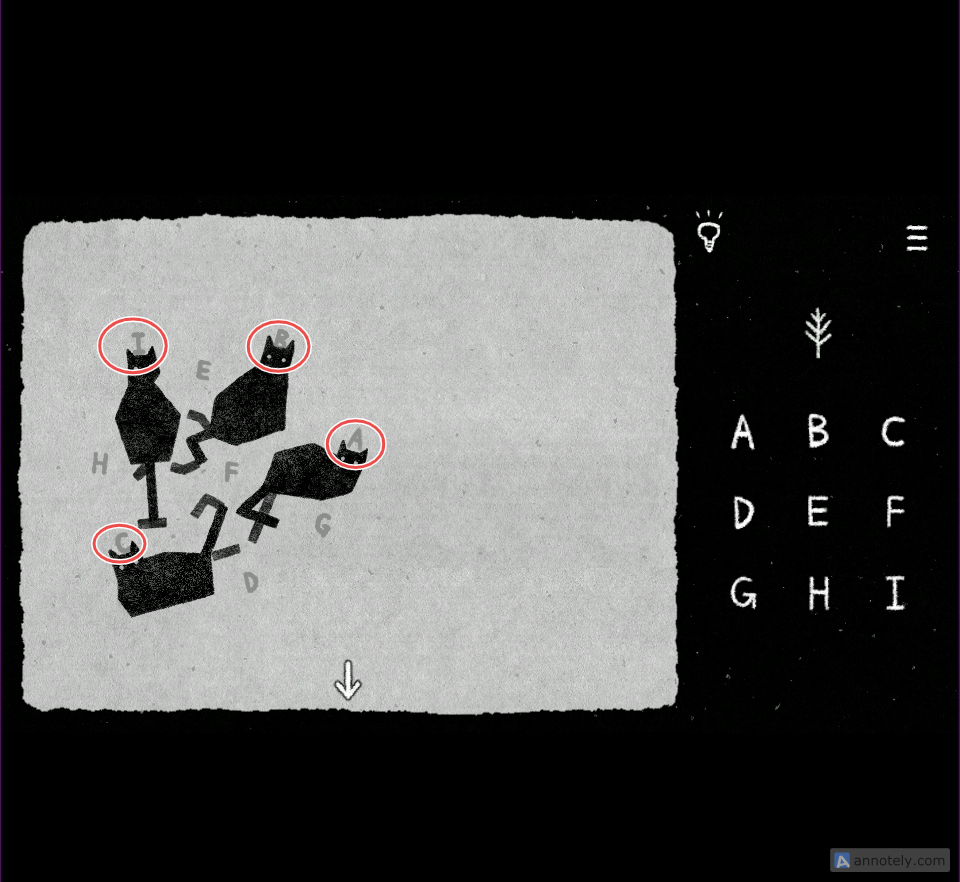
These are the letters that end up showing between each cat’s ears: I, B, A, C. Arrange them in the right order as per the numbers 1-4 formed using each cat’s tail. Following the numerical order reveals the correct letter sequence: I, C, B, A. Click these letters on the grid in that order to complete the puzzle.
6. Click on the miniature house in the middle, the one with a single window. The house will suddenly flatten into a sheet, revealing its origami design. Click on the interiors of the Origami house to start the next puzzle:
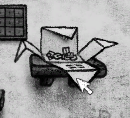
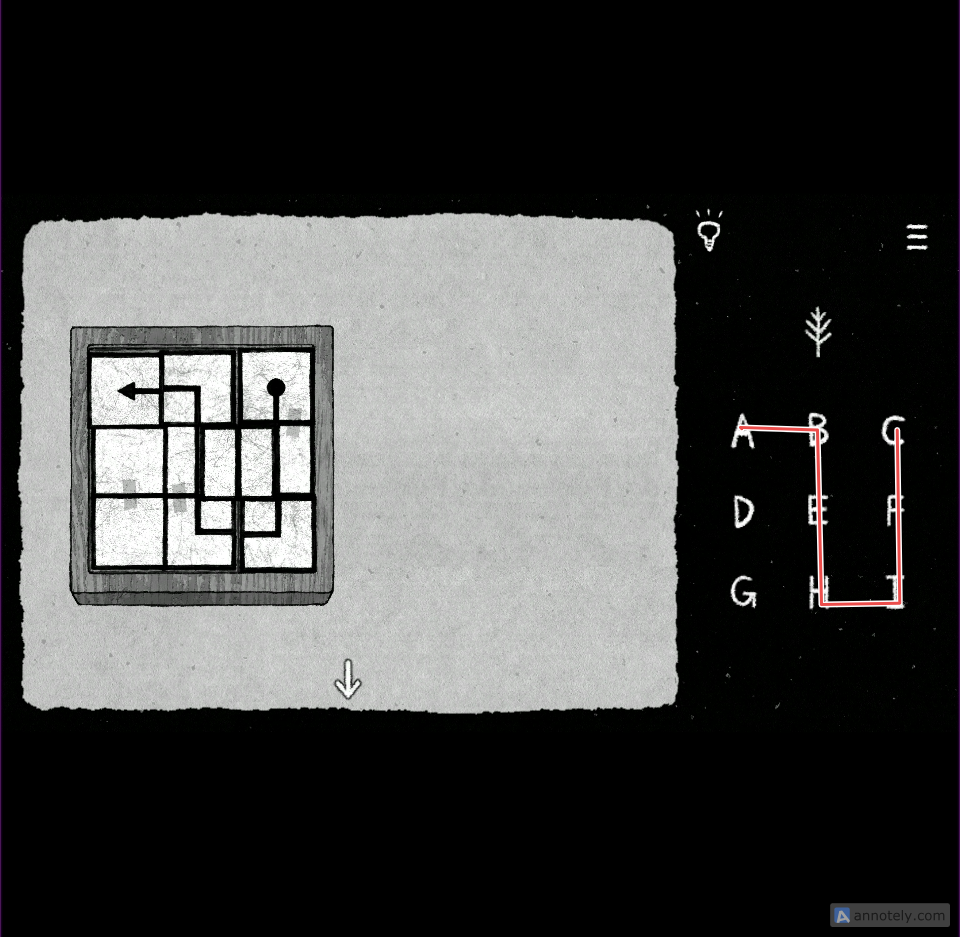
This is a jigsaw-style puzzle. On the left is a wooden block featuring the familiar letter grid, along with several white puzzle pieces. Each piece contains part of a maze-like pattern. Drag and drop the white pieces onto the wooden block to complete the maze as shown in the screenshot below:
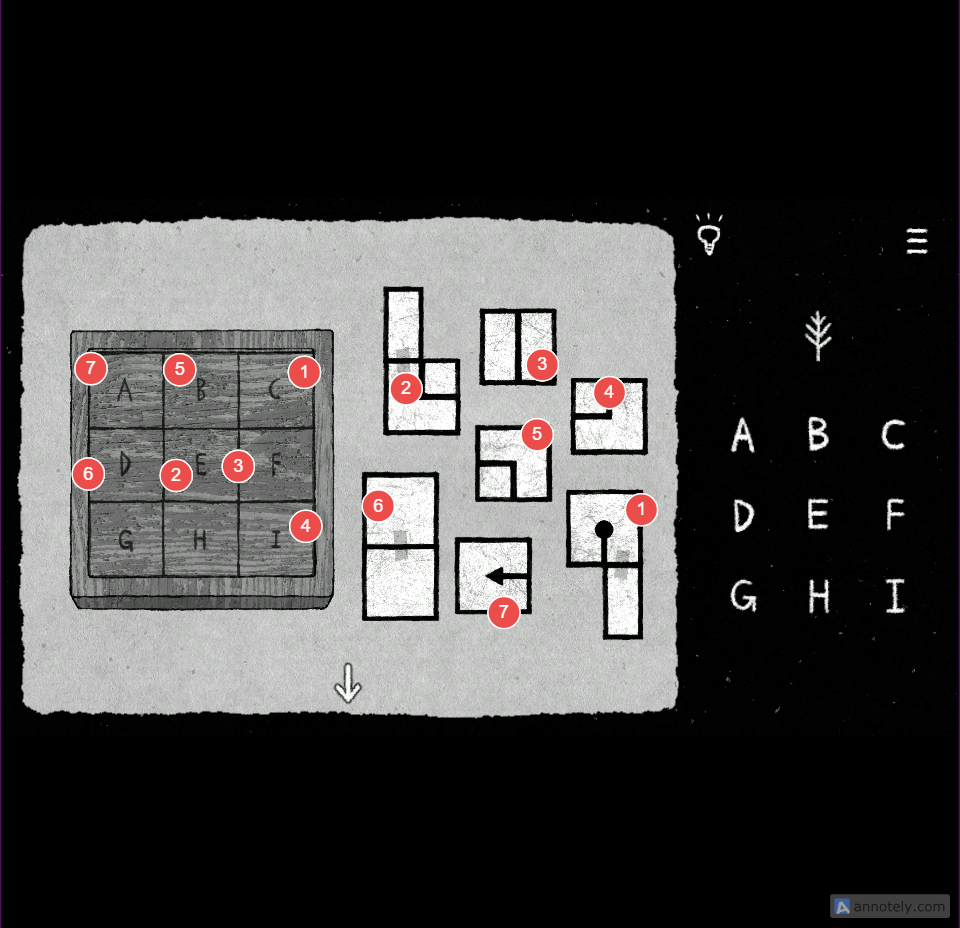
Beginning at the dot, follow the maze all the way to the arrow. Use the path as a guide and select the matching letters on the grid that lie in the same path as the maze to solve the puzzle:
C F I H E B A
7. Interact with the large miniature building. There’s a candle placed on top of it. When you click on the building, vines start appearing from the candle:
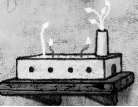
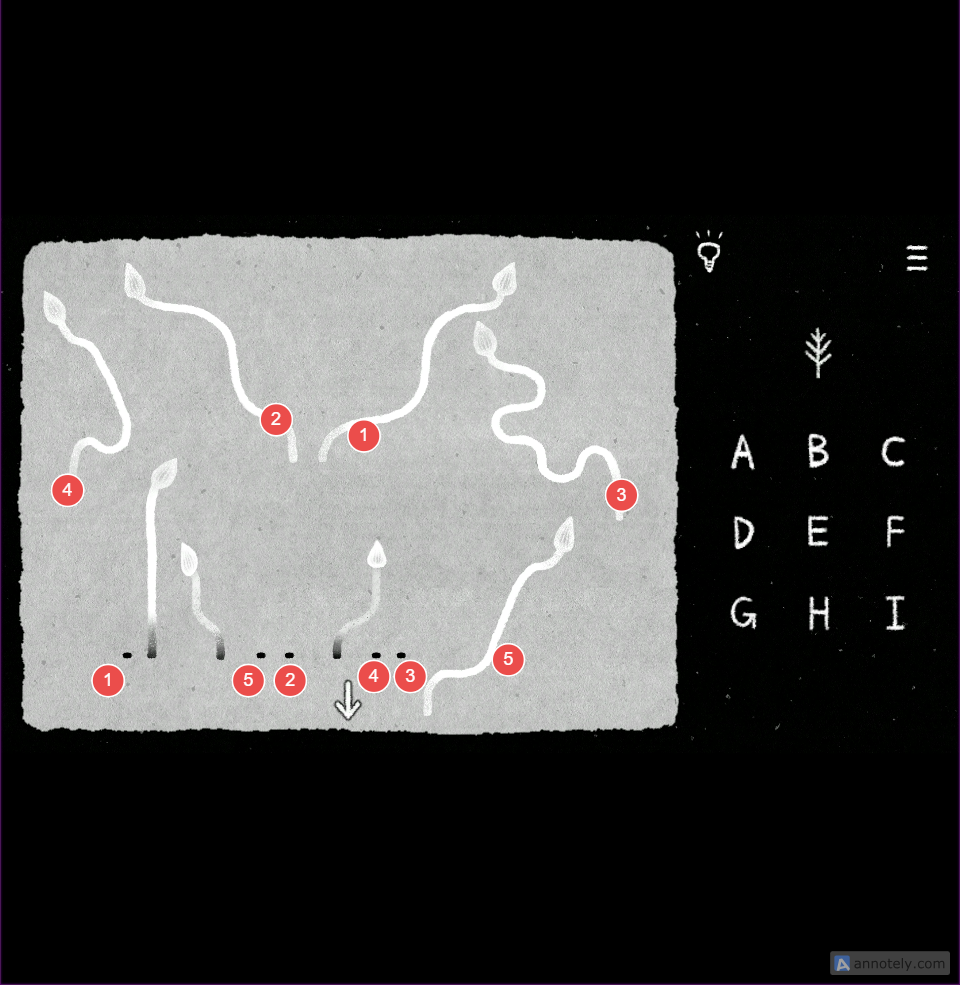
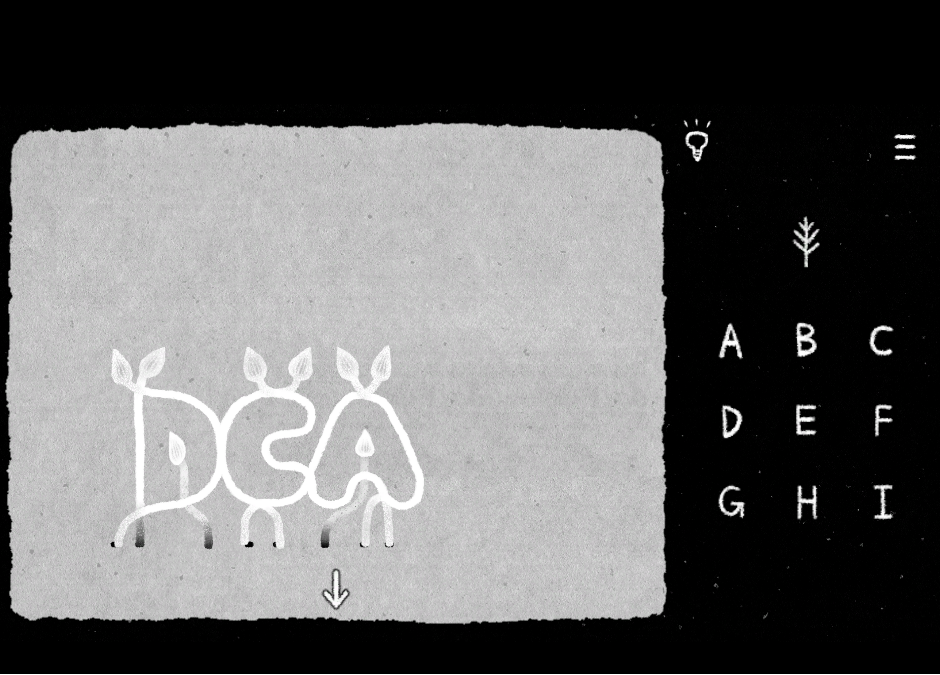
Three vine tendrils are unmovable, and five can be moved. The movable vine tendrils need to be placed beside the fixed ones to reveal three letters: D C A
8. Interact with the topmost house, the one without any windows. It will split apart, causing several fan-shaped flowers to emerge from its interior. Click on them to start a new puzzle:
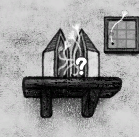
– Pay close attention to the pentagon-shaped flower. Next, observe the other five fan-shaped flowers, including the flower currently placed on the grid. The shape and orientation of the flowers provide the clue needed to solve the puzzle.
Place the pentagon-shaped flower on the board so that one of its curved parts aligns with the fan-shaped flower already on the board.
Now place all the other four fan-shaped flowers on the board so that they also align with the remaining four parts of the Pentagon-shaped flower. With the pentagon flower as the centerpiece and the fan-shaped flowers surrounding it, we now have a complete puzzle.
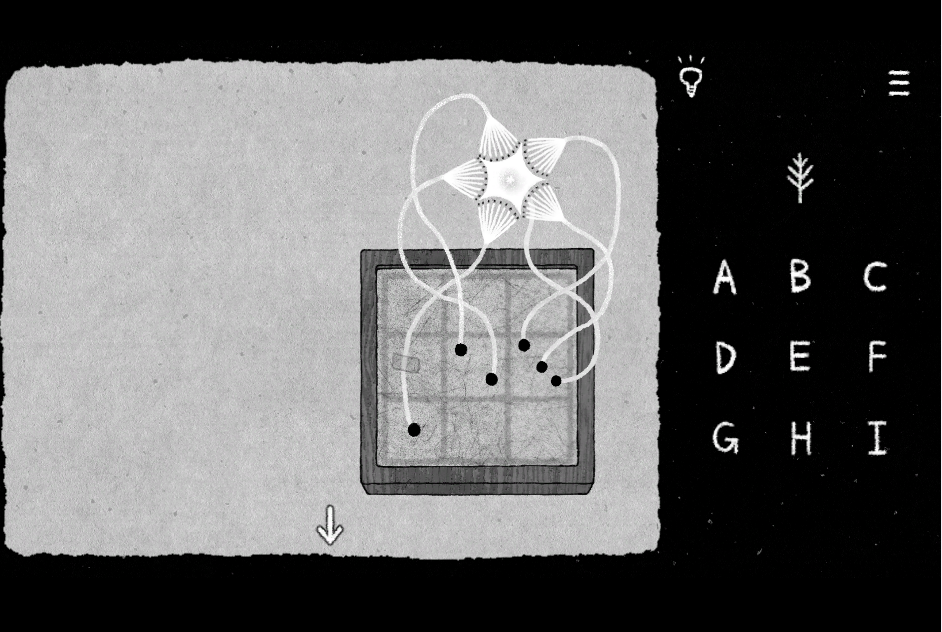
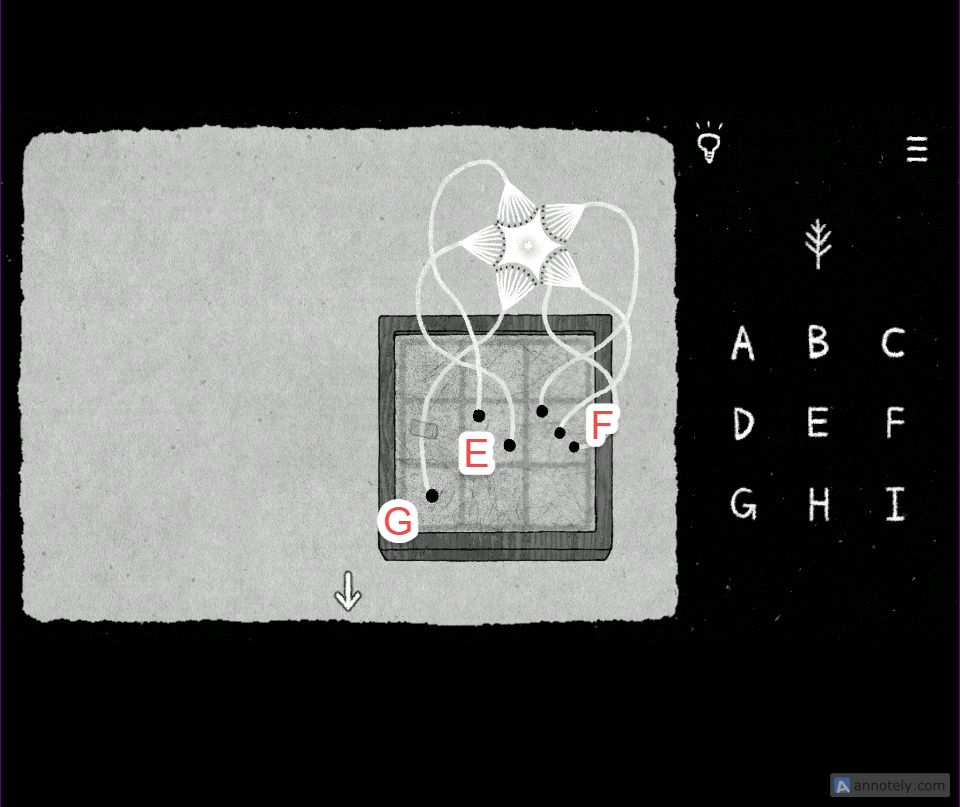
When all the flowers have been placed on the board, pay close attention to their stems. The stems will form dots on the grid. This grid mirrors the letter grid where you enter the solution. Treat the dots as numbers (1,2,3) and follow their sequence to determine which letters you need to select on the letter grid. The letters are G, E, and F.
9. Click on the tiny miniature house in the upper-left corner of the screen. Two flowering vines will emerge from the window. Click on them to begin:
Align the two budded vines so that they overlap and form a continuous chain of loops. Next, place the combined vine over the paper so that the following symbols appear inside the loops, from top to bottom: D, floral design, right arrow, floral design, and down arrow, as shown in the screenshot below.
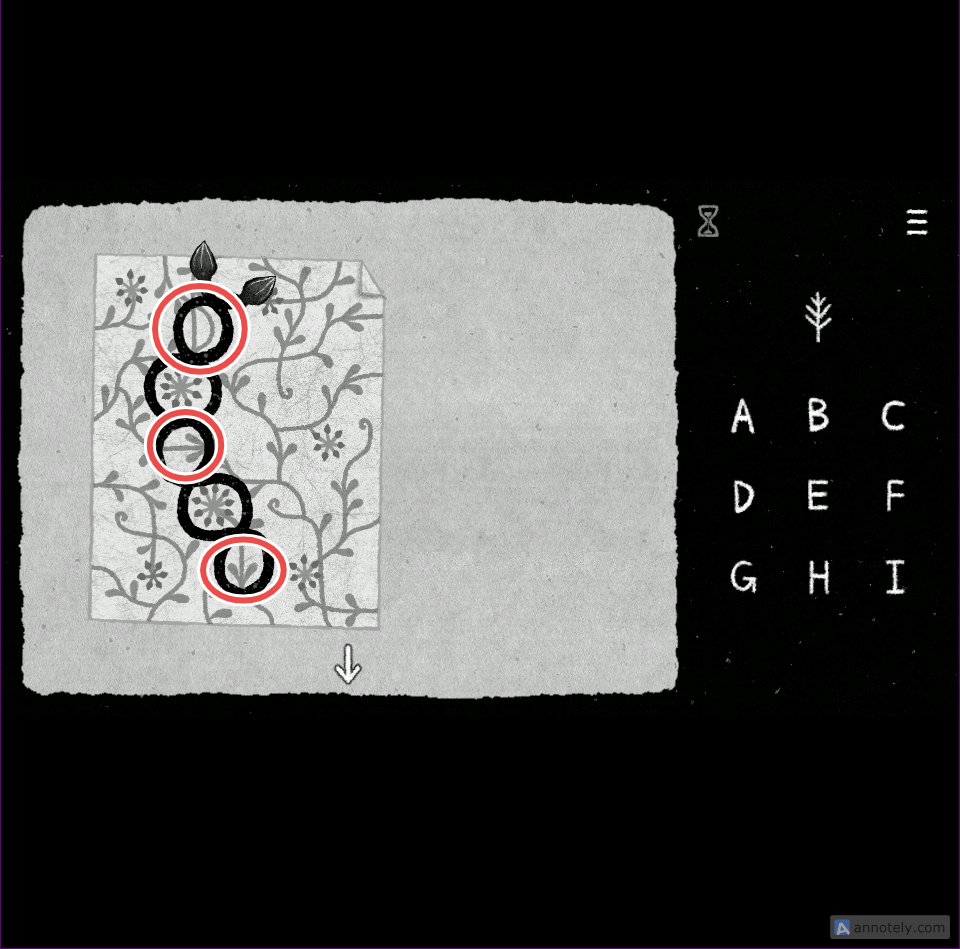
Pay attention only to the letter D and the arrows. Following the sequence as shown on the vine loop, click on these letters on the grid: D E H
Level 4
Exit the miniature houses room > the large house room, and you are back in the corridor. Enter through the right archway. You will find yourself back in front of the ladder. Click on it to climb up.
In the white corridor, the same black cat is sitting beneath the broken mirror.
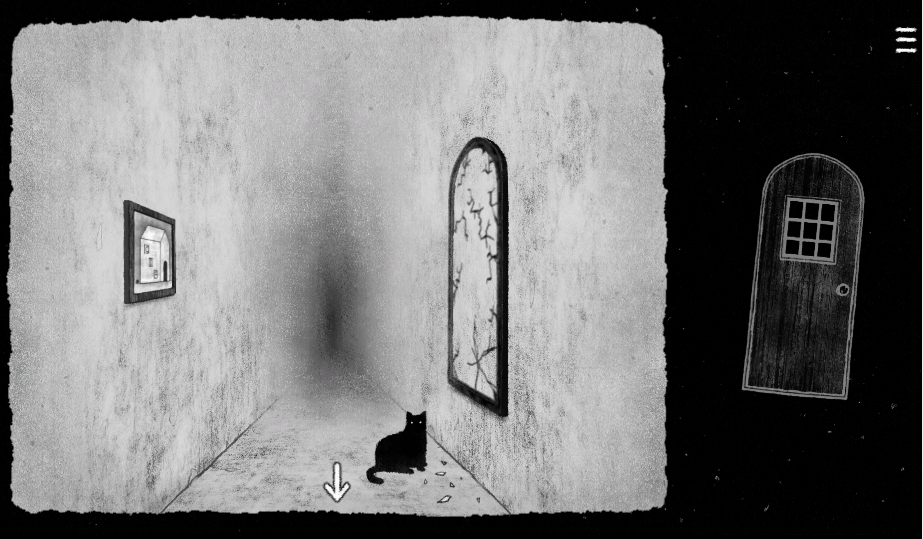
Interact with the cat, and it will leap into the mirror. Next, interact with the mirror and drag the door onto its surface. This will reveal a grid-like pattern identical to the letter grid used throughout the puzzles. When the door is positioned correctly over the mirror, the numbers 1, 2, and 3 will appear.
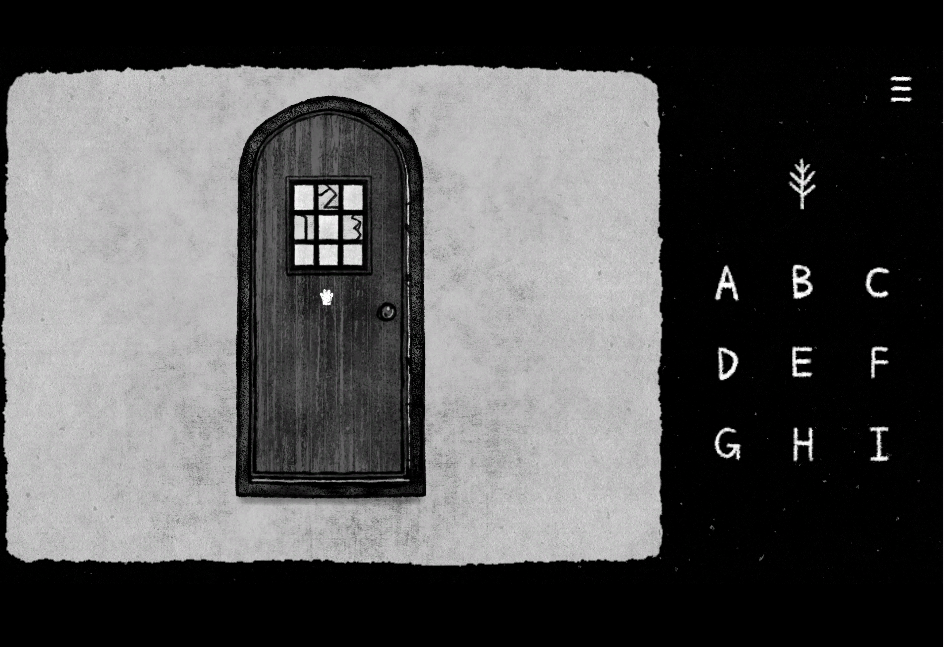
Click on the letters that correspond to the numbers and their positions on the grid.
1 = D
2 = B
3 = F
After solving this puzzle, click on the downward-pointing arrow to exit. The door/mirror opens slightly. Interact with it to unlock level 4.
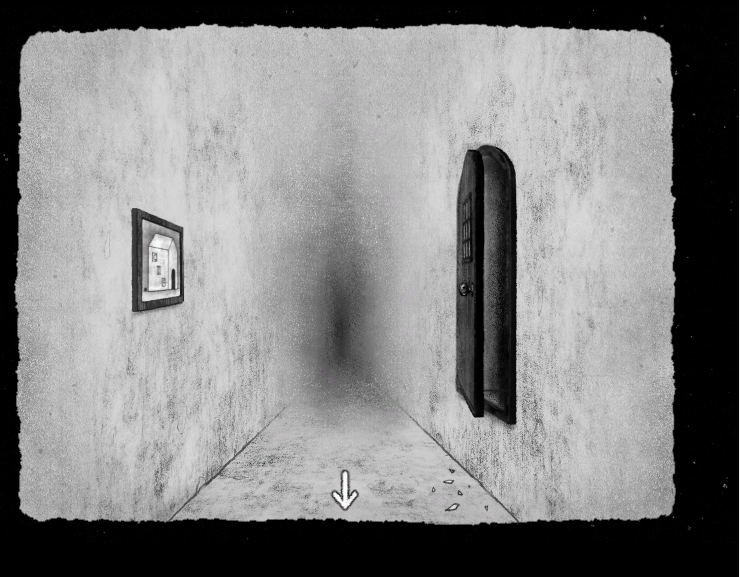
Each puzzle in the screenshot below has been numbered for easy identification. Refer to the matching number in the Solutions section to find the corresponding solution.
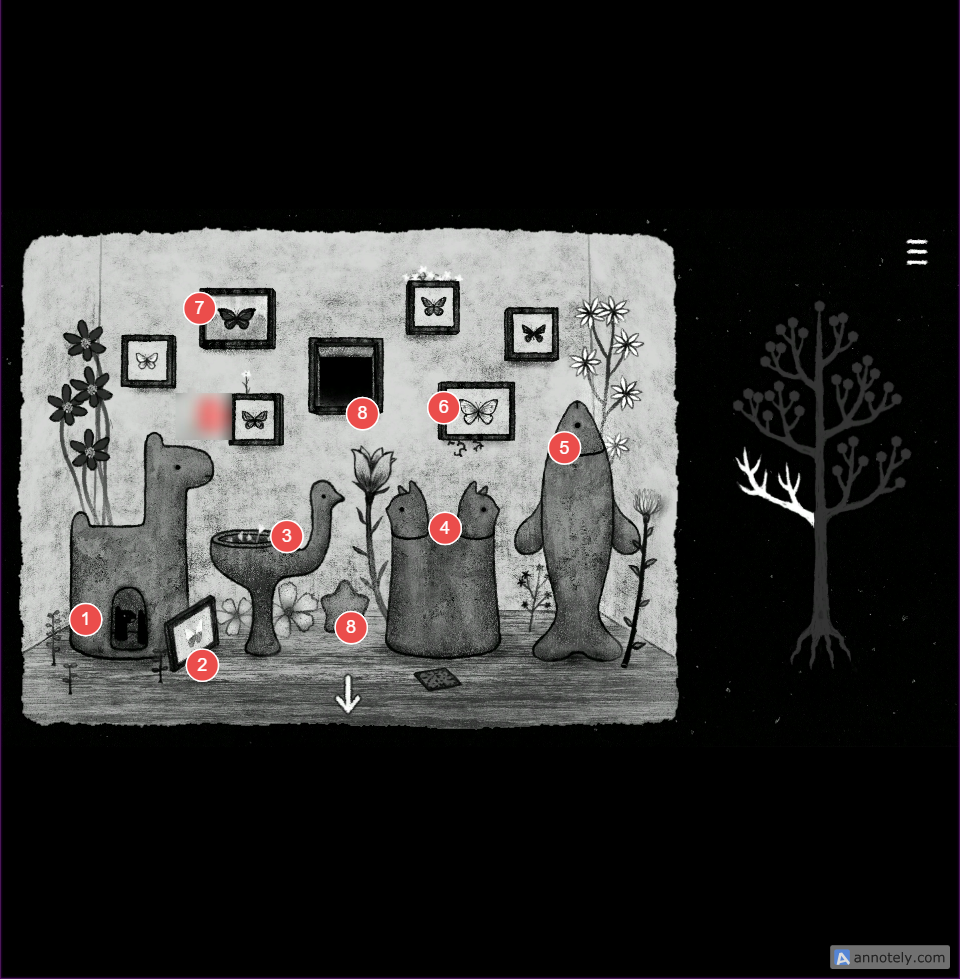
1. Interact with the tiny door built into the horse sculpture. Upon clicking on it, three smaller horse sculptures will tumble out.
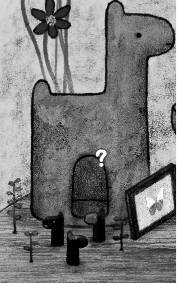
Merge the three horse sculptures to form a single large horse sculpture. Refer to the screenshots below for the correct arrangement:
1:
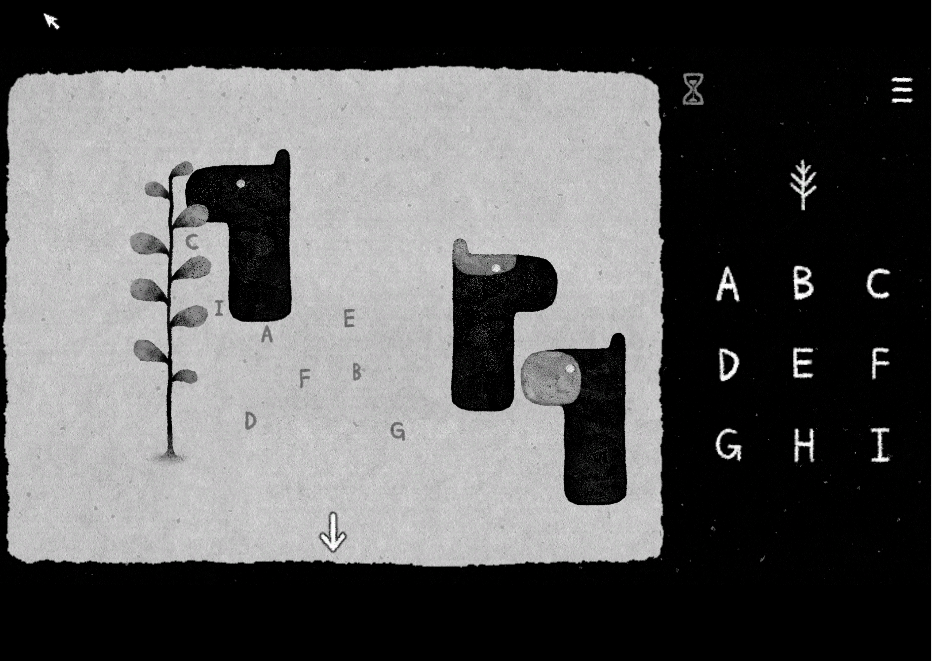
2:
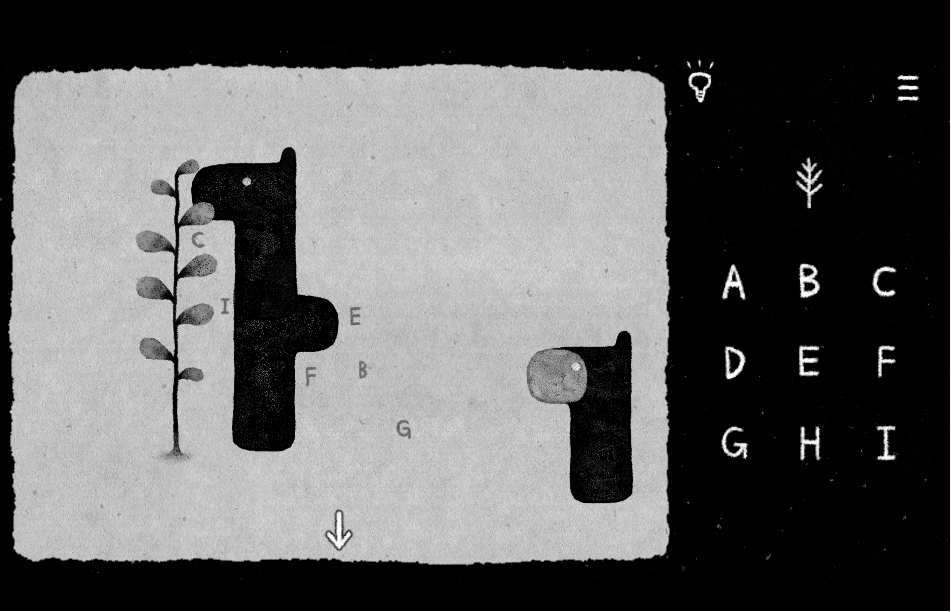
3:
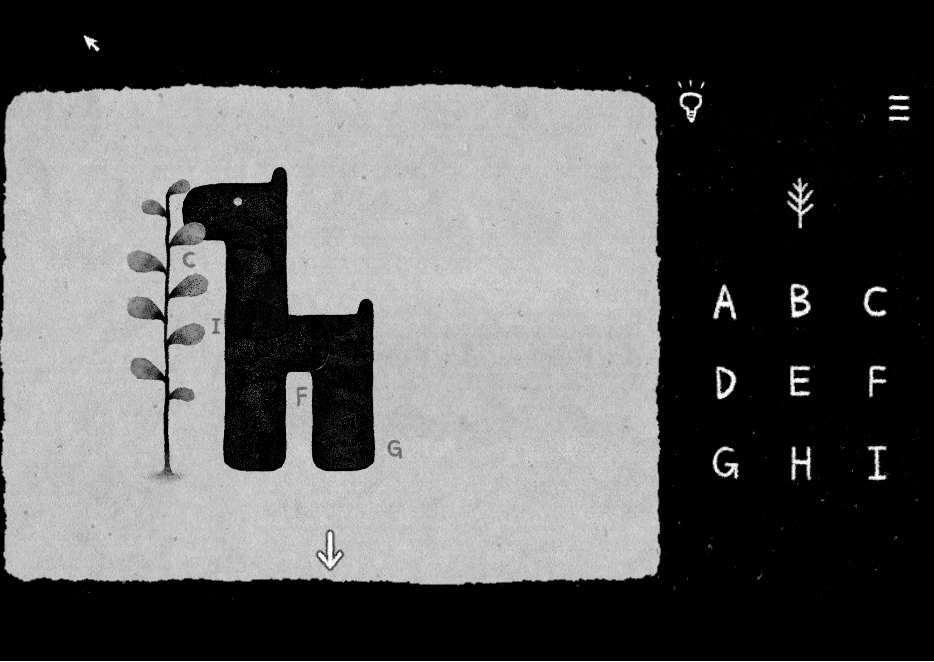
Once merged, most of the letters will be obscured by the sculpture, leaving only C, I, F, and G clearly visible.
2. Interact with the butterfly painting next to the horse sculpture. When you click on it, the painting falls to the ground. Click on the back of the painting to turn it over, then interact with it again to begin a new puzzle:
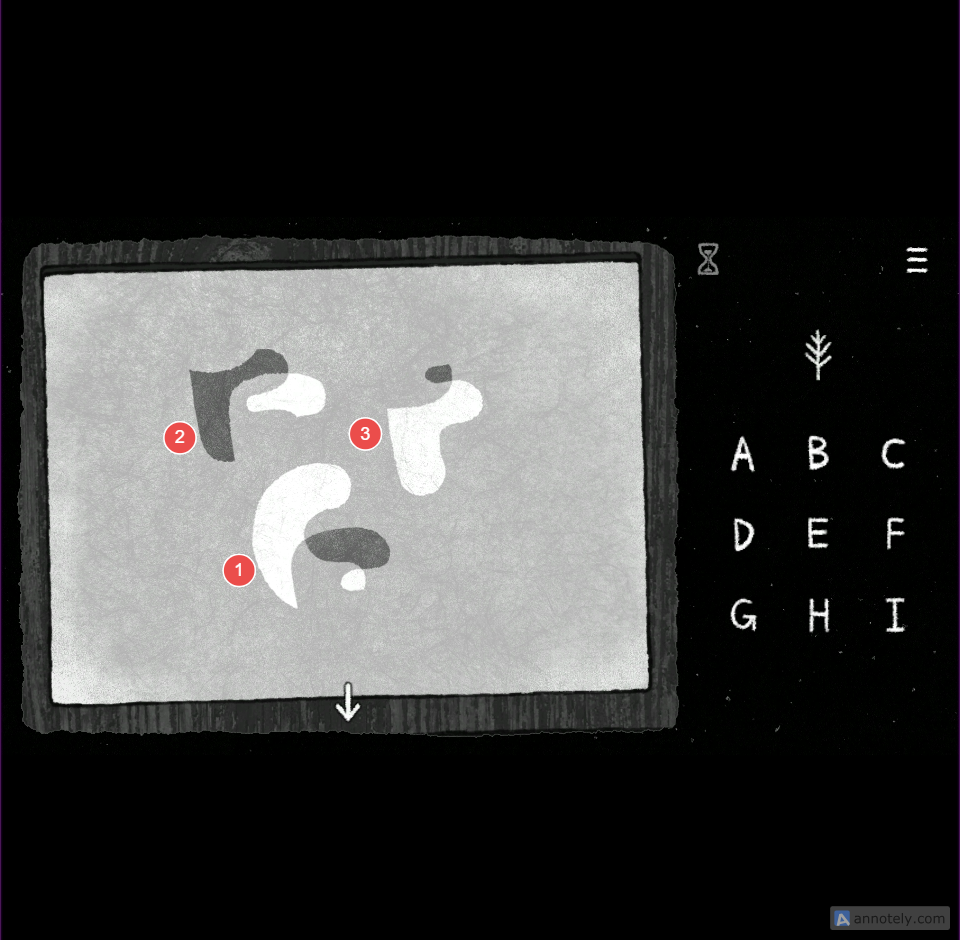
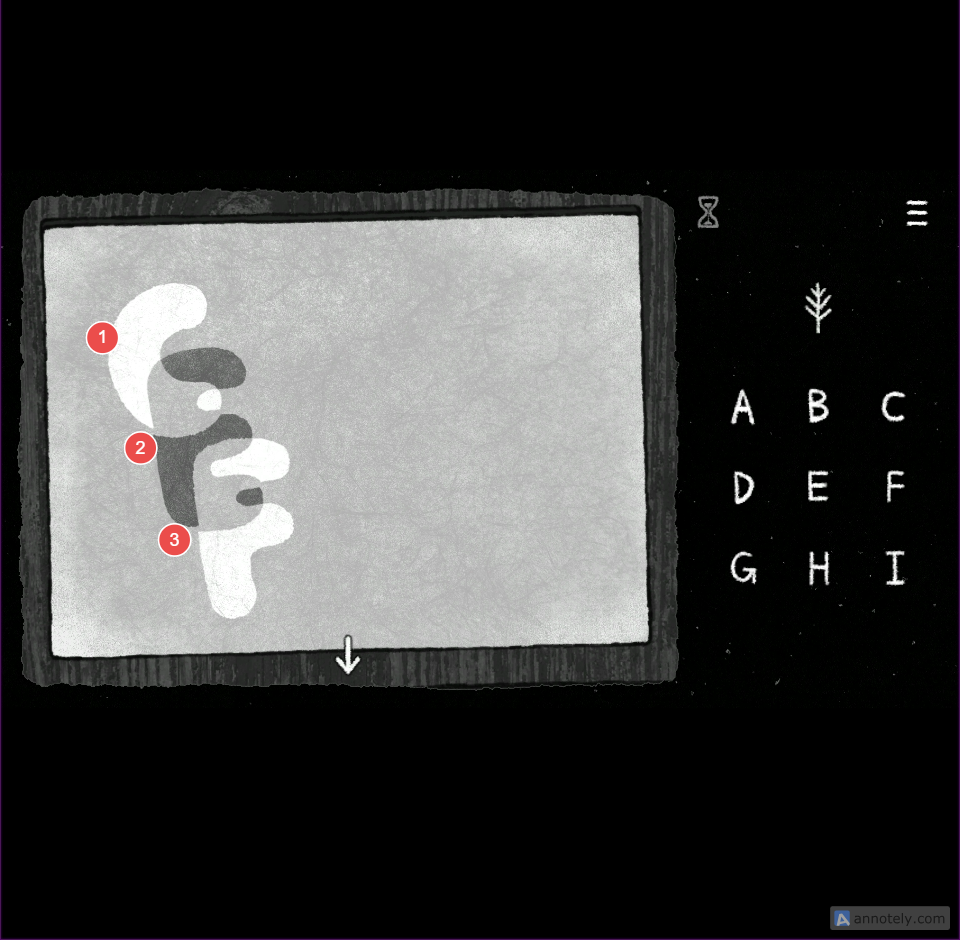
Align the three drawings in the painting vertically to form the letters C, E, and F.
1:
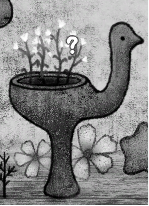
3. Click on the bowl on the duck sculpture to make the plants bloom. Click on the plants to begin:
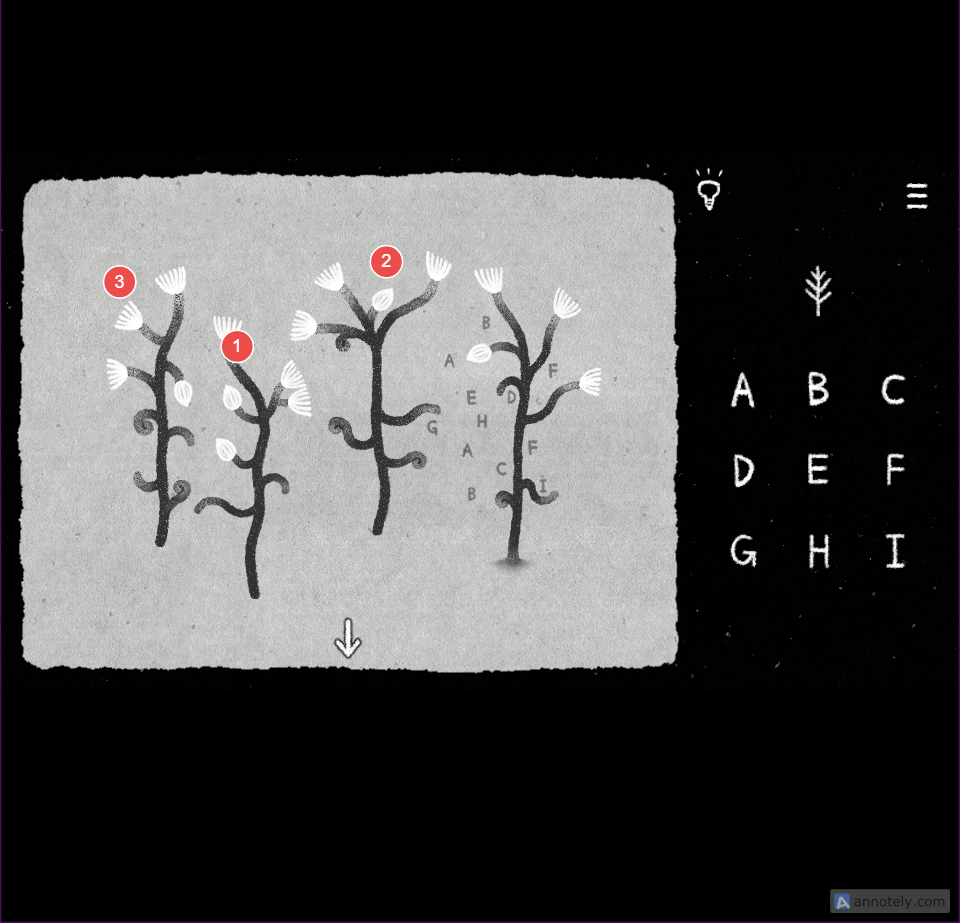
The main flower on the extreme right can’t be moved, and it is surrounded by the letters of the English Alphabet. The other three can be moved. Observe the blooming flowers and their overall curved shape.
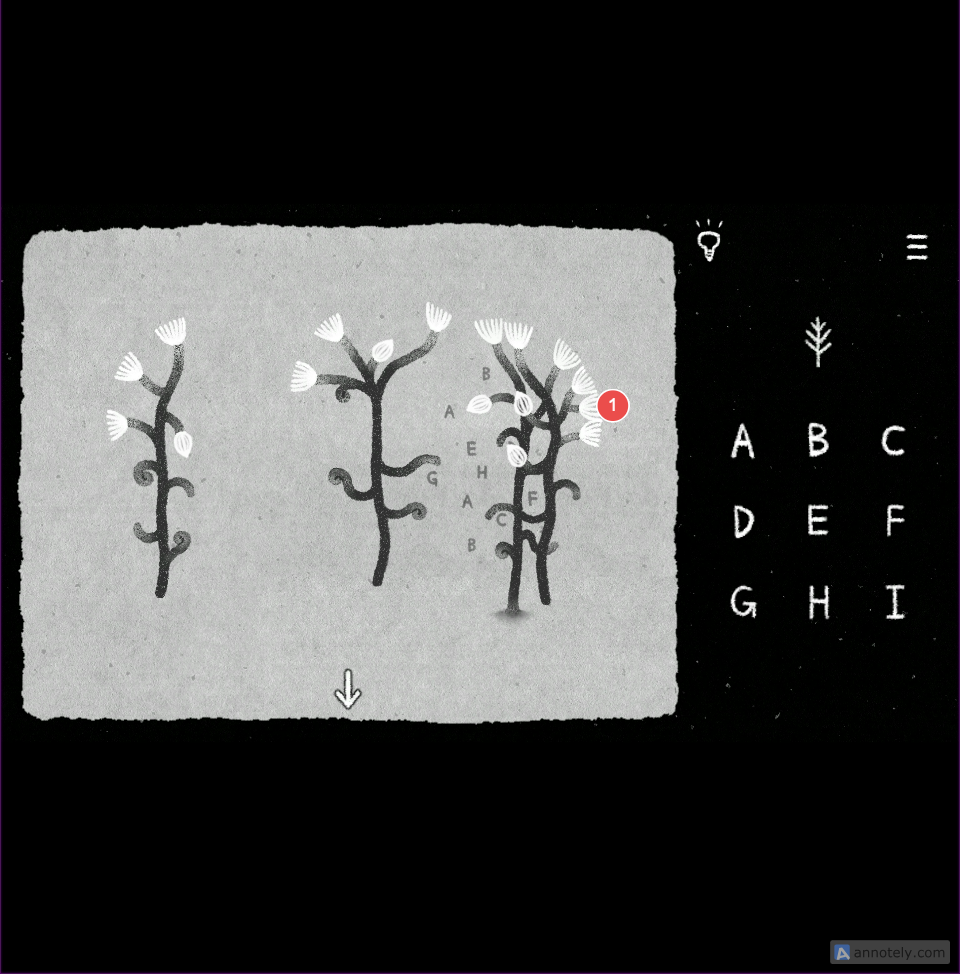
Align the three flowers with the main flower to arrange them neatly into a tree.
1:
2:
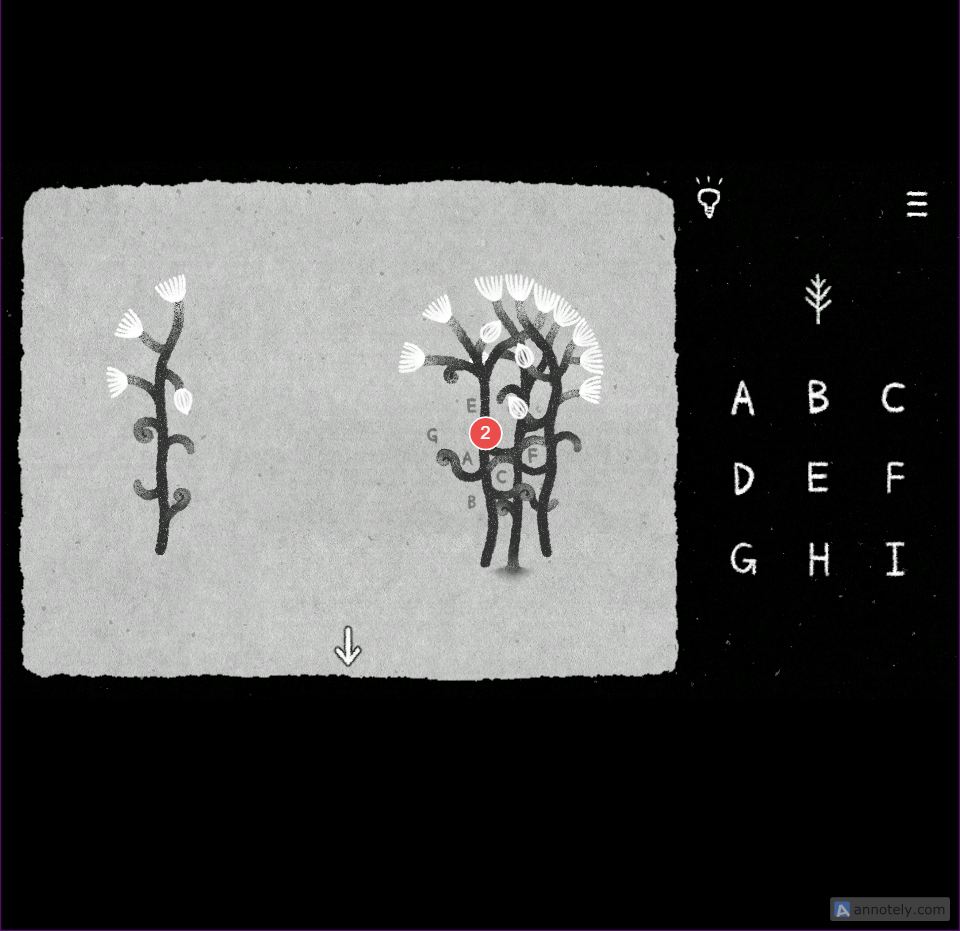
3:
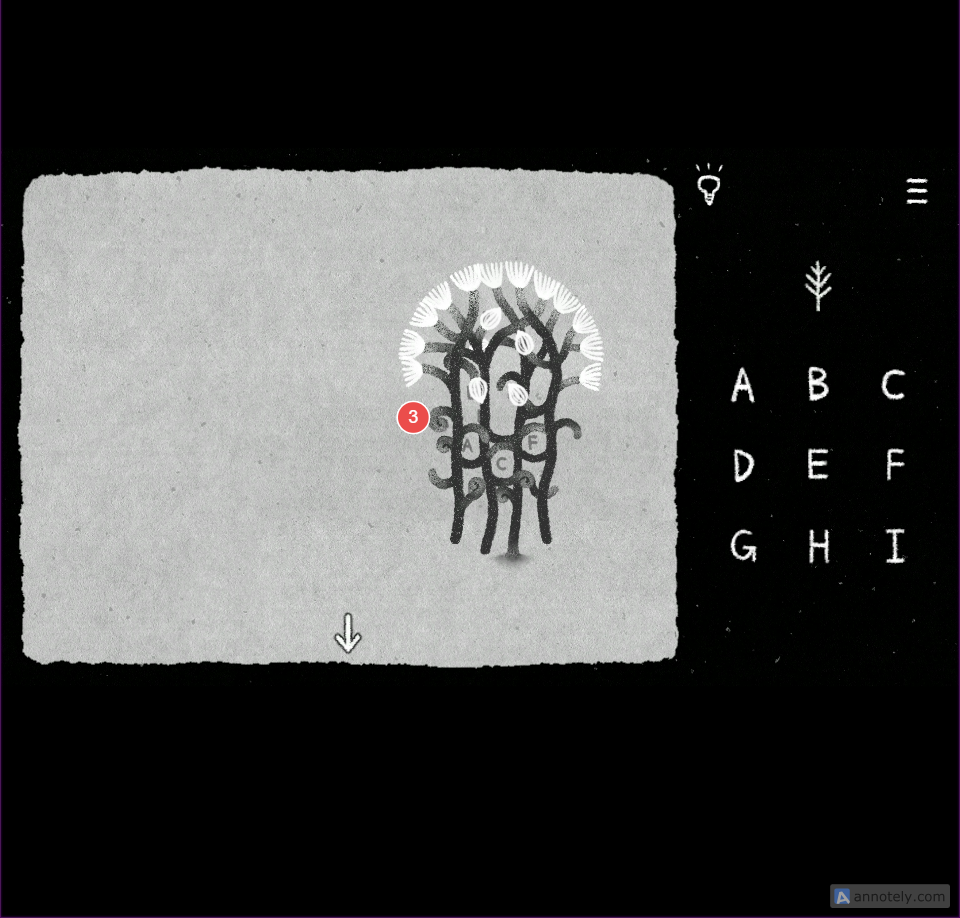
When you do this, only three letters are clearly visible: A, C, and F
4. Interact with the pair of cat heads positioned opposite one another. When you click on a cat’s head, a transparent cube will drop on the floor. Do the same with the other, and now you have two cubes on the floor. Click on the cubes to begin the next puzzle:
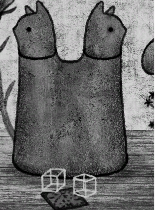
Place and align the cubes over the sheet of paper with the strange design to recreate the same grid pattern shown on the right. You will have to place them above each other in the center of the paper to form an octagon, and only then can you create a grid-like structure with dots denoting numbers.
Follow the sequence on the dotted squares and click on the corresponding letters in the same order on the letter grid (See screenshot):
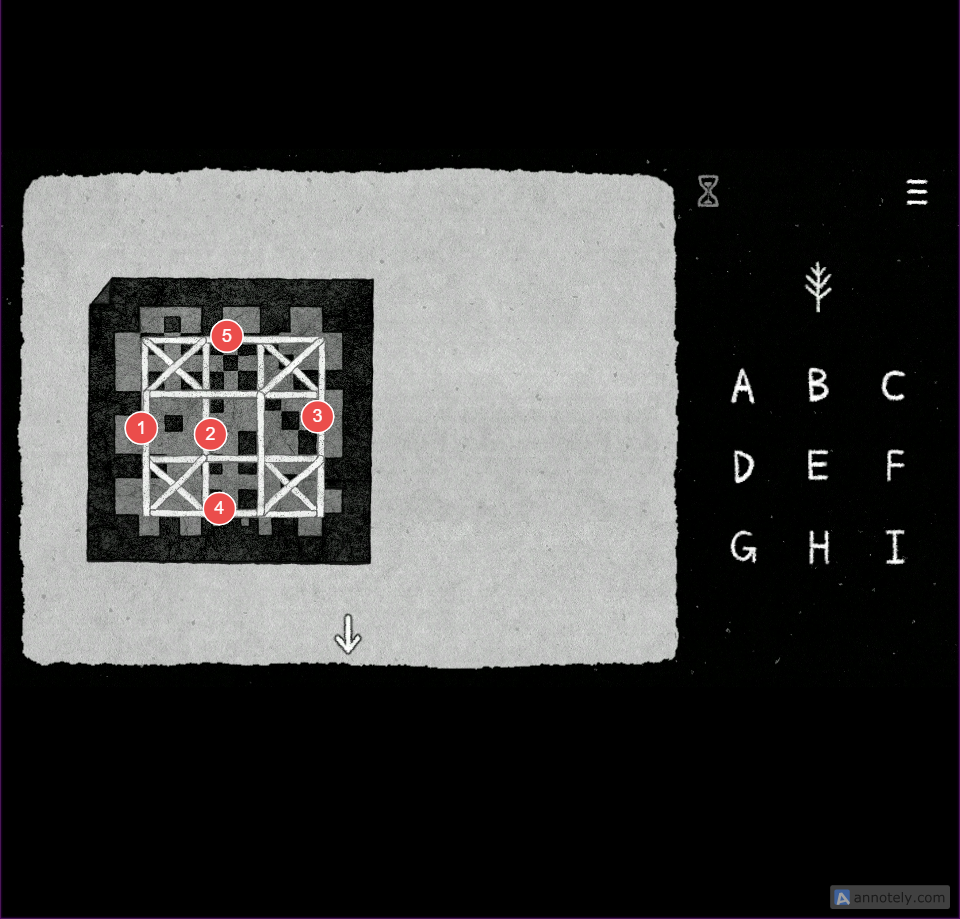
1 = D
2 = E
3 = F
4 = H
5 = B
5. Interact with the fish head, causing a parchment to fall onto the ground. Click on the parchment to unfold it, then click on it again to begin the next puzzle.
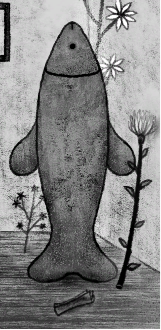
The puzzle features two paintings. The painting on the right shows only the ocean, while the one on the left depicts the ocean along with a boat and a fisherman. Drag the left painting toward the right and align it so that the fish-shaped design is positioned next to the fishhook.
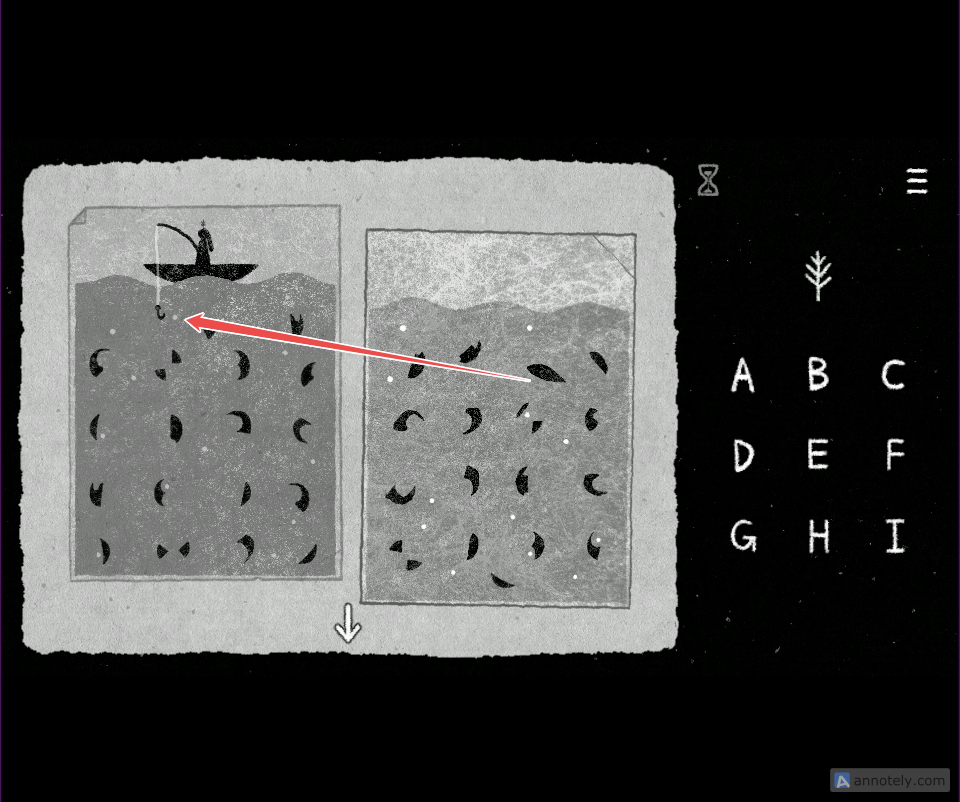
Doing so will reveal a 3×3 grid containing the numbers 1 through 9. Follow the numerical sequence and click the corresponding letters on the grid to the right in the same order.
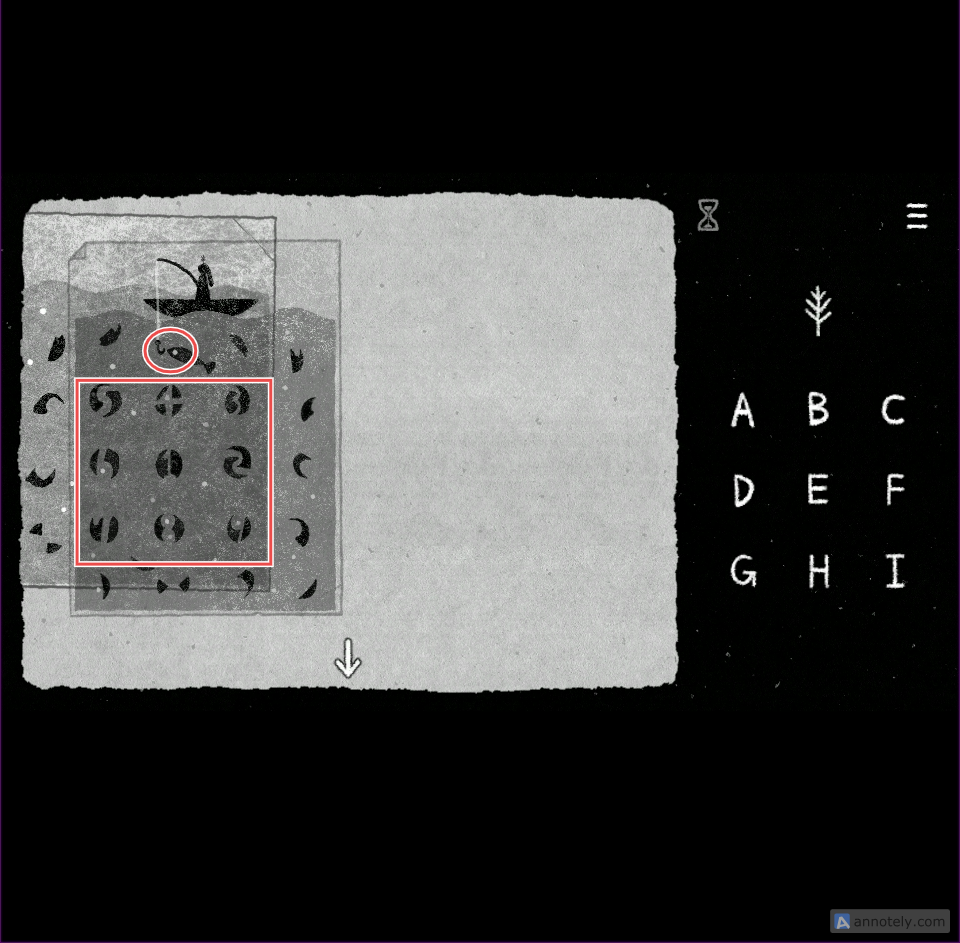
1 = E
2 = F
3 = C
4 = B
5 = A
6 = D
7 = G
8 = H
9 = I
6. Interact with the white butterfly on the wall painting. When clicked, the painting falls to the floor, revealing a hidden crevice behind it. Click on the vines emerging from the crevice to begin a new puzzle.
Arrange the movable vines with the fixed ones to create a maze. The outer boundary of the maze should be square-shaped and match the letter grid on the right. Refer to the screenshot below for the correct placement of each vine.
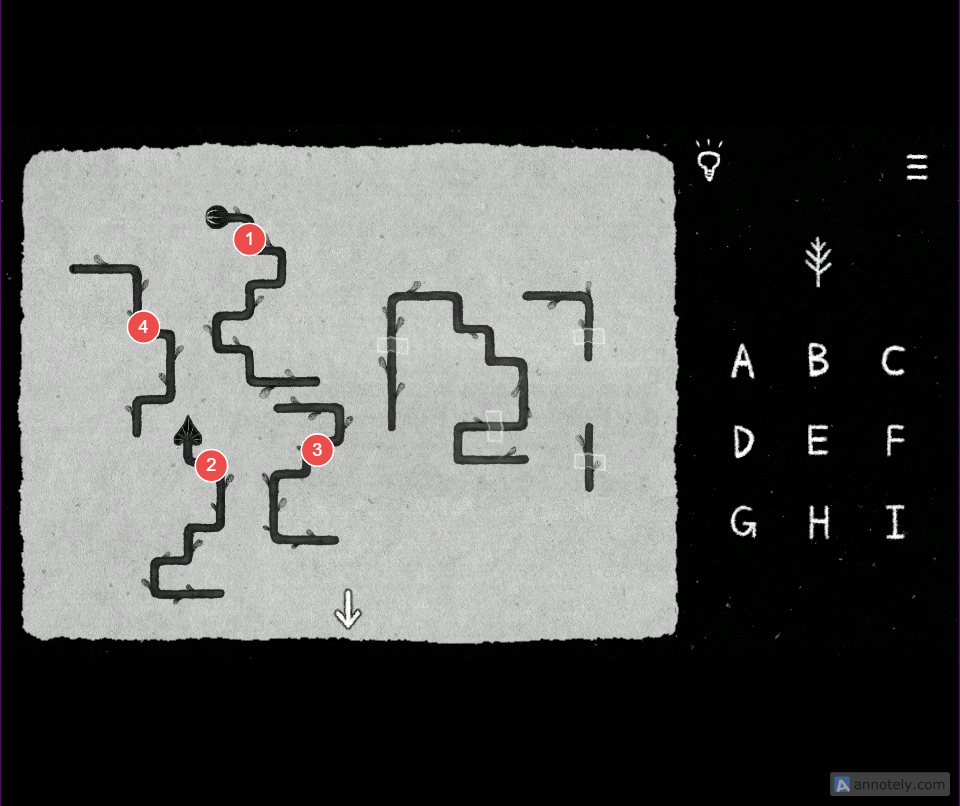
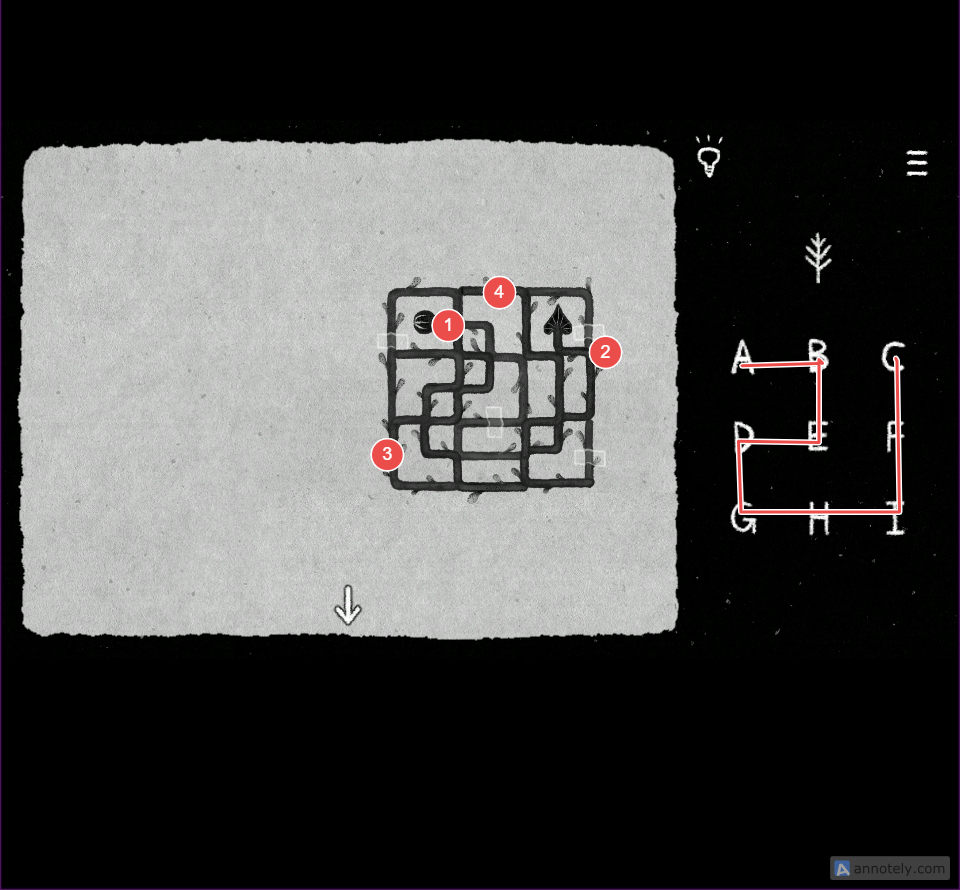
Follow the maze, starting at the dot and ending at the arrow. Trace the path and click the corresponding letters on the grid in the same order to solve the puzzle.
7. Click on the dark butterfly painting in the upper-left corner. When you interact with it, the butterfly flutters away. Click on the empty painting to start a new puzzle:
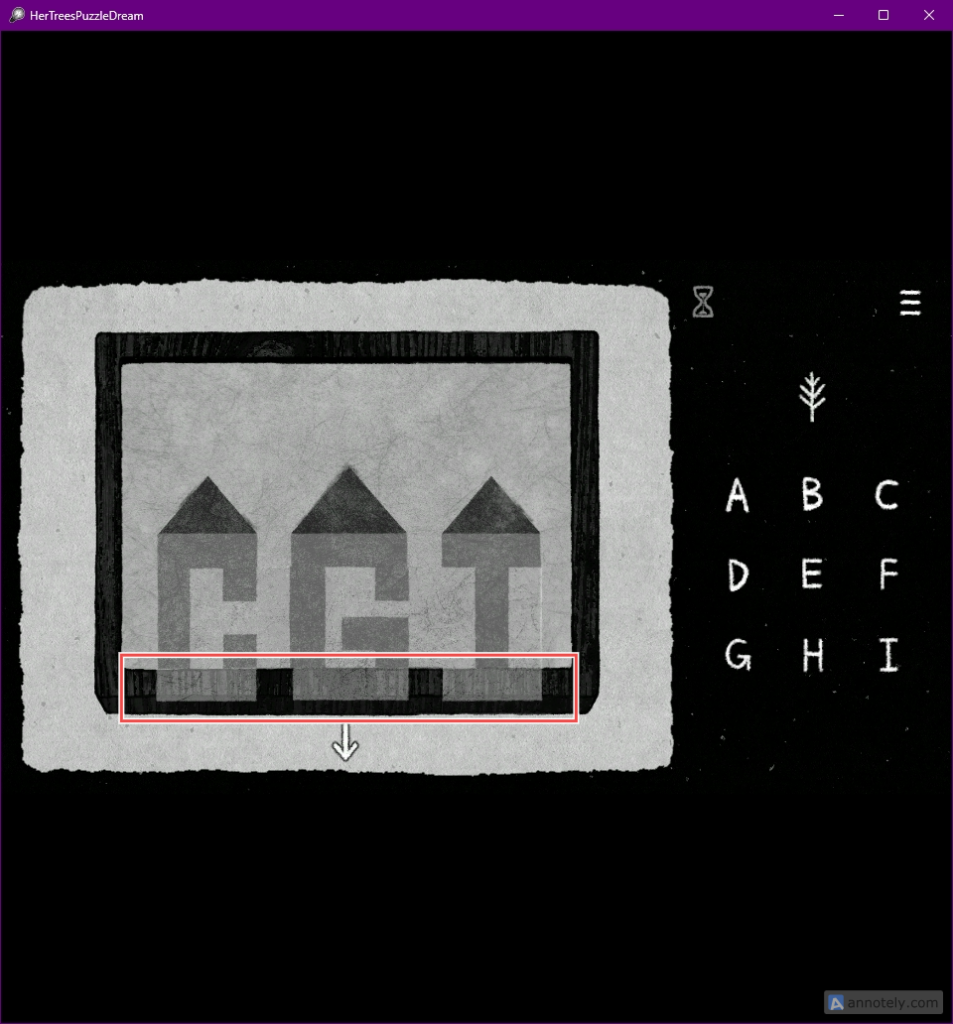
In the painting, there are two movable symbols and a building with three roofs. Move the larger symbol to the right, with its base aligned with the painting’s outer borders. While doing this, make slight adjustments to reveal two letters: G and I. Next, move the second symbol toward the left side of the building. Its base should also be aligned with the outer border of the painting. Doing so will reveal the letter C.
8. Click on the star located at the bottom center of the screen to turn off the lights. Now click on the constellation painting in the center.
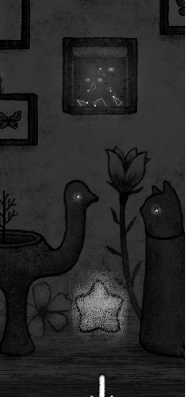
The dots on the constellation painting correspond to the letters on the grid to the right, but some dots are missing. Position the movable geometric shapes with glowing dots in their correct locations so that they fill in the missing dots. When placed correctly, the shapes will also combine with the fixed-position geometric shapes to form a star at the center of the painting.
1:
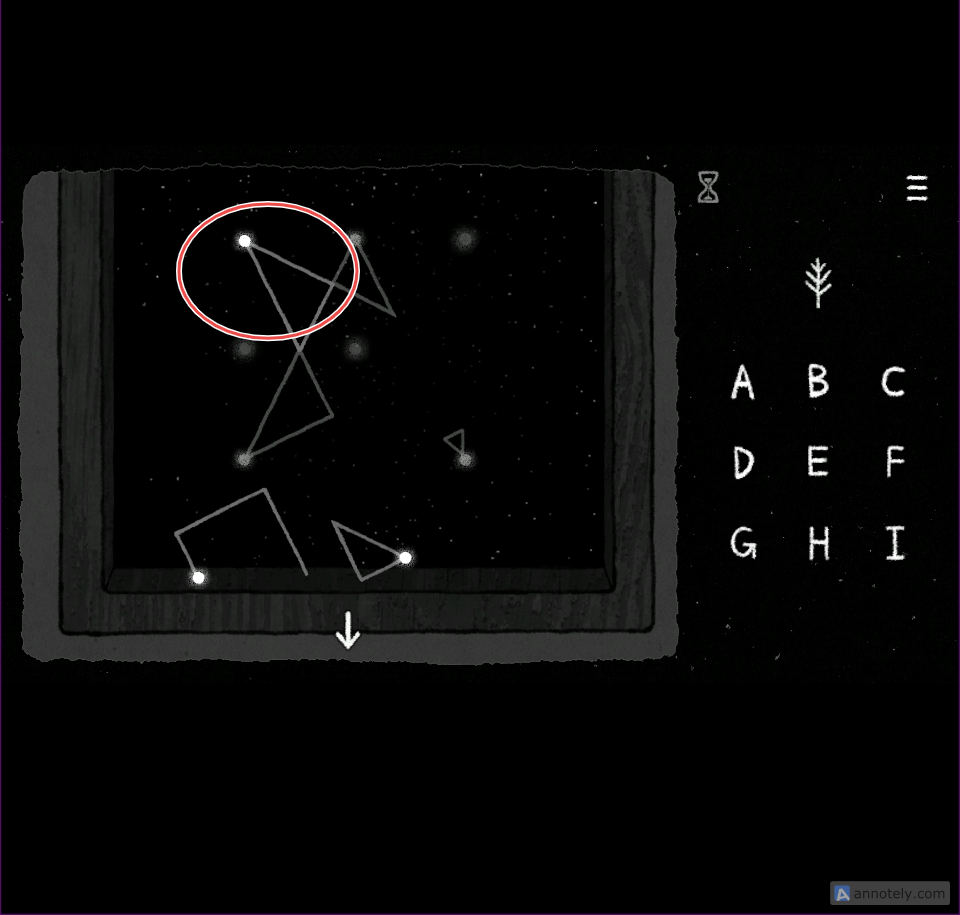
2:
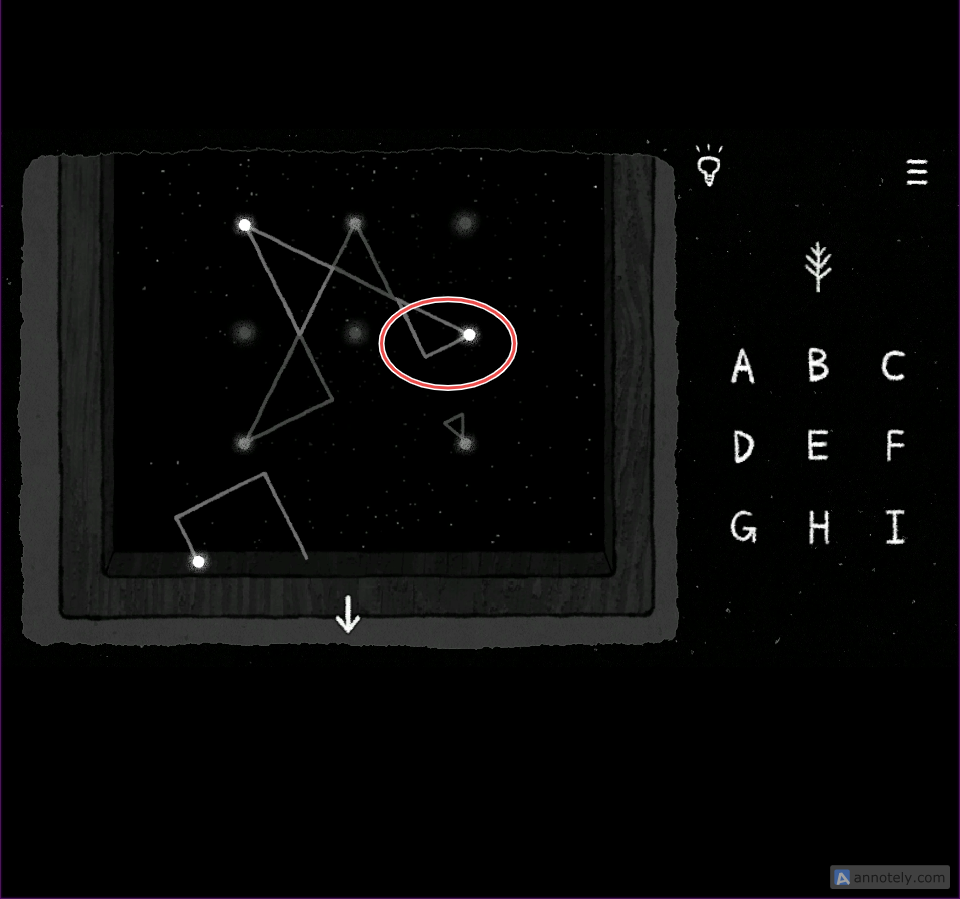
Once the star has been formed, pay close attention to the glowing dot in the middle of the bottom row. Follow the trail starting from that dot to its endpoint, then click the corresponding letters on the grid in the same sequence.
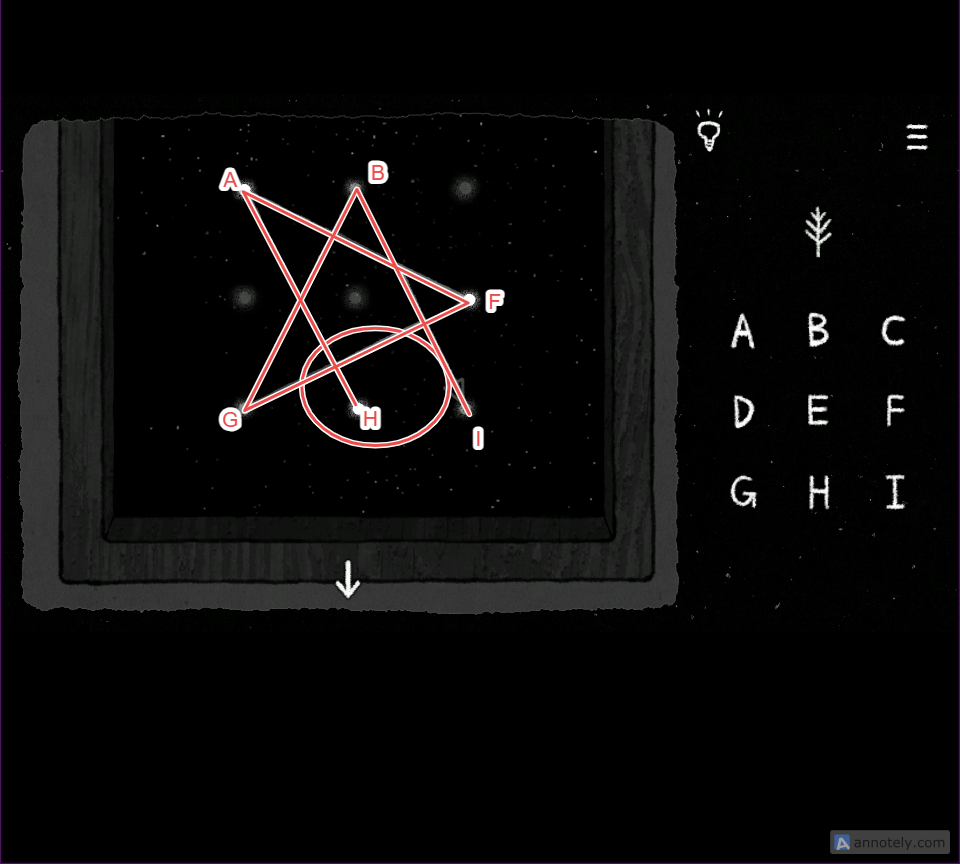
The correct sequence of letters will be: H A F G B I
Return to the main corridor with the two archways on either side and the large door in the center. Interact with the door, then drag the tree – which has served as a map of all the puzzles you’ve solved so far – onto the middle of it. Align the tree so that its dots match the faint dots on the door.
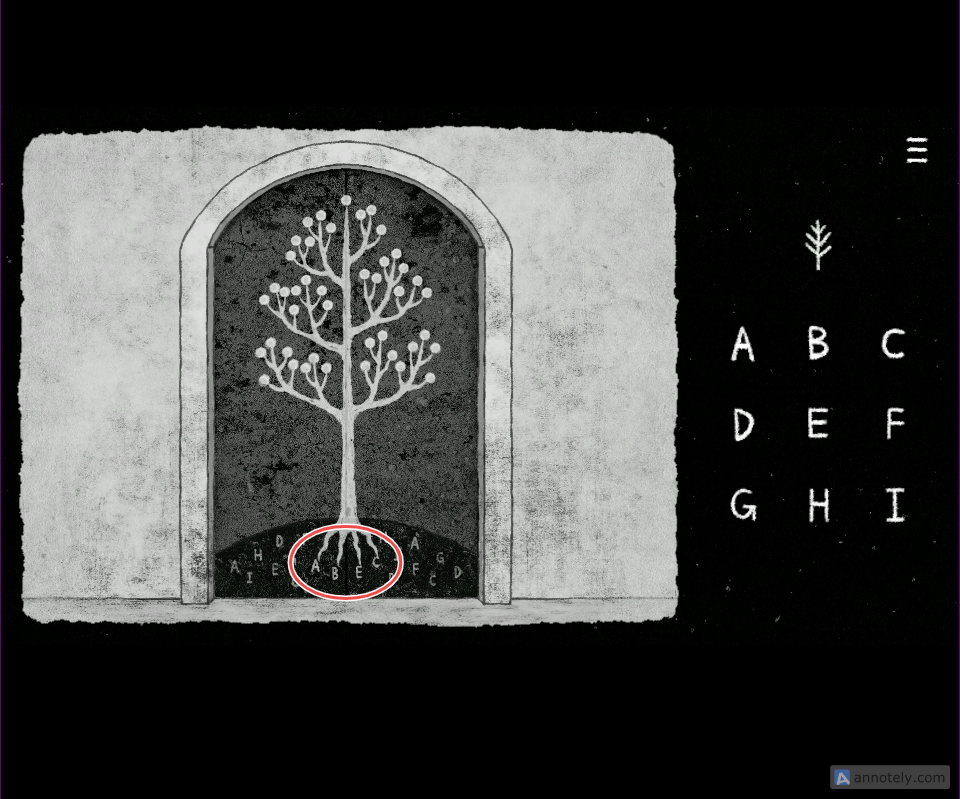
Once the tree is in place, examine its roots. They point to four letters: A, B, E, and C. Click the same letters on the grid to unlock the door.
Click on the entrance to enter a dark room illuminated by a tiny source of light. Keep clicking on the light to move closer to it until a strange wooden chair comes into view.
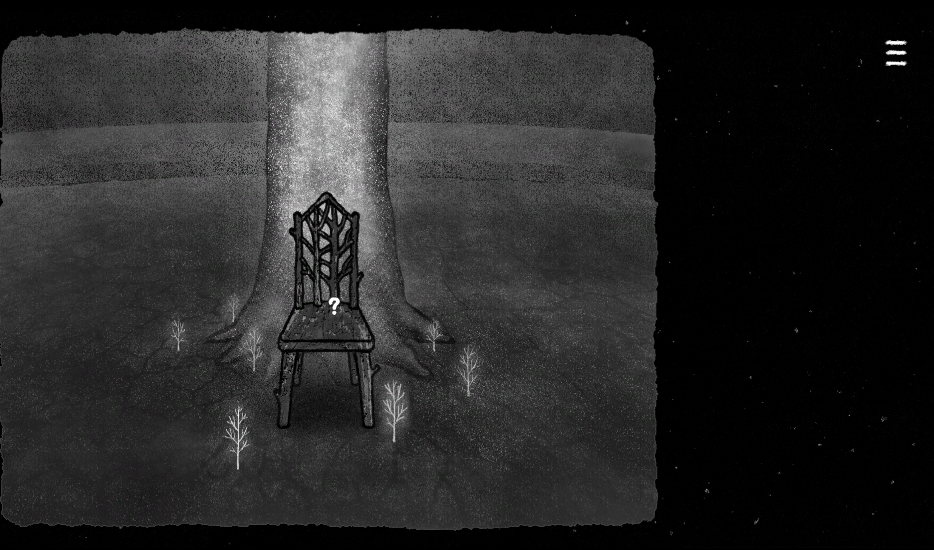
Interact with the chair to sit down, then click on the black cat to have her curl up on your lap.
The scene will then zoom out, revealing that the light is actually inside a bulb.

The camera continues to pull back, showing a tree filled with many similar bulbs. Click on the tree to trigger the final cutscene.