Everholm Walkthrough and Guide
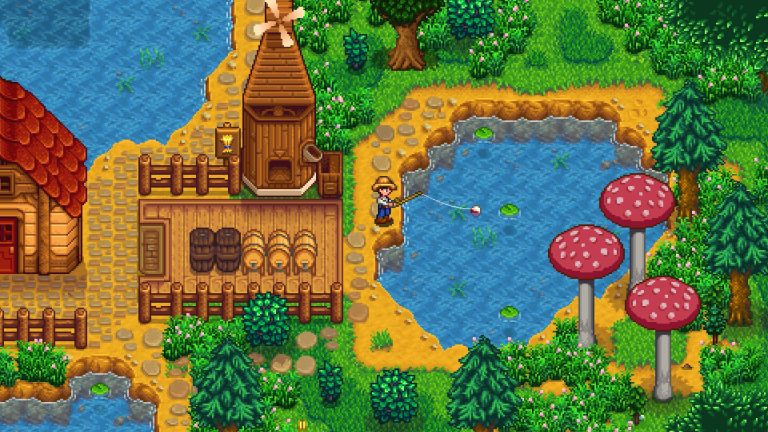
Everholm is the coziest game I have ever played. I just fell in love with its pixelart graphics. My favorite moment from this game is seeing my character’s reflection on the pond while fishing. Unlike other cozy games, Everholm introduces combat as a unique feature. Once you discover the underworld’s location, you can access it through a portal, fight monsters to obtain souls and use them to purchase spells, potions, and even a broom to fly over and explore the town. Now that’s some fun, witchy addition to the game!

If you’ve played games like Fields of Mistria, you’ll find the gameplay mechanics comfortably familiar. Whether you’re just starting out or exploring the basics of the game, we’ll cover everything to help you begin your cozy adventure. From understanding the interface to mastering your first tasks, this walkthrough and guide is aimed specifically for beginners stepping into the world of Everholm.
Quick Access
The Minimalist UI
I like Everholm’s uncluttered interface. The hotbar is located on the bottom of the screen. The most important tools and items go there. I have organized it with essential farming tools such as axe, pickaxe, scythe for foraging, and shovel/hoe, alongside a club to fight enemies, a potion for regaining HP and a fishing rod.

There are nine slots in the hotbar. To use an item, you must drag it from your backpack to the hotbar. Press B to open the backpack. At first, you will have only 9 slots available in the backpack, but you can upgrade it by buying a new one from Marry’s shop.
Don’t feel lost of you cant find your way back home while exploring. You have your trusty map that pinpoints your exact location and also helps you find new places to explore. Press M to open the map menu. When you explore a new location, shop, or house, its name and details are added to the map. On future visits, simply hover over the location on the map to view its name and additional information.
There’s a clock on the top-right hand side corner. It shows the in-game time, day and date. Hover over the icons below the day and date to see the current in-game season and whether it’s day or night. Click on the diary below the clock to open the quests and objectives menu. Click on a quest to know the details. When you complete a quest, click on it again and accept your rewards displayed on the bottom of the quest. You will also find a mini tutorial about that particular quest when you finish it.
In the same quests and objective menu, you will find additional tabs on the lefts hand side:
Heart: Displays your current relationships with the townsfolk. You can strengthen friendships with NPCs by giving them gifts. Talk to them to learn their likes and dislikes, then offer appropriate gifts to increase hearts and build friendships.

Map: Shows the map of your current location. Keep exploring the town to update the map with place names and other details. If you are planning to revisit the same location you have visited before, just hover the mouse cursor over that location on the map and you will see its name, timings (if it’s a shop) and other details on screen tips.

Purple exclamation: Quests and objectives. Complete them to earn rewards.

Blueprint: All blueprints of furnture items collected so far.

Mail: You can read all letters that you have recieved at your mailbox.

Controls
The basic control scheme is not different from other cozy RPGs. But some useful key combinations will help you a lot in your adventure, example: Left click + scroll.
- W/Up arrow key – Move forward
- A/Left arrow key – Move left
- S/Down arrow key – Move down
- D/Right arrow key – Move right
- B – Open backpack
- Space – Dash wduring combat/Skip dialogue
- 1-9 – Hotkeys for hotbar located at the bottom of the screen.
- Tab – Switch inventory hotbar rows
- Q – Diary Quest tab
- M – Map
- Left click – Use item
- Right click – Interact
- Left click + scroll – Split item stack (Very useful if you want to sell only set number of items through the shipping bin.
- H – Toggle selector
- R – Rotate placeable furniture item.
- ESC – Menu
Focus on Resource Bars
The resource bars on the lower right-hand corner of the screen are Mana (purple bar), Energy (Green bar), and Health (red bar).

Casting spells and summoning costs Mana. Engaging in any kind of physical activity, such as farming, woodcutting, fishing, or breaking rocks using the pickaxe depletes the energy bar. Eat food or return to your farm and nap to restore energy.
The health bar depletes during combat if you take damage from enemies. Consume healing potions, eat certain fishes, such as the sunfish, or munch on some special healing mushrooms, such as Amanitae dropped by enemies to restore health. I will cover more details about battle and spells later in this guide.
Low Energy Slows Down Movement
This happened once as I did not pay attention to the energy bar and kept adventuring and doing physical tasks. Once the energy bar reached the lowest level, my movement was slowed down considerably and it took more time to reach home. The best and quickest way to restore energy is to snack on some food purchased from Molly’s shop. But here are a few ways to restore energy for free:
1. Catch fish and consume them to get instant energy.
2. Go back to your farm and sleep on your bed.

Did you Know: You can get gold every morning from Mr. Fudge, a cute teddy bear found beside Lilly’s bed. Hover over the toy and right-click on it to get your gold coin.
Don’t be Late
In Alice in Wonderland, the white rabbit exclaims, “I’m late, I’m late!” But in Everholm, it’s your character, Lilly, who worries about being late, fearing she will fall asleep once dusk falls. And yes she does slip into slumber in the middle of her adventure once night falls. Also, she won’t be able to buy items from shopkeepers or even talk to NPCs after sunset.
Once Lilly falls asleep, she is teleported back to her bed. But when she wakes up, the energy isn’t fully restored. Seems being late isn’t cool at all, at least in this game.
Basic Farming Tips
Farming is one of the most wholesome, simple and relaxing acitivity in Everholm. Here’s how to get started:
You’ll receive all the essential tools, such as scythe, till, watering pot, pickaxe, and axe on day 1. Marry, the first NPC you encounter, returns them to you as a gesture of thanks for lending them to her.

On the same day, visit her again at her shop and get free carrot seeds. Here’s how to start planting crops:
1. Use the scythe to clean the debris in the garden. You will also need the axe to chop down wood lying scattered all around the place.
2. Use the hoe to dig ground up. You will see a patch of land darken a bit.

3. Put the seeds in the dug up soil.

4. Water the soil and watch for the emoji above each seed. Just hover over each seed to see teh emojis. A sad emoji indicates the seed needs watering. Once watered, the emoji changes to a happy one.

5. You can refill water from any water source. Click to equip the watering pot and move closer to a water source. Right-click on teh water to refill.
6. Water your crops daily to ensure they grow within the expected timeframe. To find out when a crop fully matures and its preferred season, hover your mouse cursor over its icon in the hotbar or your backpack. Take the example of carrot seeds. They take 5 days to fully grow and they grow in all seasons except winter. So before sowing seeds, hover over them to know on which seasons they can be grown and then hover over the seasons on the top-right hand side of the screen.
7. You can also use fertilizers or poop (Obtained by completing certain quests, such as talking to Marry for the first time) to grow your crops at a faster rate. You can purchase seeds from Marry’s shop.
Ship Items to Earn Extra Gold
Shiping items, whether farm produce, fish or anything you have foraged so far, can be shipped for profits! There’s a wooden bin next to your house in the farm:

Approach the wooden shipping bin, right-click to open it, and drag items from your backpack into its empty slots.

After filling the bin, head back home, sleep (will also save your game), and wake up to find gold earned from the items you sold. Thats it! Easy peasy!

Take up Side Quests from the Job Board
On day 4, Tomos will introduce you to the job board, where you can accept odd jobs to earn extra gold, Everholm’s in-game currency. Head straight to the town square and you will find the job board near Marry’s shop. Move near the board and right-click on it to get up to three side quests. You can accept only one quest at a time.

Choose the easier job that grants a good amount of gold upon completion. On my first interaction with the job board, I chose the “Hardwood Needed” job as it was the easiest of the three. The reward was x960 gold, but I had to give hardwood to Caleb.
I used my axe to gather 5 hardwood, but finding Caleb was not easy. Finally, I found him near the docks, fishing with his pet dog. I clicked on him and was paid the promised amount instantly.
Interact with the Crafting Station
The crafting station is right next to your homestead, in your farm. It’s a cute little workbench with a blueprint, hammer and chisel. Move near the crafting station and interact with it by right-clicking on it. A workbench section will pop up on the screen.

If you have just started playing, you will find very few blueprints of furniture items. Click on an item and the required materials will be displayed on the right hand side. Here are some of the items you will see at the start of play:

Item Name | Materials Needed |
Box Plant (Decor item – cute leafy box) | x4 grass, x2 clay x2 fiber |
Wood Fence | x1 hardwood |
Board | x1 hardwood |
Rope | x4 fiber, x2 sap |
Twig | x1 woo |
As you progress throughout the game, you will obtain blueprints as rewards for completing side quests/jobs. You can also purchase a few blueprints from Tomo’s workshop.
Purchase the Backpack
On your keyboard, press B and you will notice that your backpack only has 9 slots. Others are locked. You can unlock additional slots by purchasing a new backpack from Marry’s shop.

Always open the mailbox whenever you see an exclamation mark above it. It is right next to your house. On day 8, open the mailbox to find a letter from Marry. She has some exciting news for you. A brand new and sturdy backpack that can expand your inventory is up for grabs.

Go to Marry’s shop near the town square to purchase the backpack. It costs 15K gold. Quite pricey but can be a handy upgrade to your adventure, especially if you are exploring the town for foraging.

If you don’t have enough gold to purchase the backpack, then there’s a much cheaper way to store items. But unlike the backpack, this storage option is stationary. You won’t be able to take it with you everywhere you go? Want to know what it is? Follow the next steps.
Get the Chest to Store Items
There are two ways to obtain chest:
1. Complete the “Ship 20 Items” quest. Click on the journal icon on the top-right hand side of the screen to find this quest. You will get 2 wooden chests upon completion.
2. Go to Tomo and purchase the wooden chest or its blueprint.
The chest can be a great alternative to the backpack. Here’s how to purchase one:
1. Go to Tomo’s workshop. You can find his location on the map, as shown in the screenshot:

2. Purchase the basic wooden chest. It has 18 storing slots and costs 800 gold. Make sure you have at least 1 slot free for the chest in your backpack, else you won’t be able to purchase it.

3. Go back to your farm. When you are inside your cozy home, press B, drag and drop the wooden chest from your backpack to the action bar. Now, select the chest from the action bar and then left click on an empty space to place it.
How to Craft a Chest
You can also purchase the chest’s blueprint, which costs 2300 gold. One big advantage of this is that you can craft multiple chests with one blueprint. But if you are short of gold, then purchasing the wooden chest would be a wise decision.
After buying the chest blueprint from Tomo, drag and drop the blueprint from the backpack to the action bar. Click on the blueprint and then click on the empty space. A prompt will be displayed on the screen. Click yes to learn the blueprint.

Interact with the crafting station and click on the wooden chest icon in the workbench section. You will need 3 hardwood and 5 sap to craft a chest.

Use the axe to chop trees to get sap. Chop down large wood logs scattered all over the town to collect hardwood.
Save Often
Save at regular intervals, especially during crucial moments in the game. At the time of writing this guide, I found only one way to save my progress in Everholm – Going back to my farm and right-clicking my bed. Going to sleep also restores your energy and health bars.
Get the Fishing Rod ASAP
Like most cozy games, Everholm features fishing. You can also earn gold by selling fish at the market. Talk to Zac near the docks and get the basic wooden fishing rod. You can not only earn gold by selling them for profits but can also consume some of them to restore energy and health levels.
Fight Monsters to Obtain Souls
After going to bed (Read: saving the game) on day 6, Your character, Lilly will dream of a portal to the underground. When she wakes up next day, she will meet Fiona the witch at the doorstep. Fiona warns her about the future and the portal. She also gifts her a wooden club and 3 healing potions to fight her enemies. This triggers a new quest – Visit the portal to the underworld.

The Underworld Portal can be found near Fiona’s house, quite a distance from your farm. I have marked its location on the map in the screenshot below. Hint: Its a large spiral near Fiona’s house.

When you reach the location, right-click at the entrance to enter the portal.

Inside the portal entrance, move close to the holographic sigil and right-click to enter the underworld.

Your character should be equipped with the wooden club to battle monsters before entering the underworld. Press B and drag and drop the club from your backpack to the action bar. Click on the wooden club in the action bar to equip it.
Everholm’s combat features a classic hack-and-slash style that’s both engaging and enjoyable. Move closer to a monster and left click to attack. Be swift to move away from attacking mushrooms and their projectiles. Your health will decrease if you take damage from enemies.

Defeated monsters often drop souls and various items, with Amanitae being a particularly common find. You can place it in the action bar and consume it to restore health, but there’s a catch – Every time you consume Amanitae to regain some HP, you will lose equal amount of stamina. You can also find Amanitae scattered all around the underworld. Use healing potions sparingly.

Although not that common, but Boberry is also dropped by defeated monsters. When consumed, it gives +50 Energy and +5 damage but only for 35 seconds.

Souls are special currency that can be used to purchase potions and spells at Fiona’s house. Along with souls, you will also need special materials to purchase them.

Fiona’s witchcraft shop is open on Monday, Tuesday and Wednesday from 8 AM-7 PM. Visit the underworld at regular intervals to fight enemies and farm souls.

Press B to open your backpack. In the lower-left corner, you’ll see the total number of souls you’ve collected by fighting monsters at the underworld.