Her Trees – The Puzzle House: Full Walkthrough
Her Trees: The Puzzle House is a point-and-click puzzle game that lets you align objects to reveal letters. Once you find all the letters in a puzzle, click on the grid to move to the next puzzle. The game has a very ambiguous ending, but it’s a unique puzzle experience that will appeal to a lot of players. Here’s a complete walkthrough to help you finish all four stages:
Quick Access
In Her Trees: The Puzzle House, uncover a set of letters of the English Alphabet by solving puzzles.
Tutorial mode
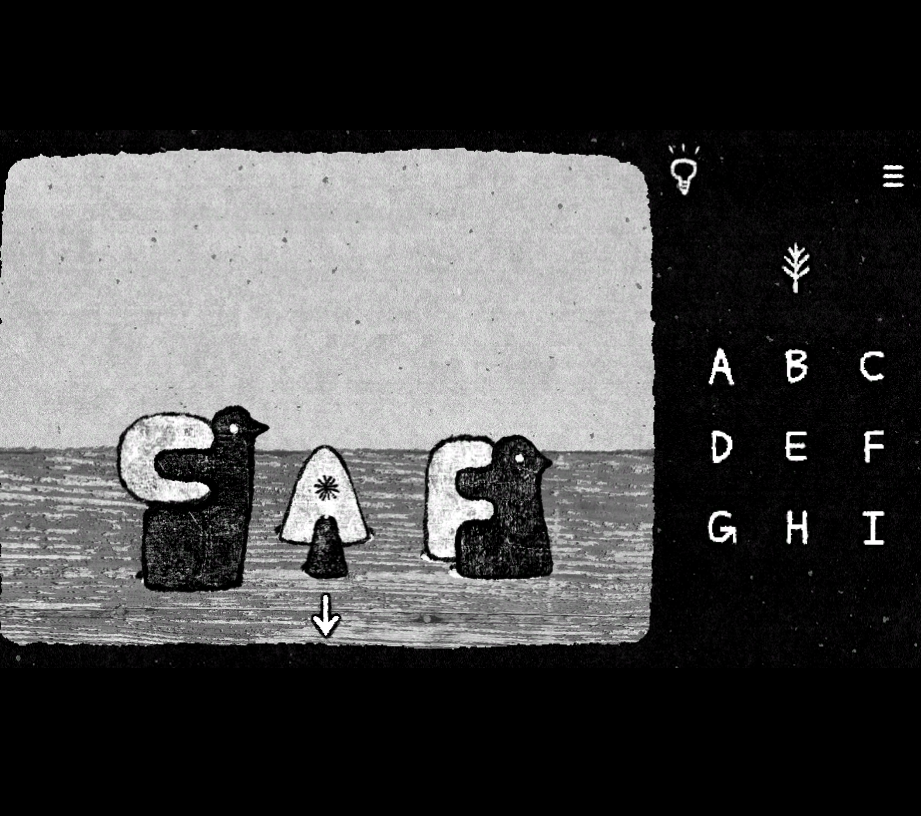
Click on the tiny door, then tap the box. Drag the leaf sitting on top of the box to reveal four letters underneath it: C, A, F, G. Click on the same letters in the same order on the A–I grid: C, A, F, G. Click on the tree symbol on the top of the grid to complete the puzzle.
The box opens, revealing two pieces of a toy house. Click on them. Join the two pieces of the toy house together to reveal three letters – F E C. Click on the same letters in the same order on the letter grid on the right.
Click on the downward-pointing arrow to exit the tutorial puzzle.
In this scene, you will see two arrows pointing left and right. Click on the right arrow to move to a new set of puzzles.
The Toy House
You will see a large toy house with several windows. Clicking on a window will either reveal a new puzzle or uncover an object.
Click on the first window to get a toy bird. It sits on top of the house. The next window reveals a sad figurine. It also sits on the top of the house.
Click on the third window. It is smaller than the first two, and you will find a button on it. Press it. The chimney on the house will begin to release smoke. Shortly after, it starts to rain, washing away the soot covering the rock placed on the right side of the house. Click on the same rock to start the first puzzle:
The Clockwork Key
Click and drag the wind-up (clockwork) key toward the rock. Place it over the rock so that it aligns correctly and reveals five digits, as shown in the screenshot below.
Noticed the pattern of the 5 digits on the rock? It matches the letter grid on the right. Click on the letters in the same order on the grid:
1 – I
2 – C
3 – G
4 – E
5 – A
Next, click on the tree symbol above the grid to complete the puzzle.
Open the fourth window in the first row, then click the object to place it on top of the toy house.
Toy House Set
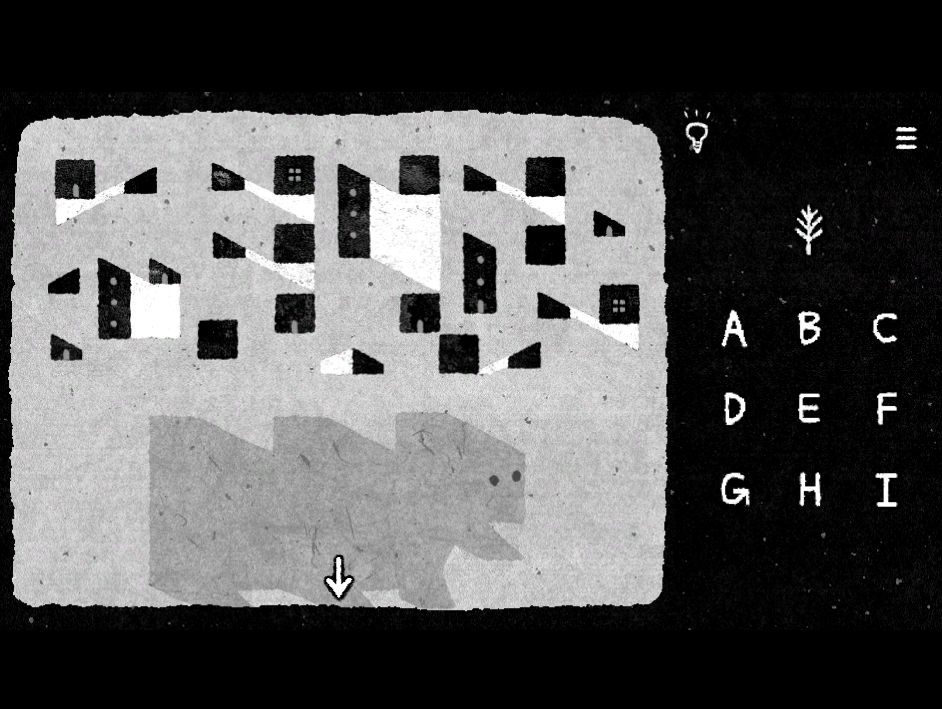
Open the fifth window to reveal another set of small toy houses inside. Click on them to get a new puzzle:

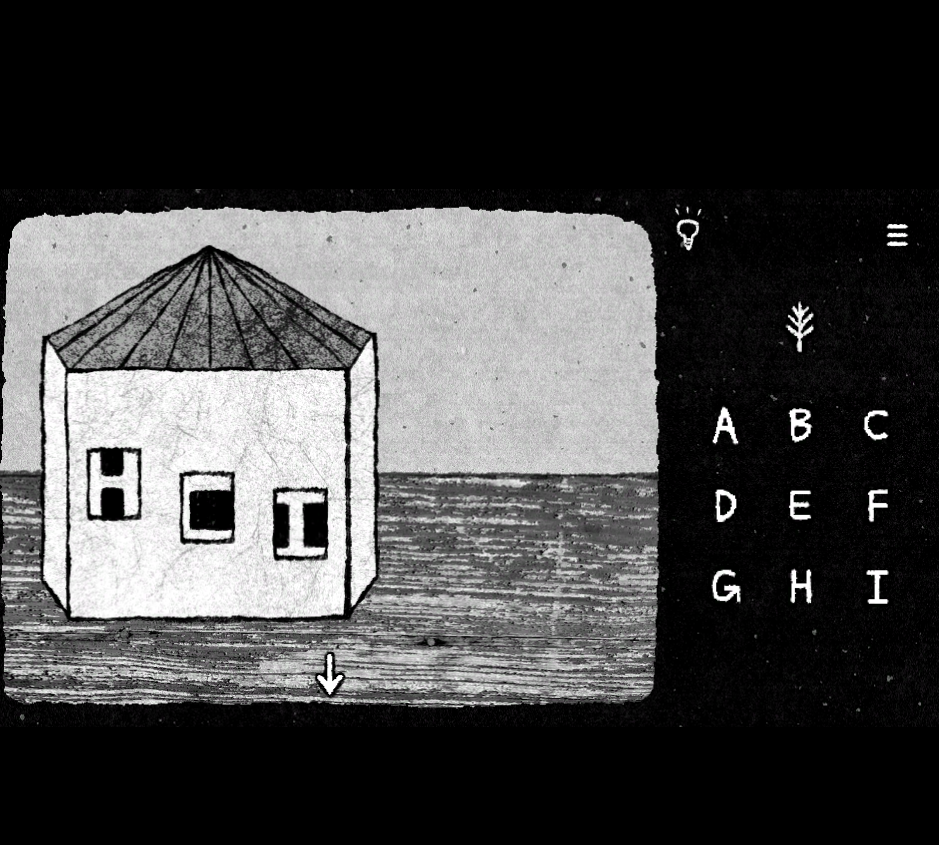
Remove the front of the house, then arrange the three towers inside in the correct order shown in the screenshot below:
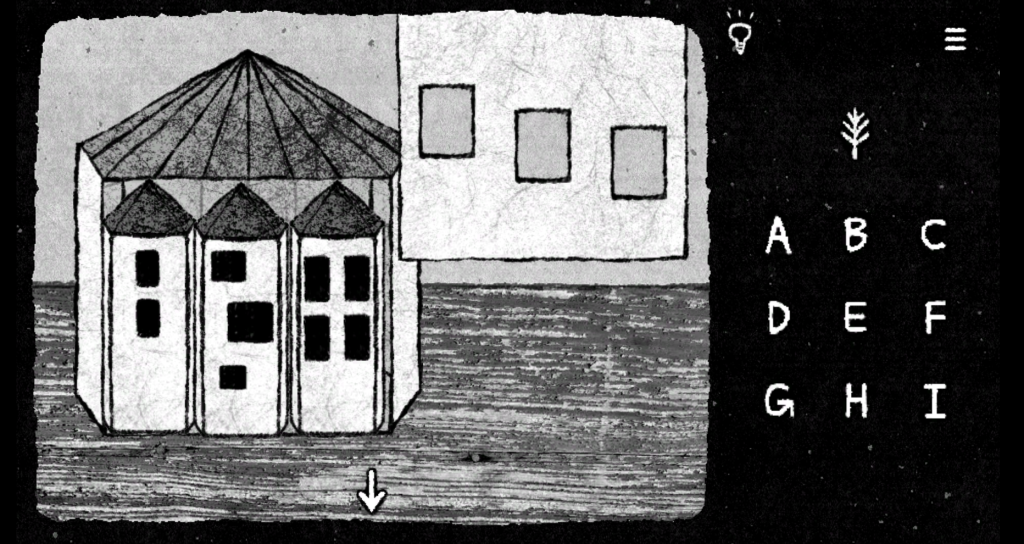
Put the front of the house back in its place to reveal three hidden letters – H C I. Select the same letters in the same order from the grid on the right. Click on the tree symbol to complete the puzzle.
Open the sixth window to reveal a second toy bird. Click on it to put it on top of the house.
Cat Painting
The seventh window has a nice little cat puzzle. Open it and click on the cat pic to start. Follow the steps to finish the puzzle:
First, arrange the jigsaw pieces to reveal the cat painting. See the screenshot below for the completed jigsaw puzzle:
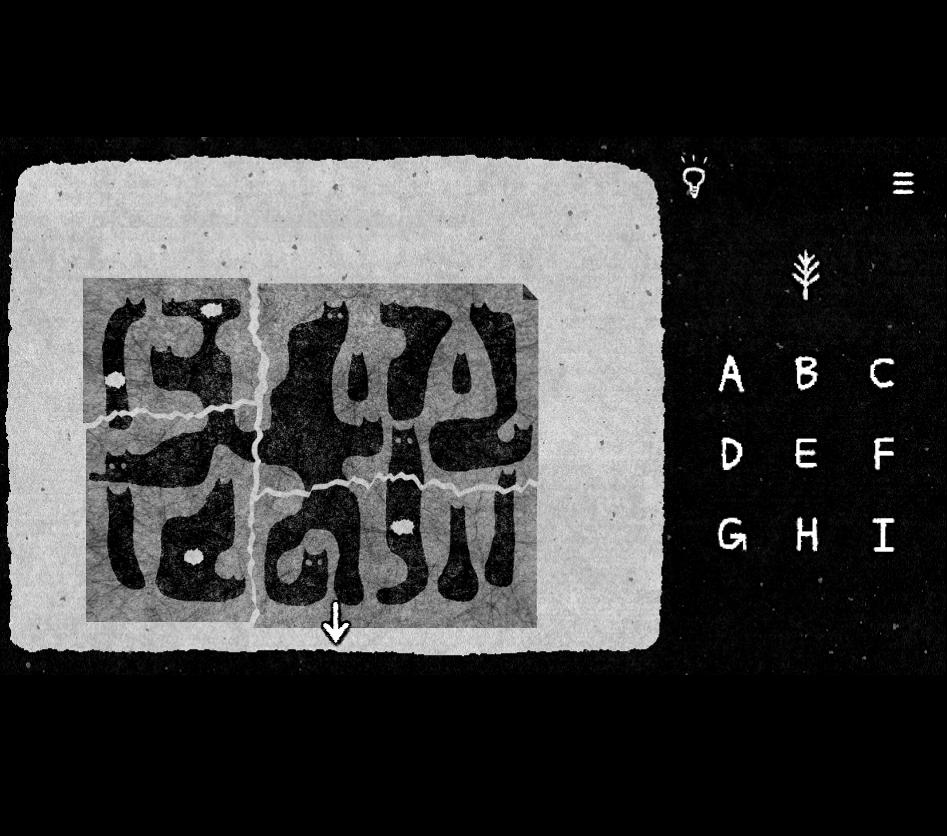
Notice the four holes on the cat jigsaw puzzle?
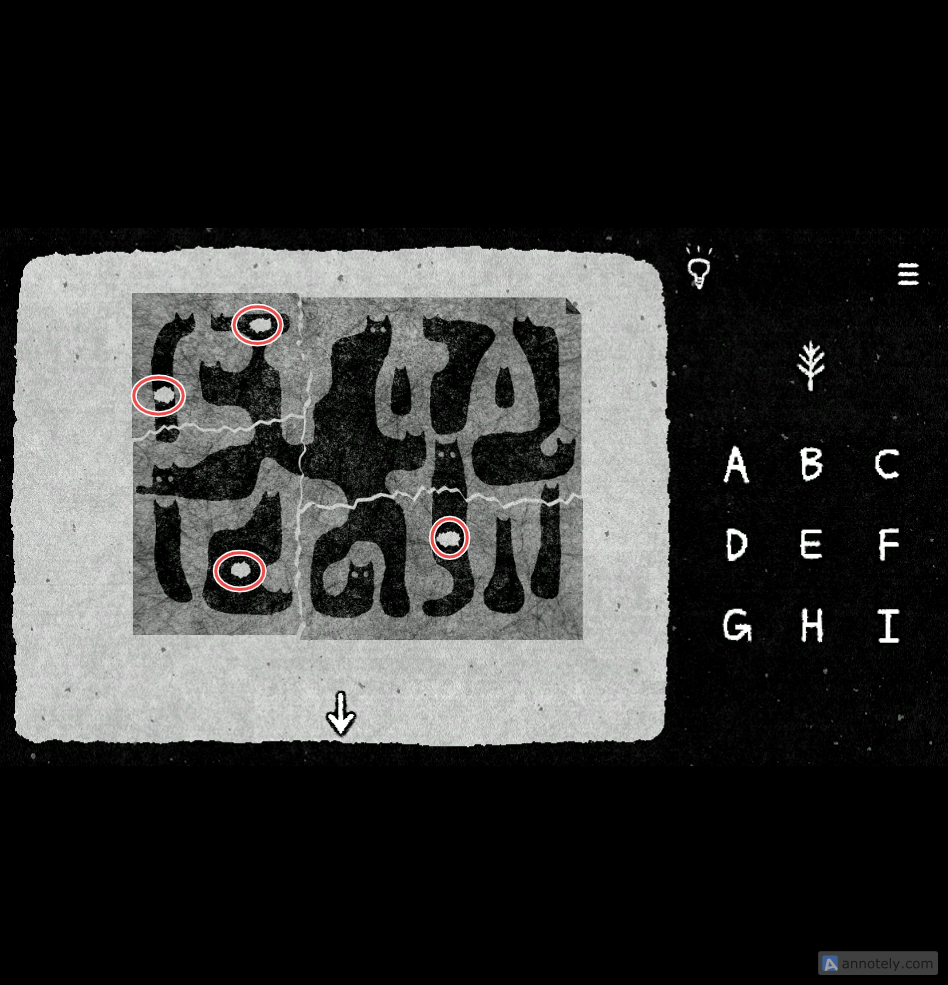
Now move the puzzle pieces so they overlap in a way that the holes align with the cats’ eyes. It then reveals three letters: F I A. Choose the same letters from the grid and exit by clicking on the tree symbol.
Open the eighth window in the bottom row. Click on the toy to place it on top of the toy house. (You’ll need these toys later to solve another puzzle.)
Then open the next window and press the button. The screen will shake, and a bird will stick its neck out of the chimney. Click on the bird to put it on top of the house.
Open the last window to let the cat flee the scene.
Group of Toys
Click on the toys on top of the window to solve the last puzzle in the toy house stage.
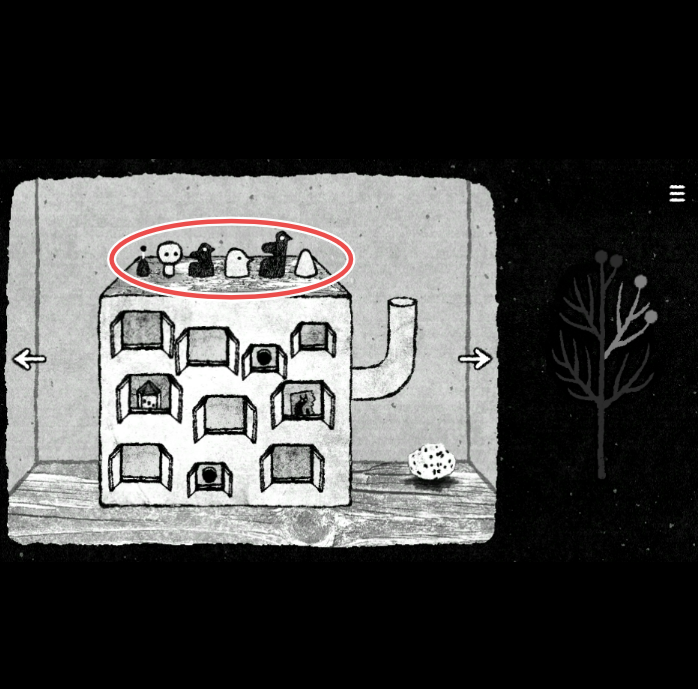
Place the six toys in the six slots in front of them so that they spell out three hidden letters. The black and white objects should overlap in such a way that they reveal three letters:
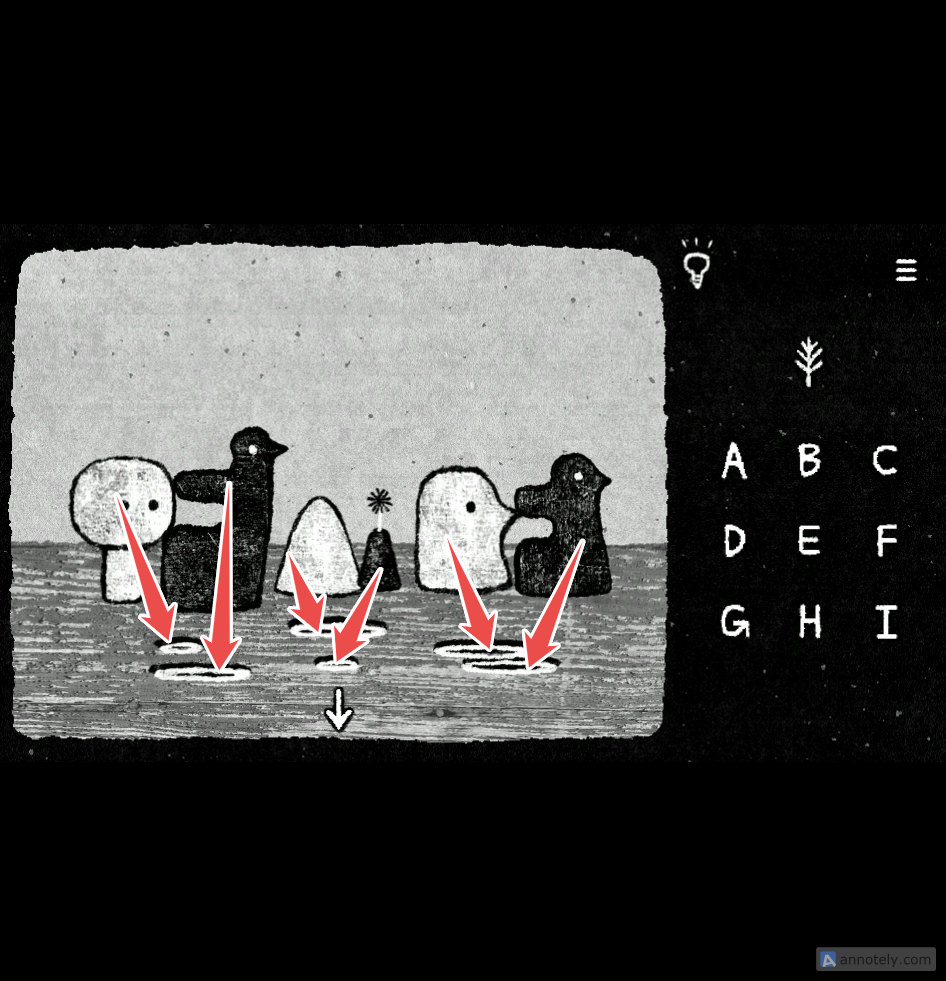
The letters are C A F.
The Cabinet of Oddities
There are six puzzles in this stage. Let’s try the first one:
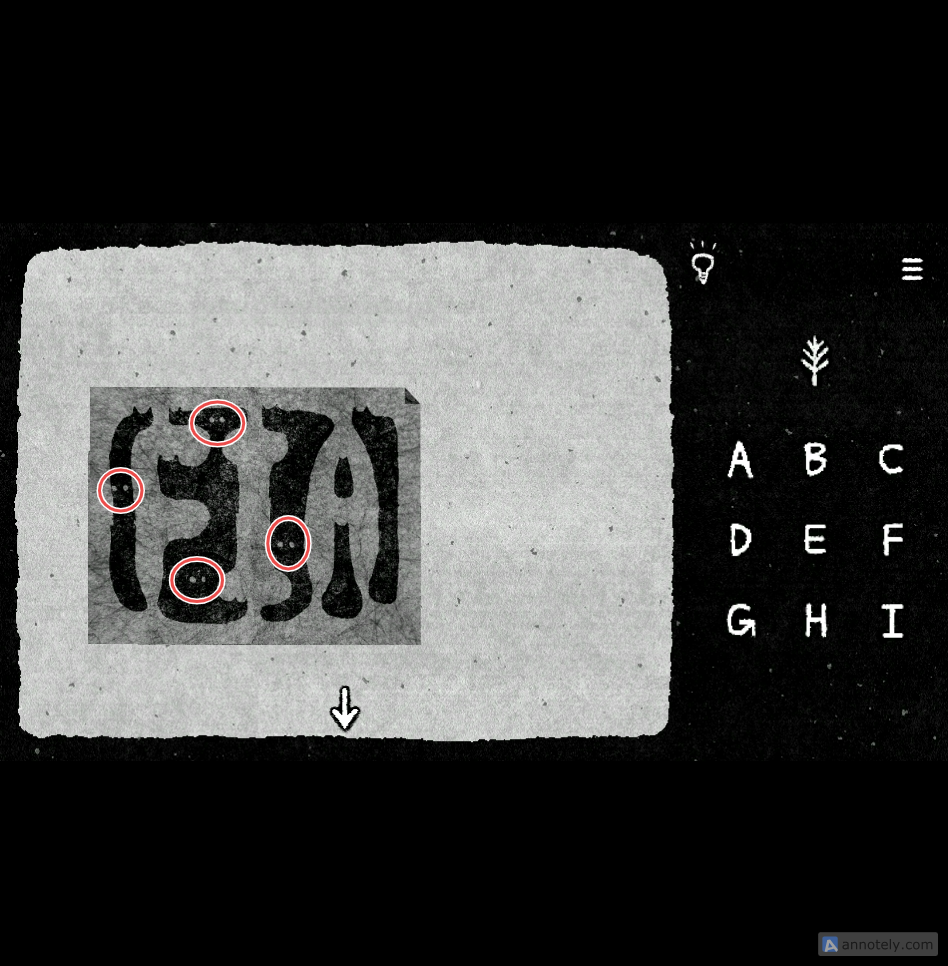
1. The Torn Poster on the Wall
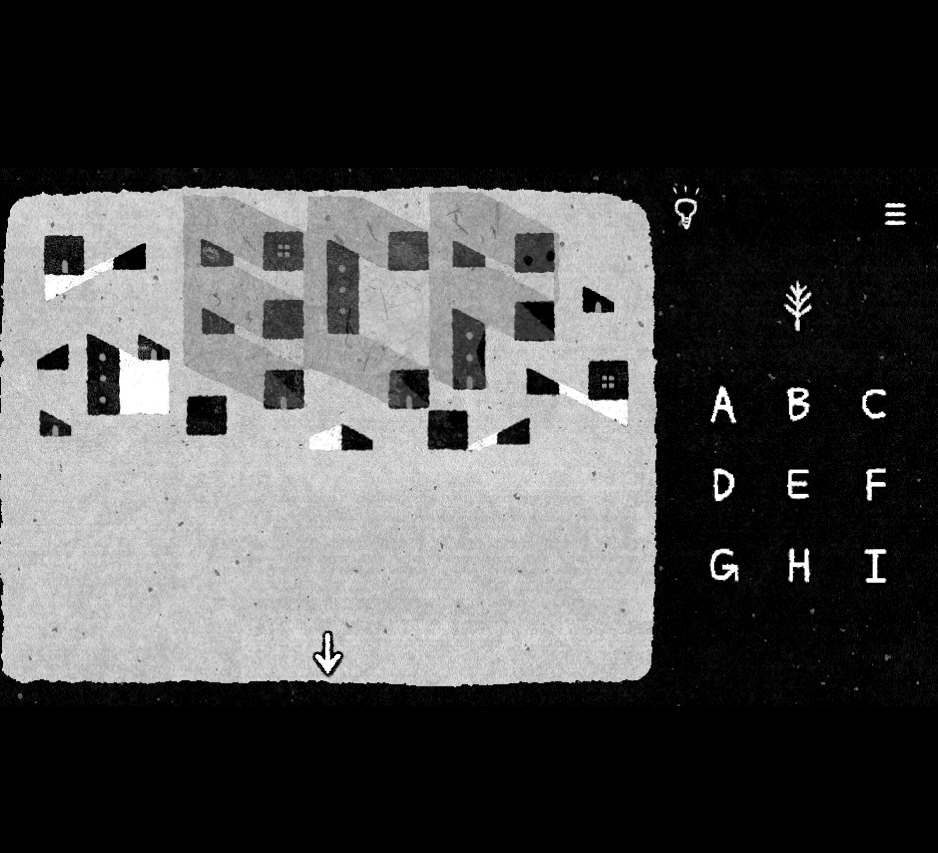
You will find a tracing paper/sticker at the bottom of the screen. Move it upwards and superimpose it on the torn poster in such a way that three hidden letters will be magically revealed.
Here’s the screenshot with the correct alignment. The correct answer is E C F.
2. The Potted Plant
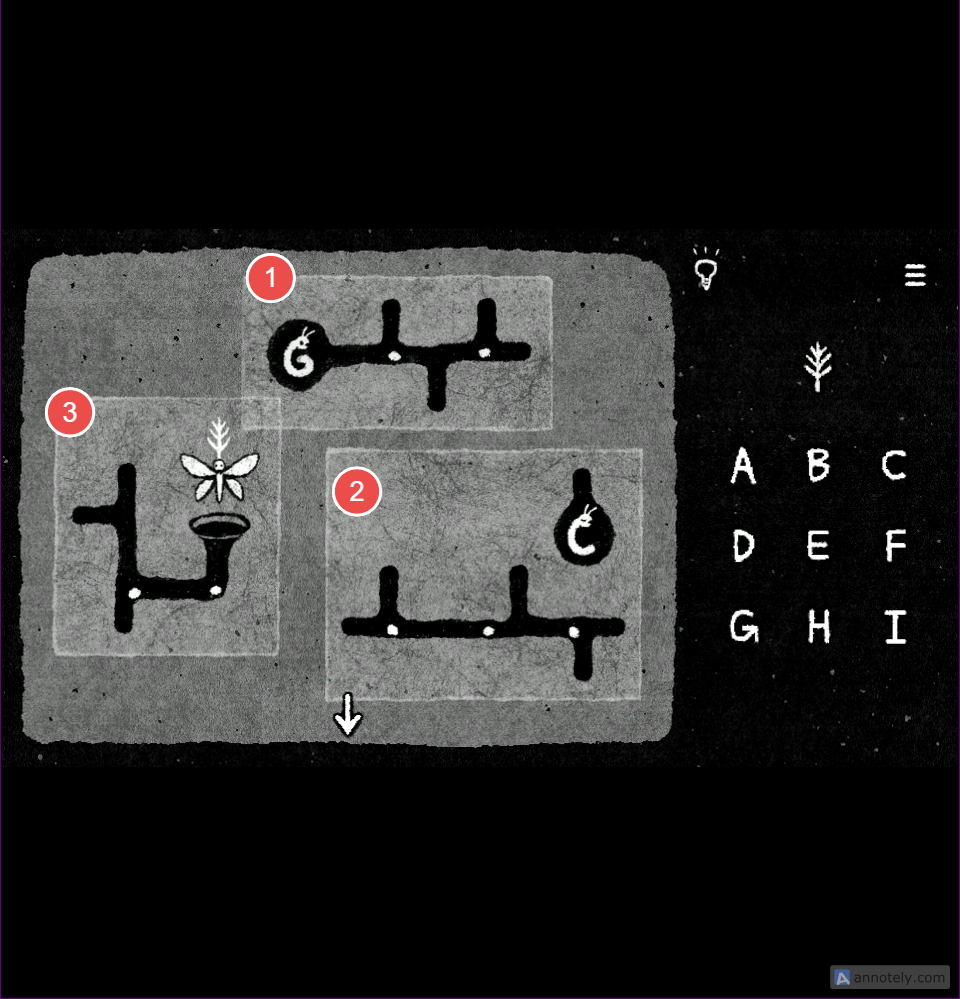
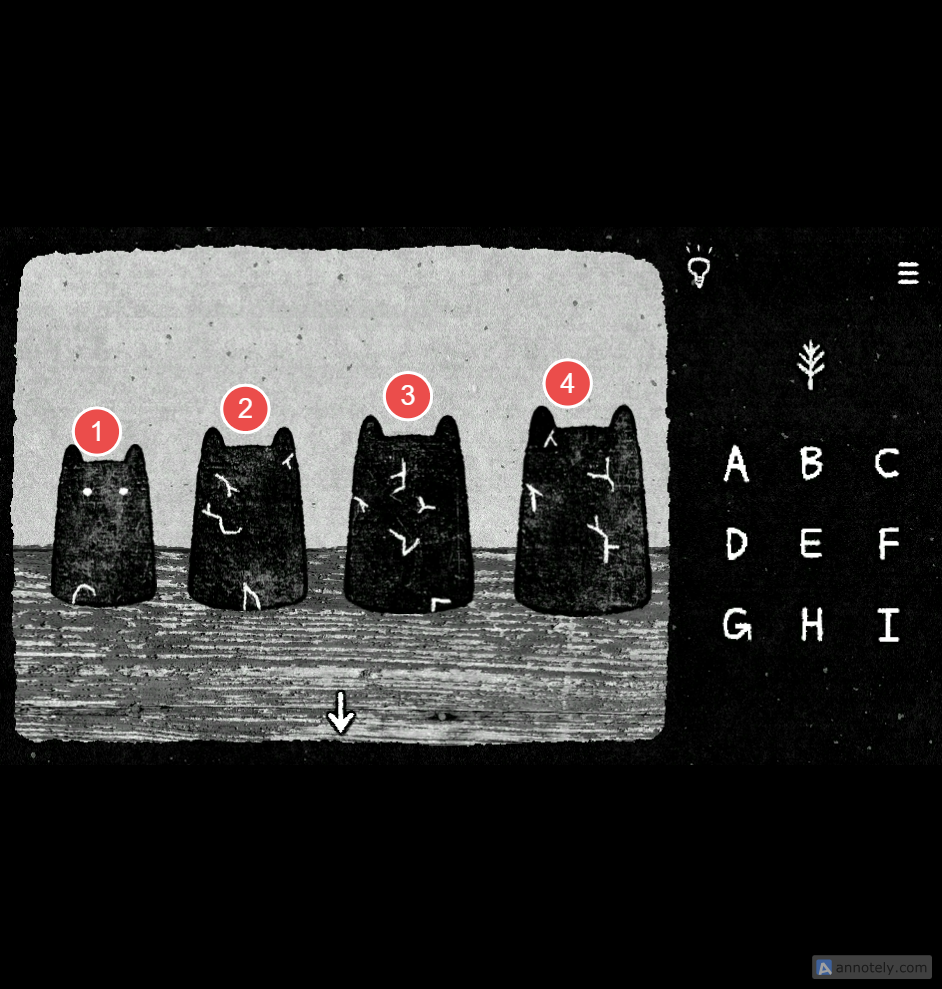
Click on the withering plant growing in a glass container. All twigs will fall on the cabinet. Click on the fallen twigs to start the puzzle:
I have numbered the four twigs from 1 to 4:
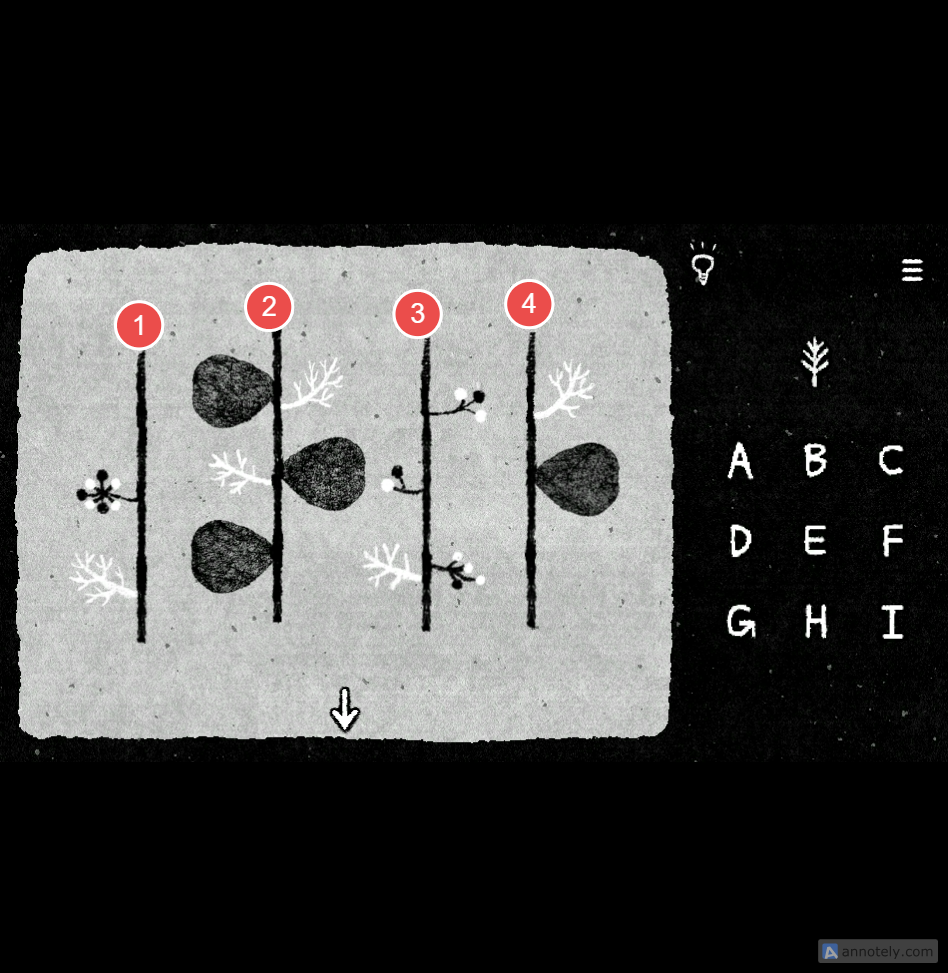
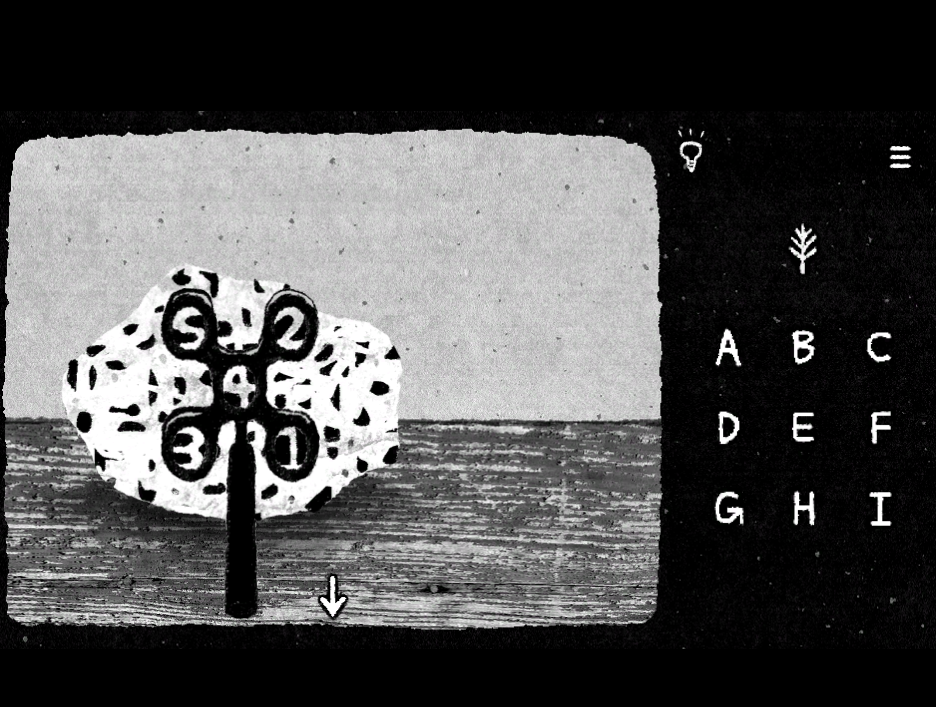
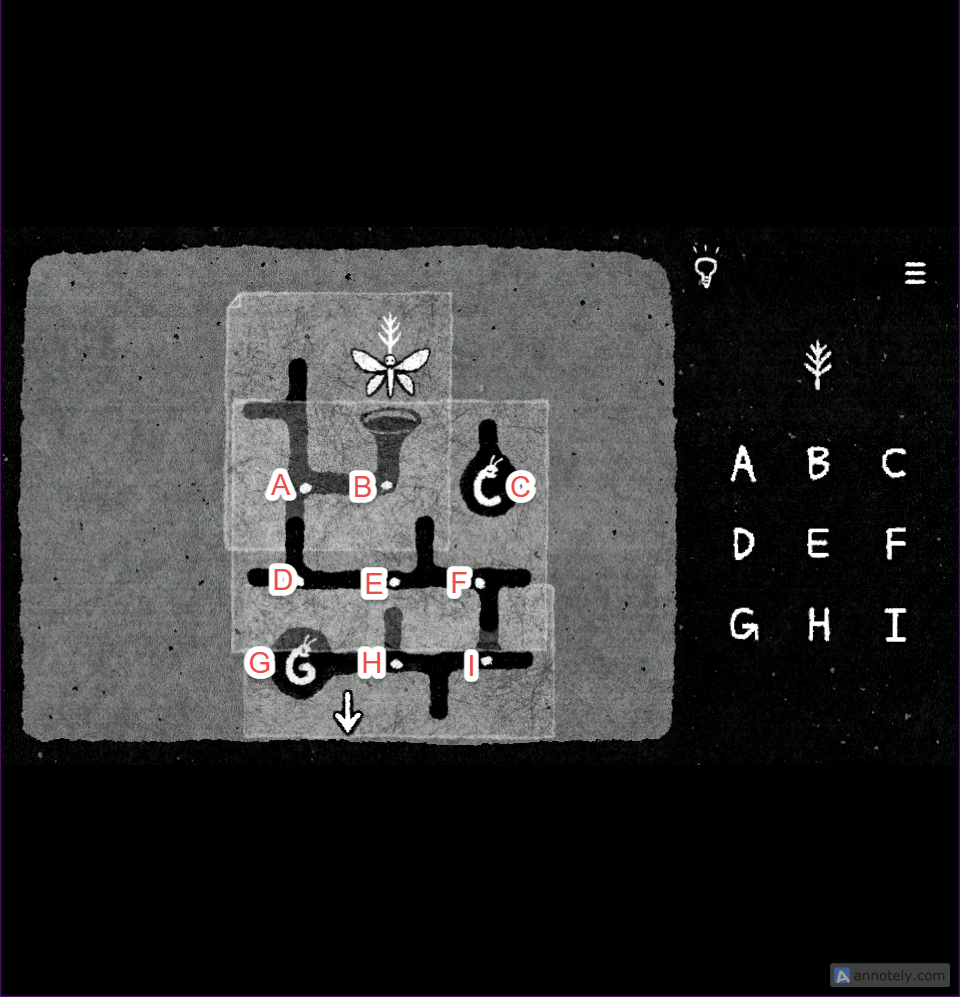
Arrange the twigs as shown in the screenshot below to reveal numbers marked by white dots on the four leaves:
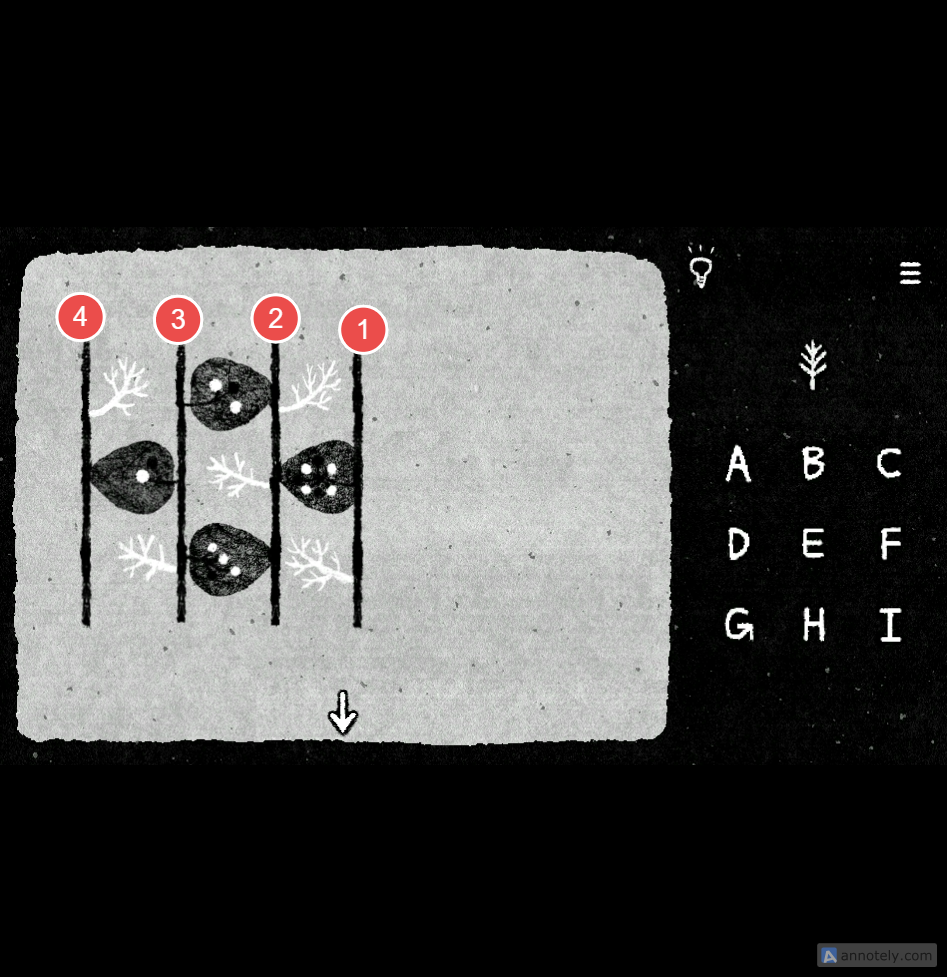
The leaves marked by white dots (numbers) are arranged in the same pattern as the letters on the grid. Click the corresponding letters in the same order as the numbers on the leaves.
1 – D
2 – B
3 – H
4 – F
3. The Four Glass Jars
There are four glass jars on the second shelf. Click the first jar to pour the water into the second, then click the second to move it into the third, and finally click the third to pour it into the fourth. Click on the fourth jar to start the puzzle:
The water in the fourth jar is split into four parts. You can drag and move all four and arrange them to discover new letters:
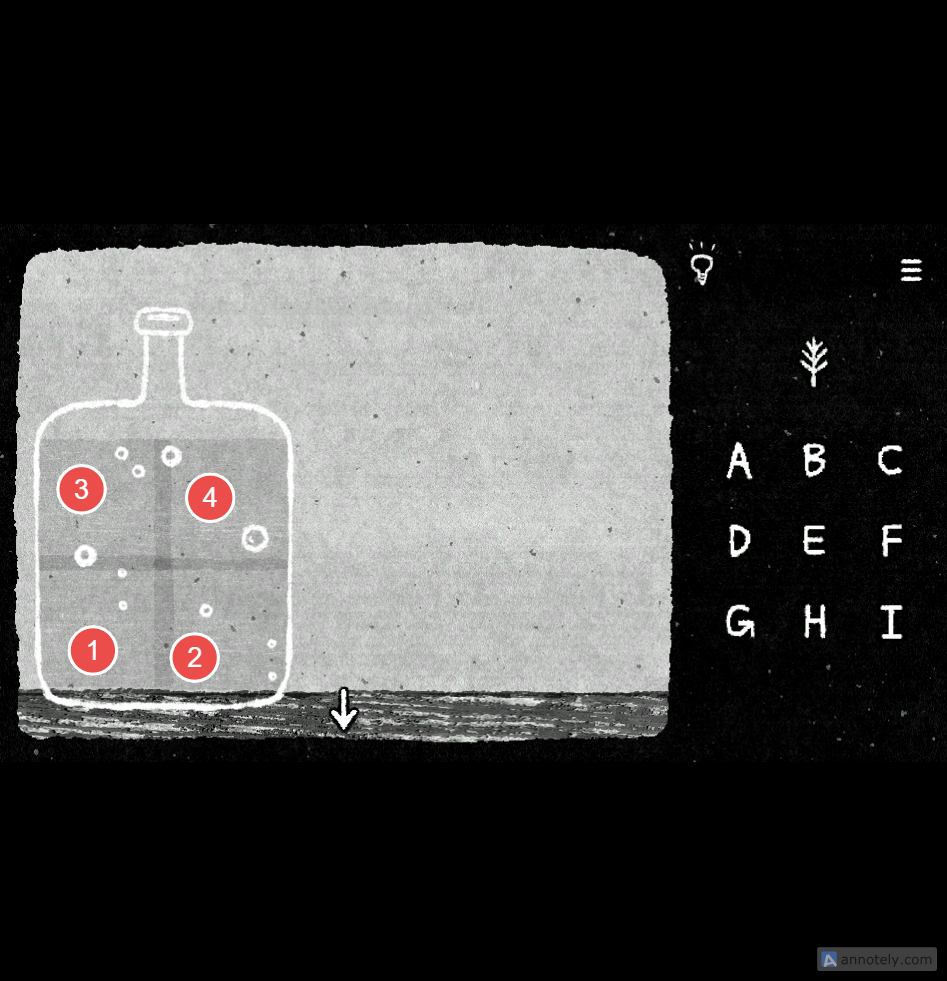
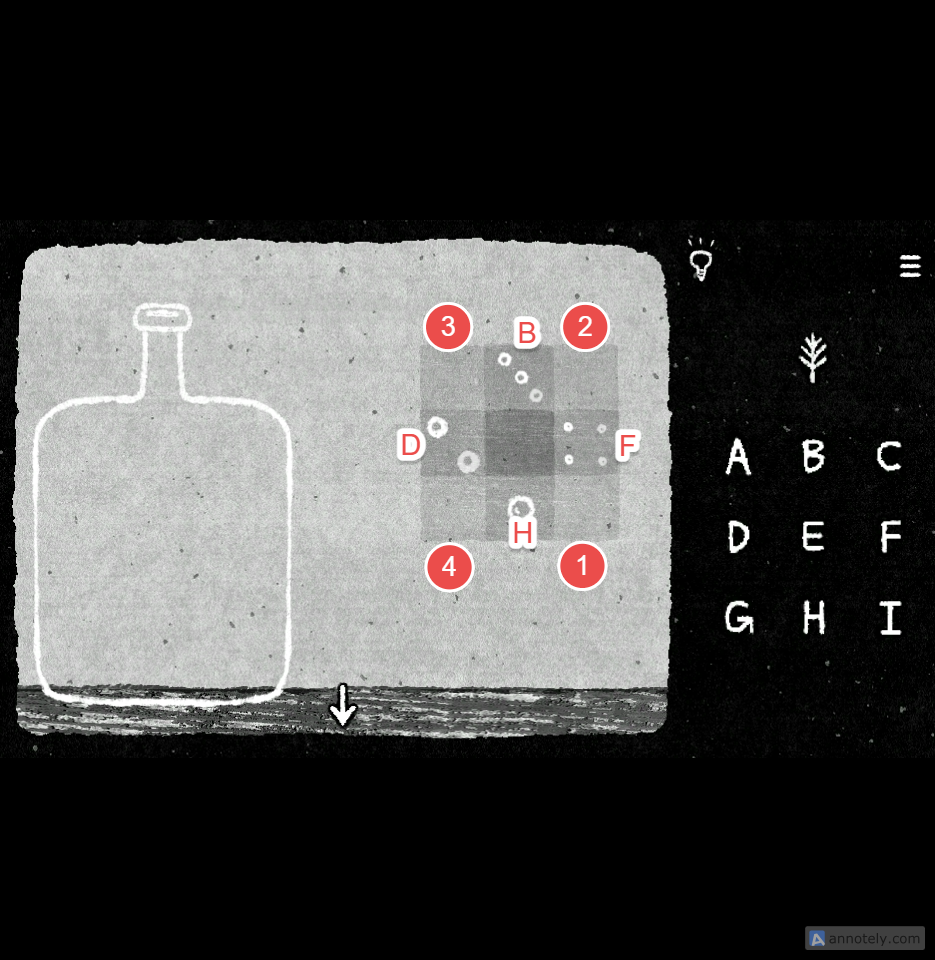
Move the four parts out of the jar to the space beside it and arrange them. The red numbers represent the four parts of the water in the jar. Slide each part over the others to align them, revealing four numbers marked by white dots, as shown in the screenshot below.
After arranging them, you can see a grid similar to the one on the right. Click on the corresponding letters in the same order as the white dots on the grid.
The correct solution is:
1 – H
2 – D
3 – B
4 – F
Cat Doll
There’s a cat doll on the third shelf that you can dismantle. Drag its four parts to reveal random scribbles inside:
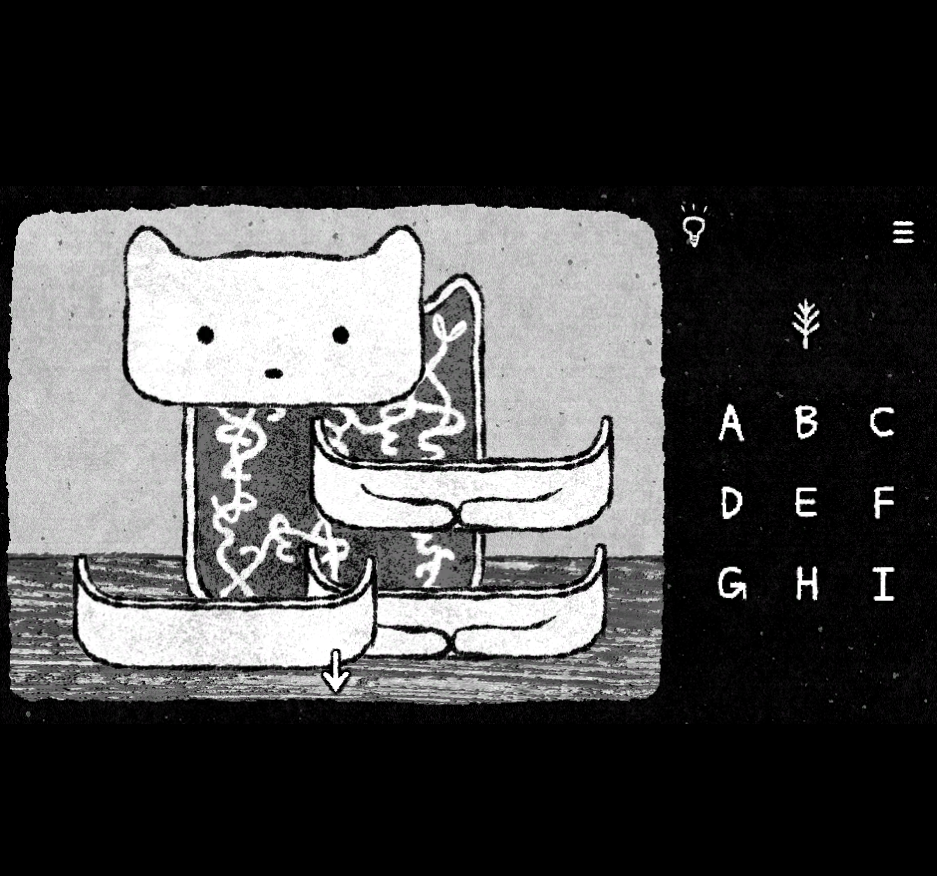
Arrange the four parts as shown in the screenshot below to reveal a grid that looks similar to the letter grid on the right:
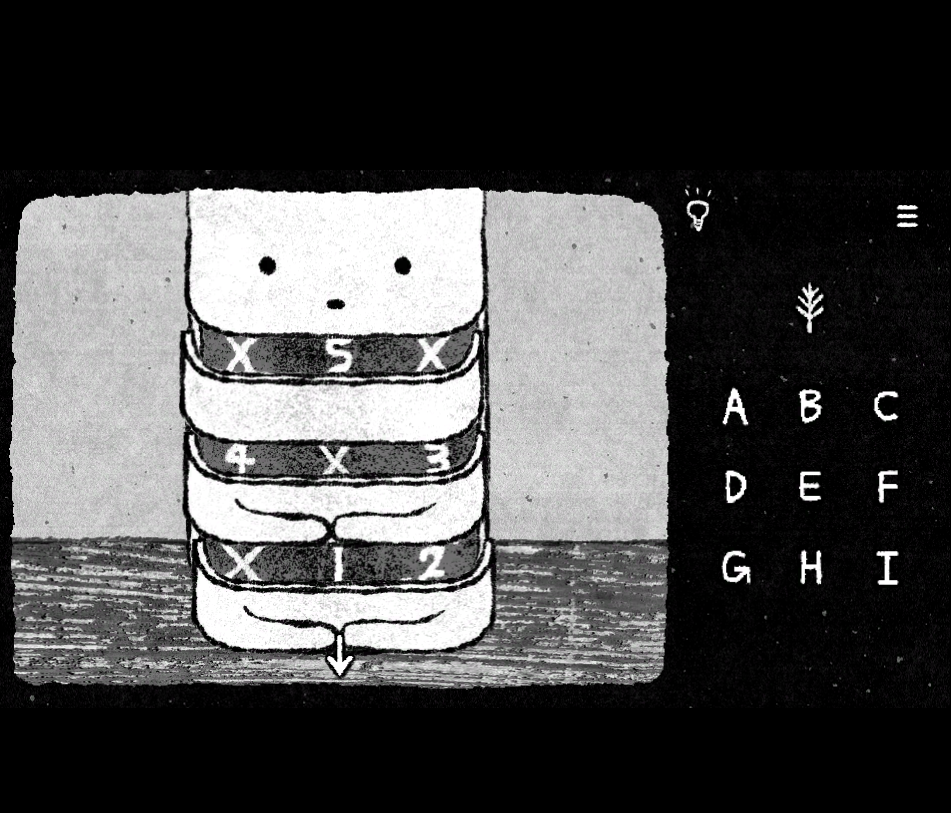
Noticed the random scribbles revealing numbers on the doll after rearranging the parts? Replace the numbers with the letters on the grid and click on the letters in ascending order. Ignore the “X”.
1 – H
2 – I
3 – F
4 – D
5 – B
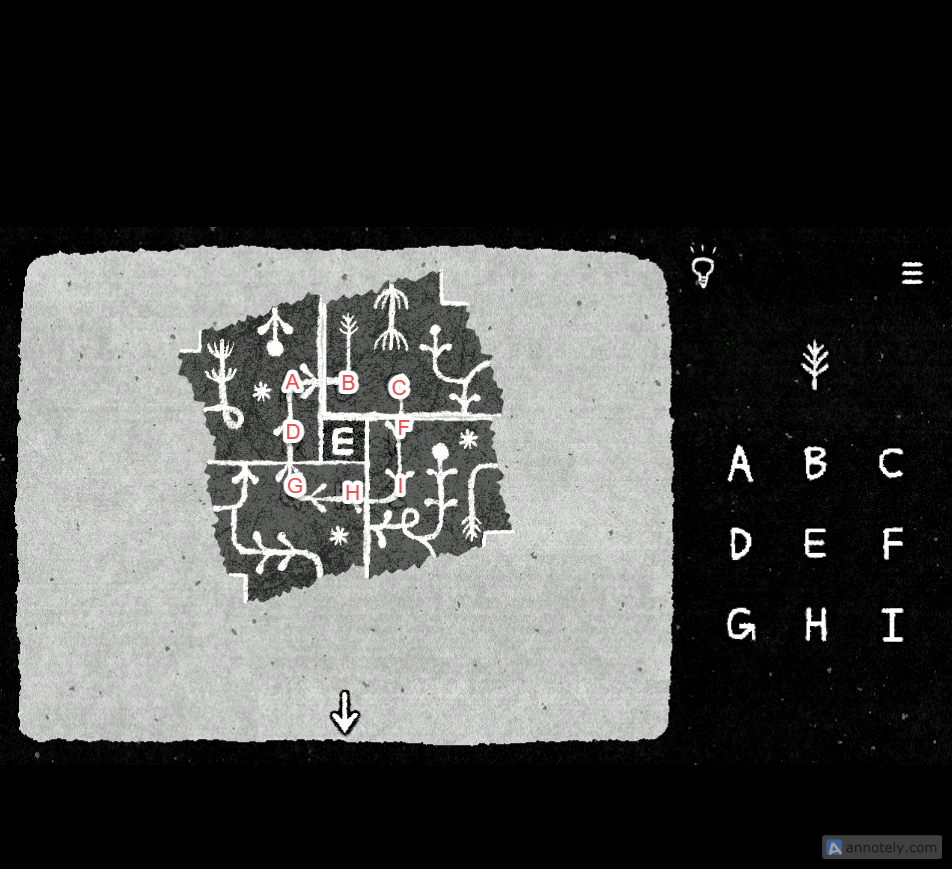
The Maze on the Card
There’s a card beside the doll on the same shelf. Click on it to start the maze puzzle:
The card has the letter E in the middle and features a strange design. If you move the pieces, you will see a grid of letters, just like the one on the right. Rearrange the pieces of the card to form a maze.
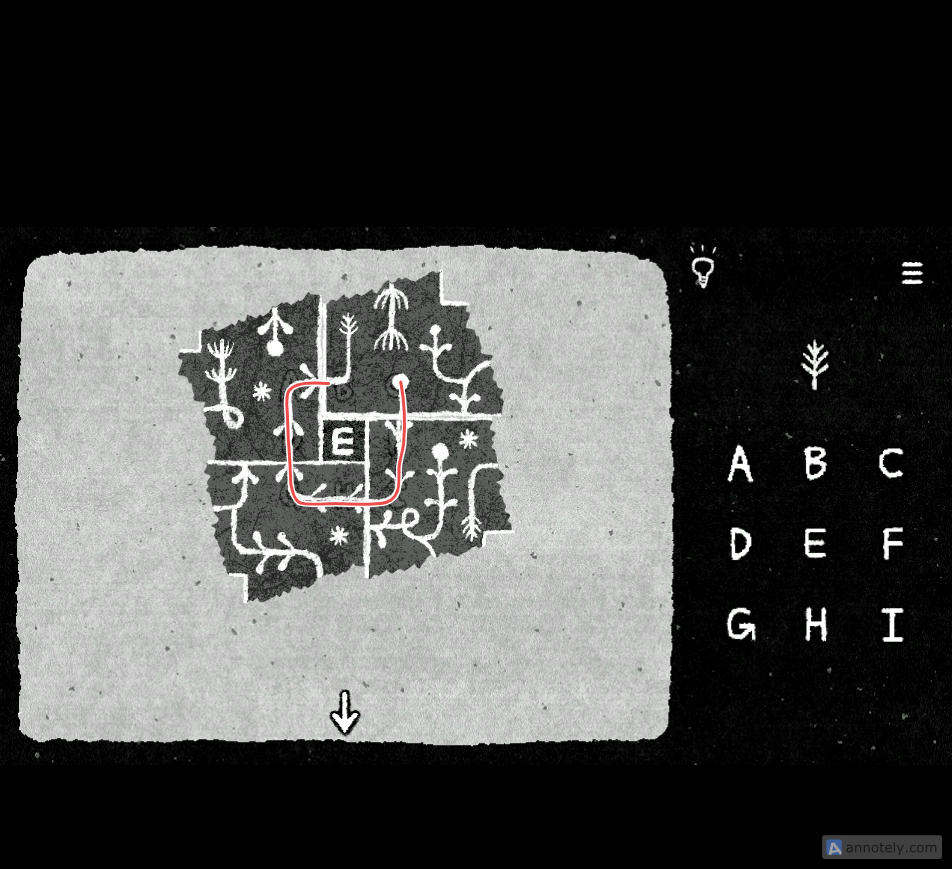
The maze’s starting point is the dot, and the end is the arrow. Trace the letters from the dot to the arrow, and you have the solution to the puzzle –
The Fishbowl
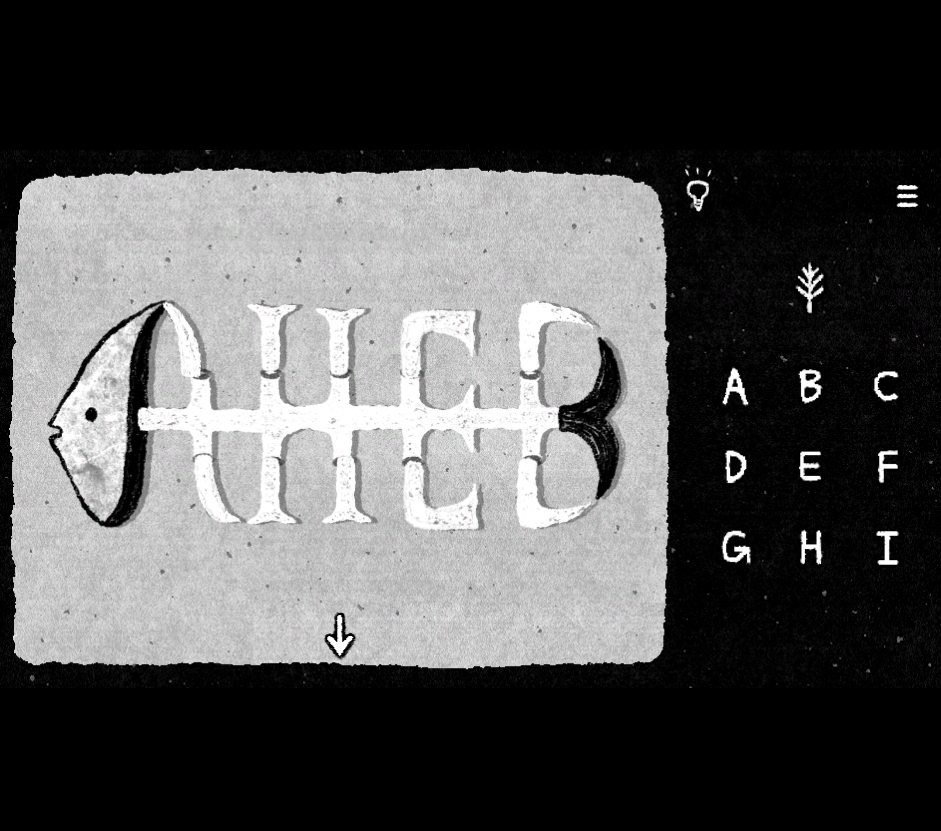
There’s a dead fish in the bowl. Click on the fish to begin your last puzzle in this stage.
Arrange the fish bones to reveal hidden letters:
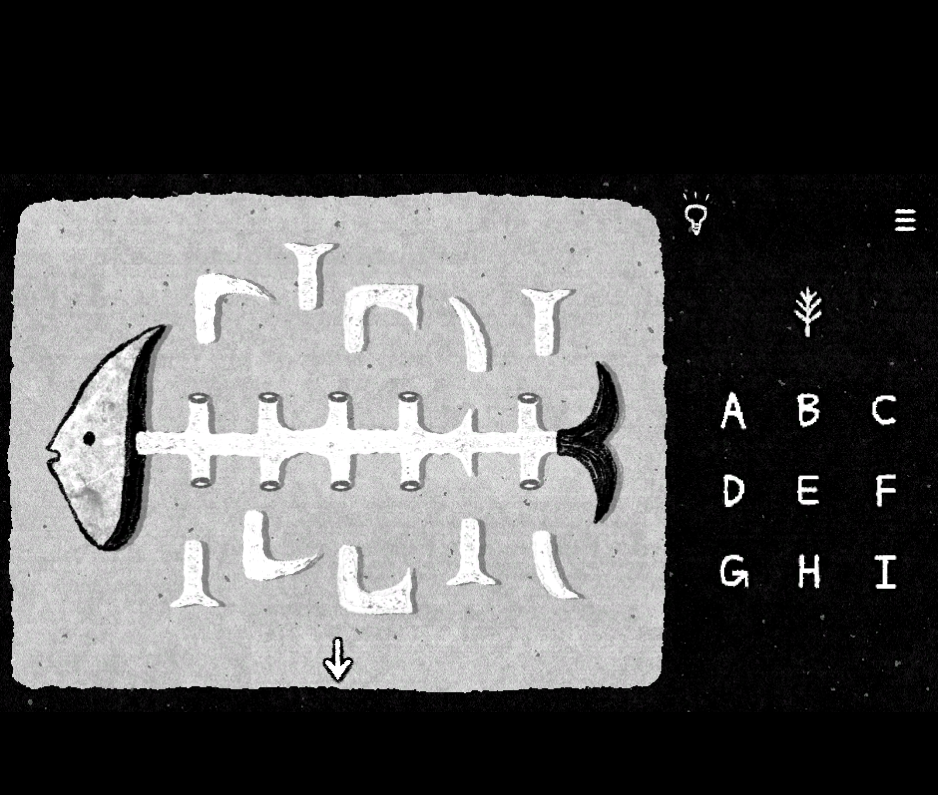
The hidden letters are A H E B
Mousehole
In the same room, you will find a mousehole on the right side of the cabinet. Click on it to enter a small world of puzzles. Now click on the mushroom to turn on the lights.
The Aquarium
Click on the aquarium. Drag the fish to the center so that its head aligns just above its replica on the water:
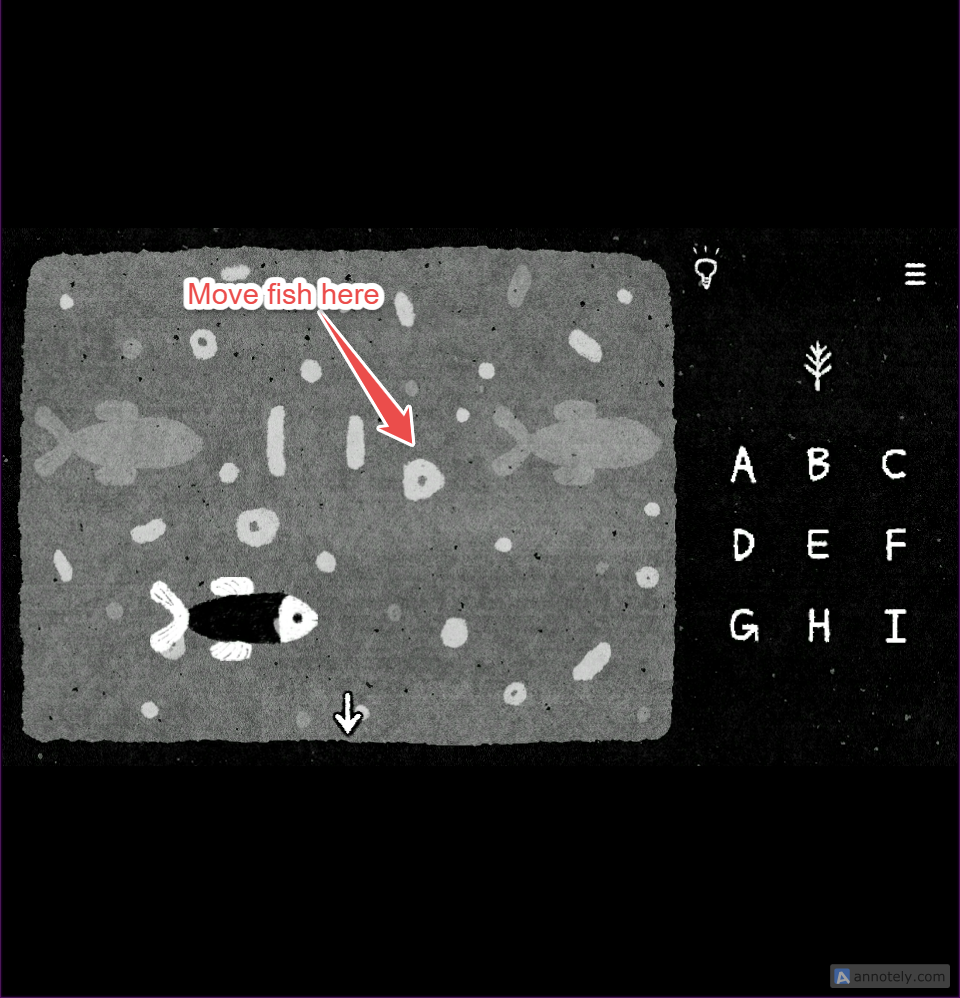
Once you move the fish just above the fish head replica, you will see three letters magically appearing on the aquarium – D I B
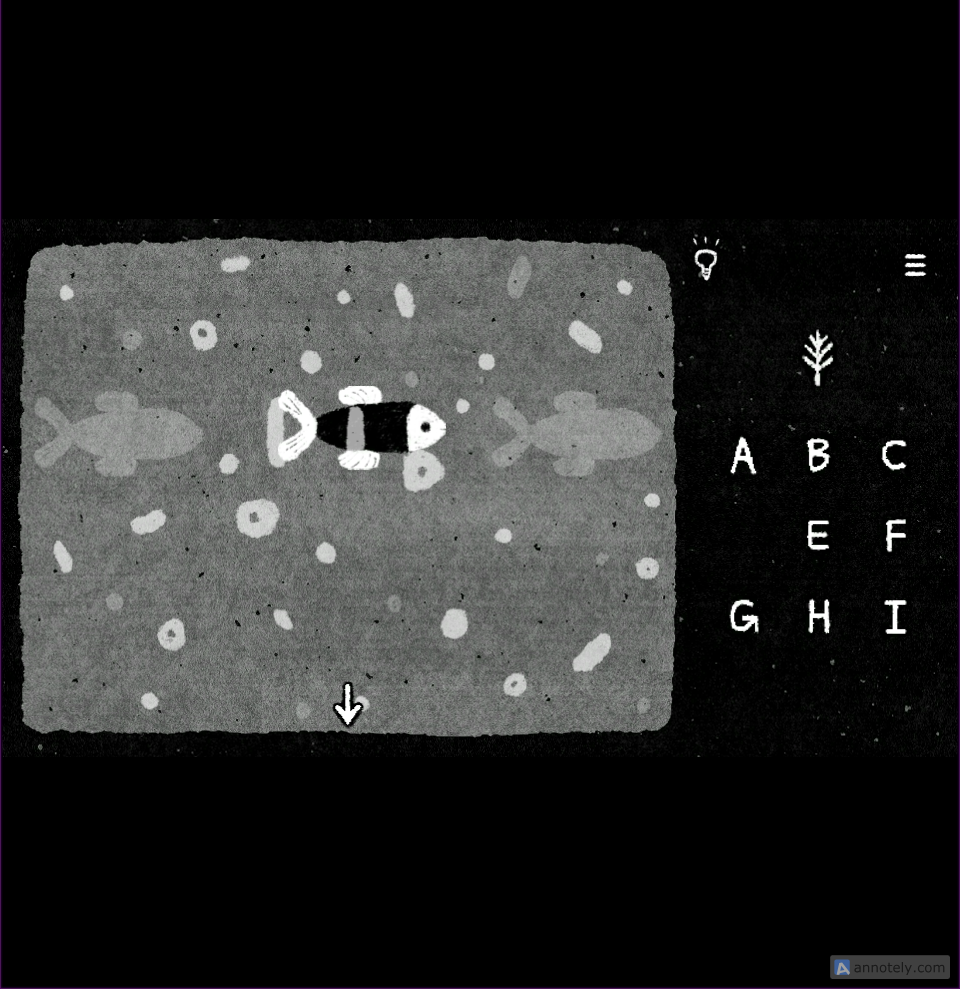
Choose the same letters on the right grid to complete the puzzle.
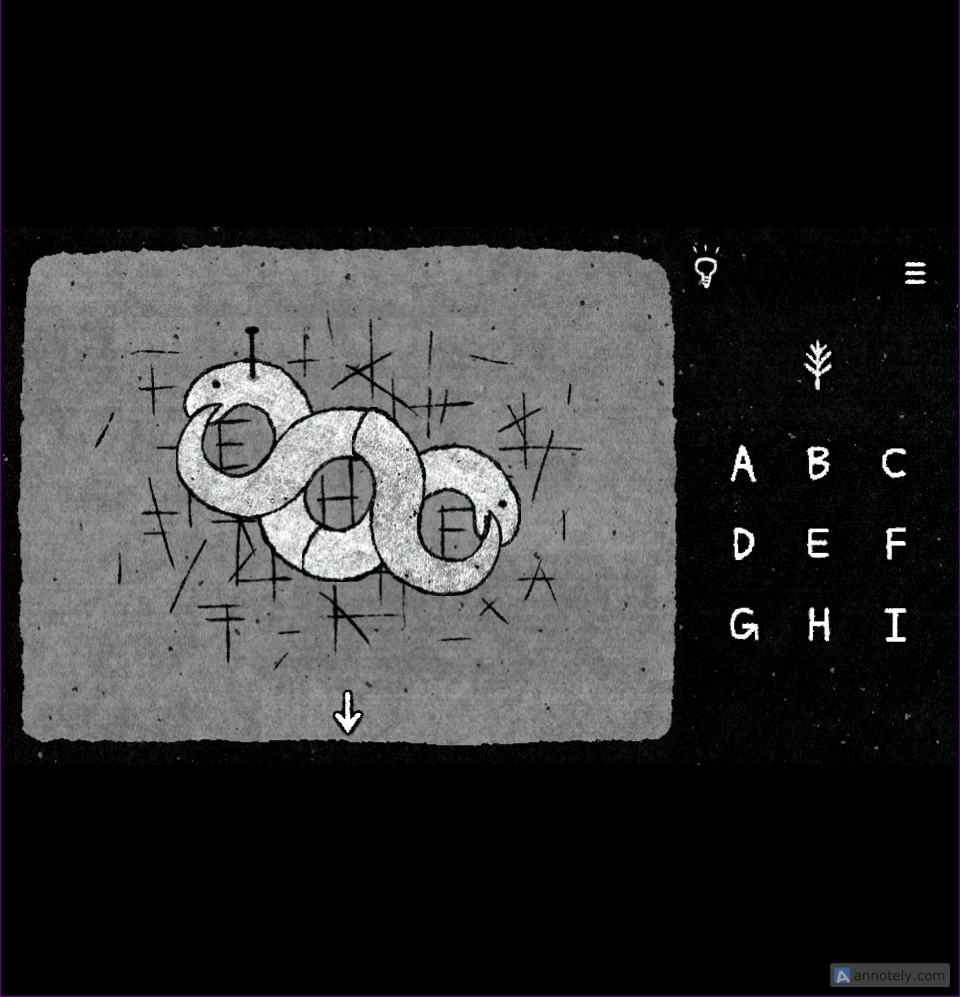
Snakes
Click on the pair of snakes near the aquarium. Align the two dissected snakes to reveal hidden letters. One of the snake’s heads is pinned in place and cannot be moved, but the others are movable.

Align the other three parts so that the snakes appear to be eating their own tails. Doing this will reveal three letters: E H F
Butterfly
This is a neat little puzzle that depicts the transformation of a caterpillar into a butterfly. Align the three images in the correct sequence to show the process and reveal a hidden grid:
This is the correct alignment of the images showing the butterfly transformation. Notice the white dots and the two caterpillars. The dots correspond to the letter grid on the right. The bottom caterpillar represents the letter G, and the top-right one represents C.
Starting from G, follow the sequence indicated by the dots:
G > H > I > F > E > D > A > B
Since C is isolated from the rest, ignore it and select the letters on the grid in the same sequence to complete the puzzle.
The Laboratory
The Leaf Puzzle
Click on the leaves of the first potted plant in the laboratory to pluck them. The leaves will be on the table. Click on them to start the puzzle:
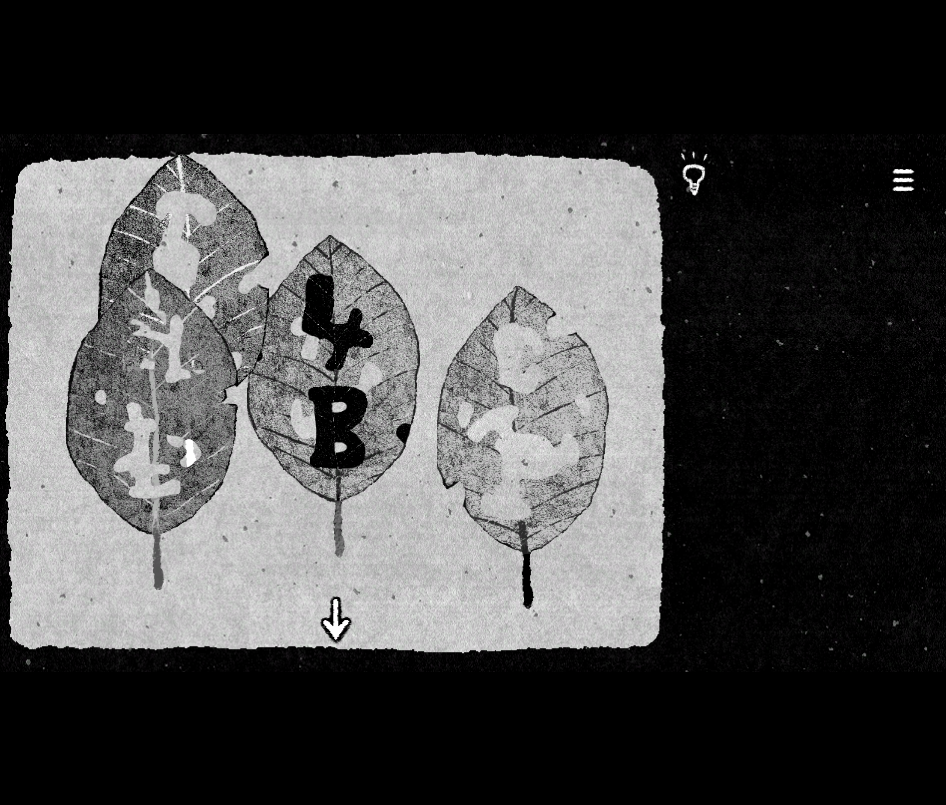
There are five leaves, each with a distinct pattern. Place the first, second, third, and fourth leaves on top of one another, using the black leaf as the base, to reveal a number and a letter on each. The screenshot below labels the leaves as 1, 2, 3, and 4. Stack them in this order, starting with the black leaf as the background, to unveil the hidden characters:
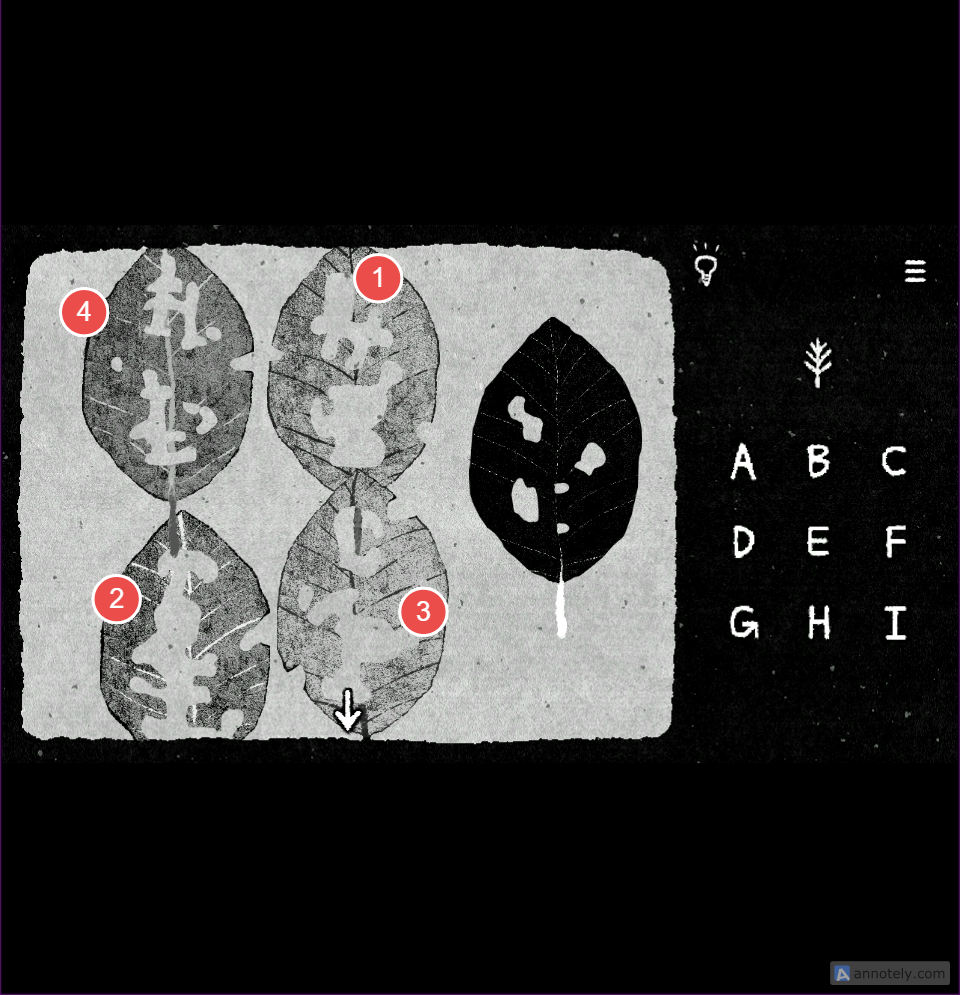
When you place Leaf 1 on top of the black leaf, it shows 4 B
Leaf 2 – 3 E
Leaf 3 – 2 F
Leaf 4 – 1 I
Now, if you arrange it in ascending order: 1 I, 2 F, 3 E, and 4 B
The solution is: I F E B
The Tripod
Click on the second potted plant to drop all the seeds into the tripod on the table. Then click the tripod to extract the juice from the seeds. The juice will drip into the cup below. Click on the cup to begin the next puzzle:
Dismantle the cup by moving its front part aside. Then, remove all solidified juice pieces from the cup and move them to the top. These are jigsaw pieces that need to be aligned properly to find letters.
I have numbered the jigsaw pieces from 1 to 5, as shown in the screenshot below. The next thing I would do is align the circles in each piece to find
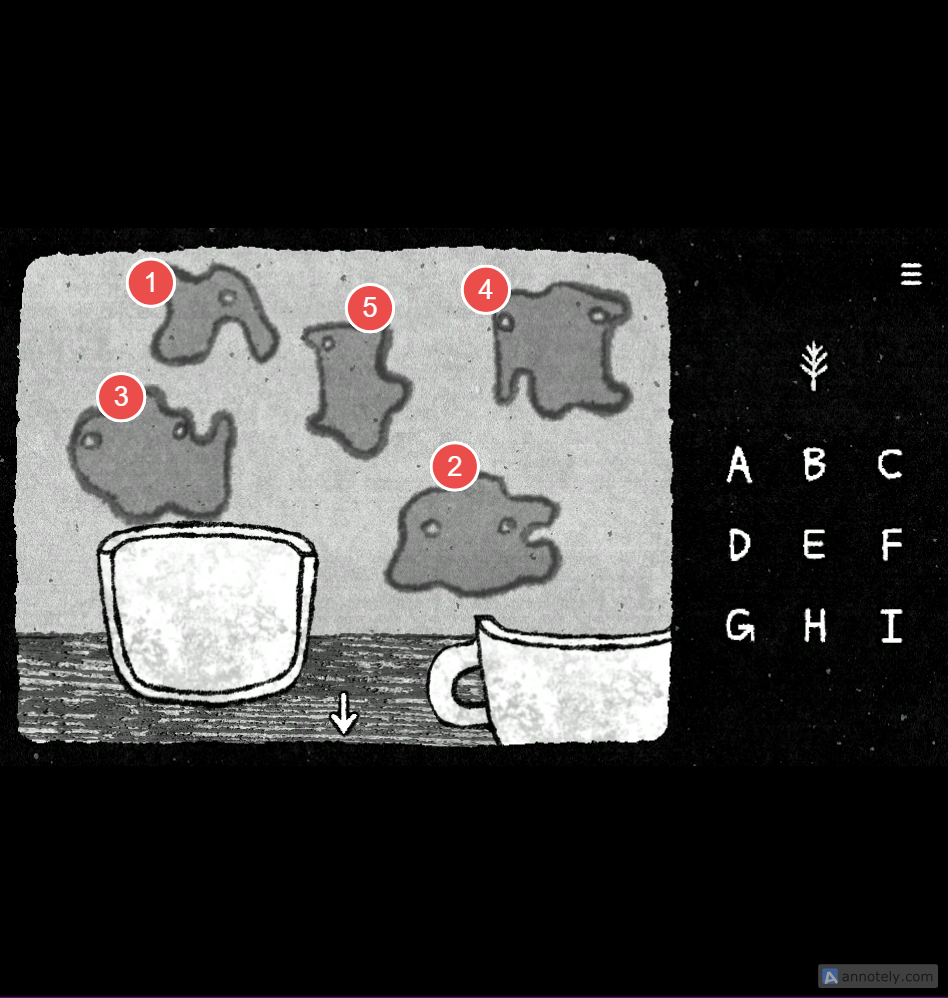
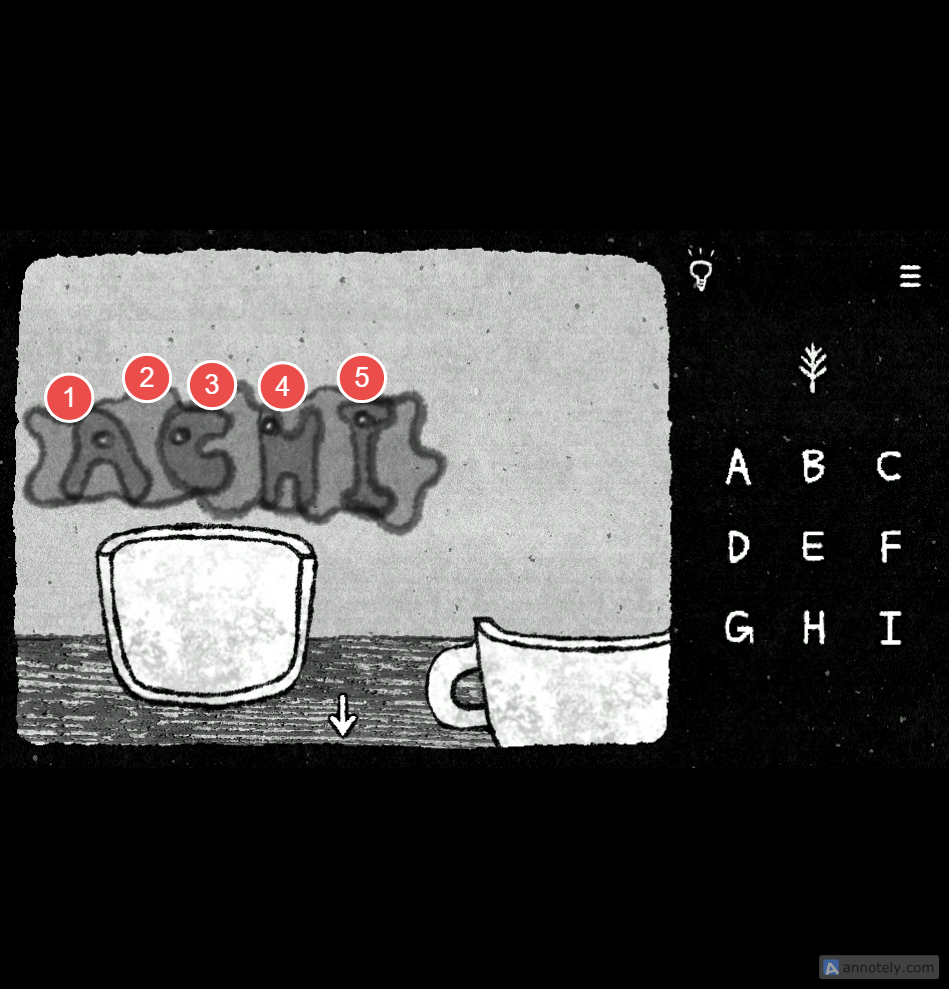
The letters are A C H I. Move the pieces and join the white circles by aligning one piece on top of the other to find the letters:
Leaf Puzzle 2
Click on the leaves of the second potted plant to drop them on the table. Click on the leaves to begin the puzzle:
Place the torn leaf below its missing piece, which is taped above 6, 2, 1.
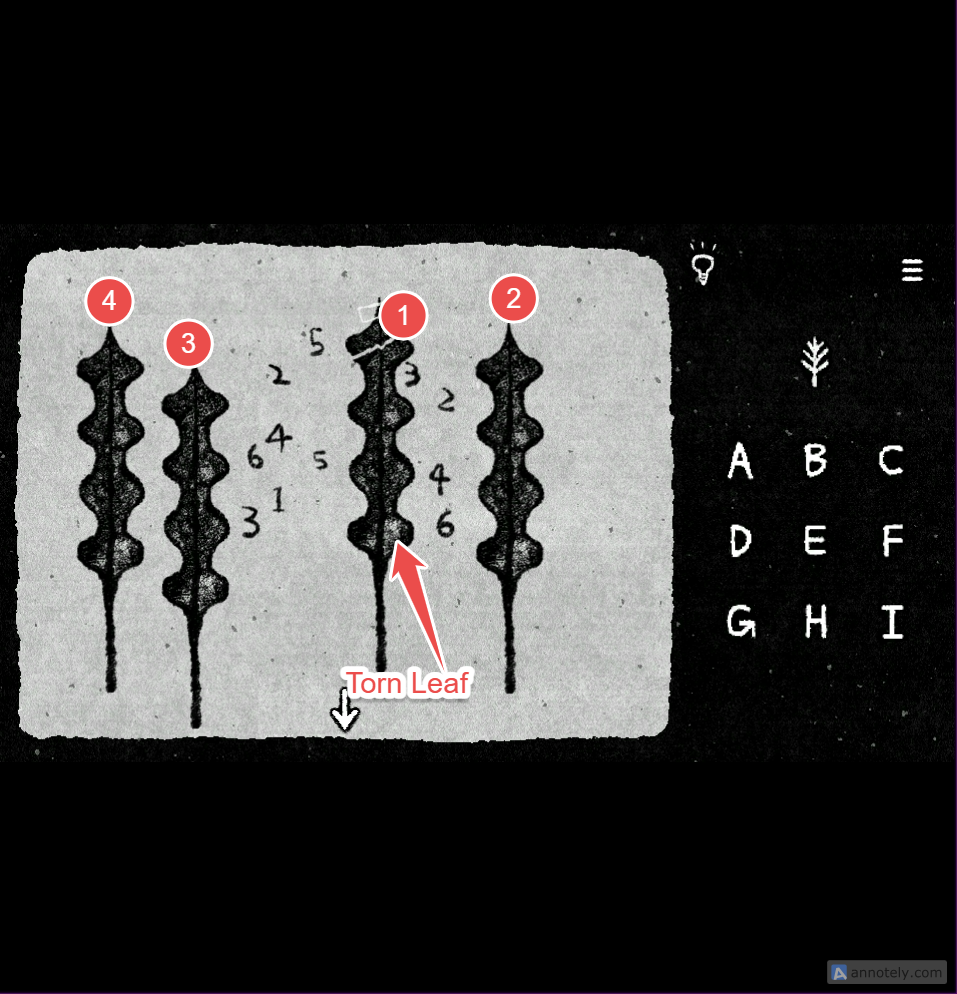
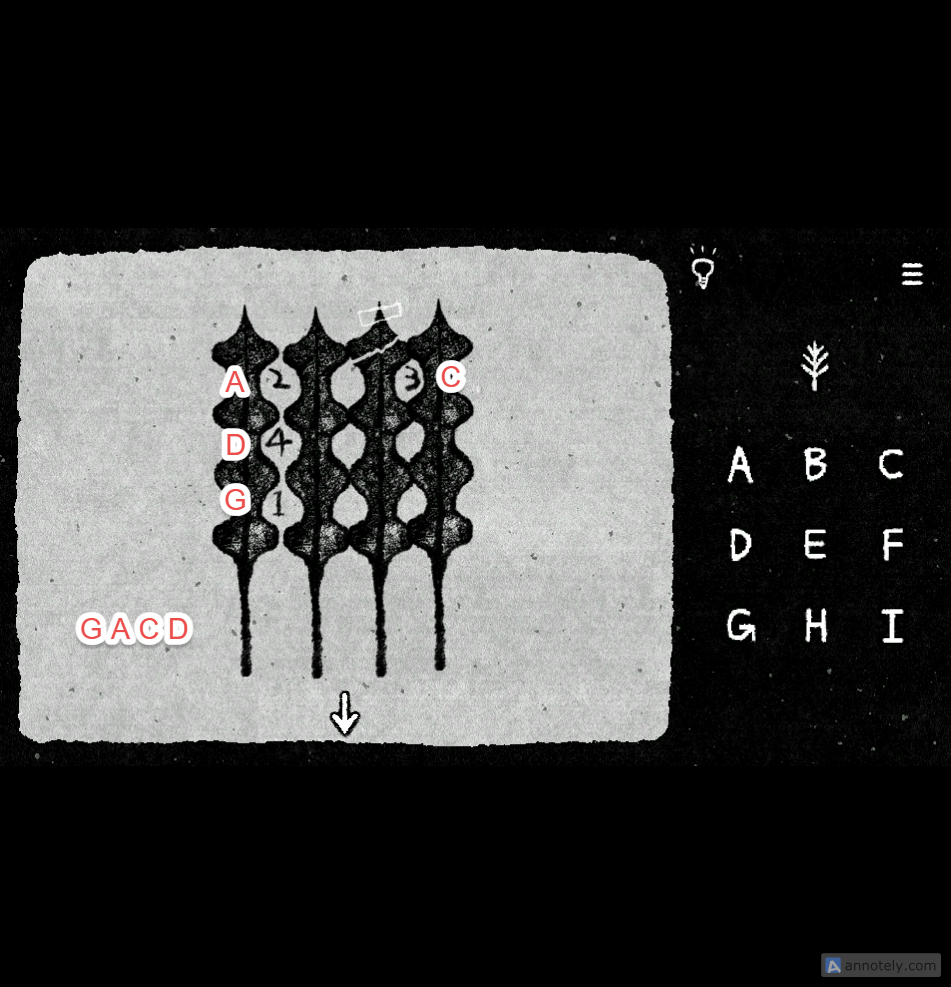
Now place all three leaves side by side, with the torn leaf in the center, as shown, to form a grid-like structure. Note down the numbers and select the corresponding letters from the grid on the right in the correct order:
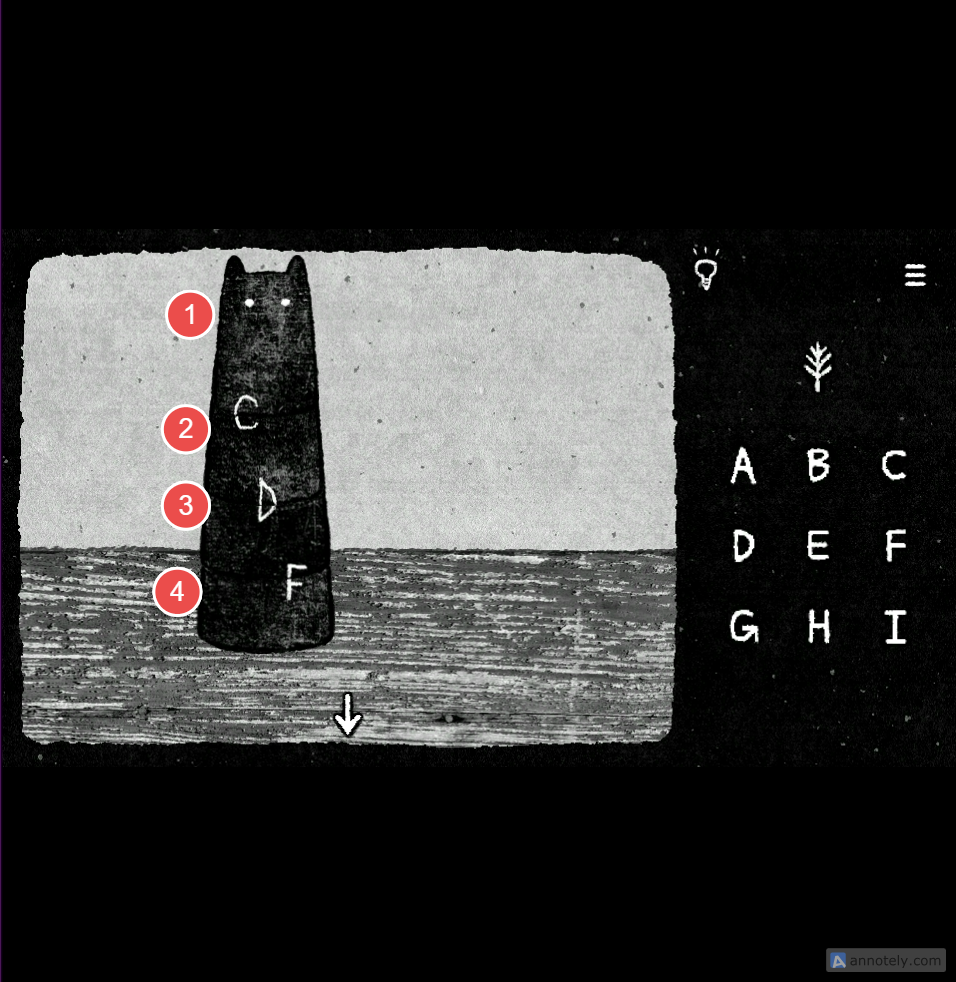
Cat Figurines
Click on the cute cat figurine at the bottom of the table to start the final puzzle of this stage:
There are four parts of a toy cat figure with strange markings. Stack them one on top of another to reveal three letters:
The hidden letters are C D F
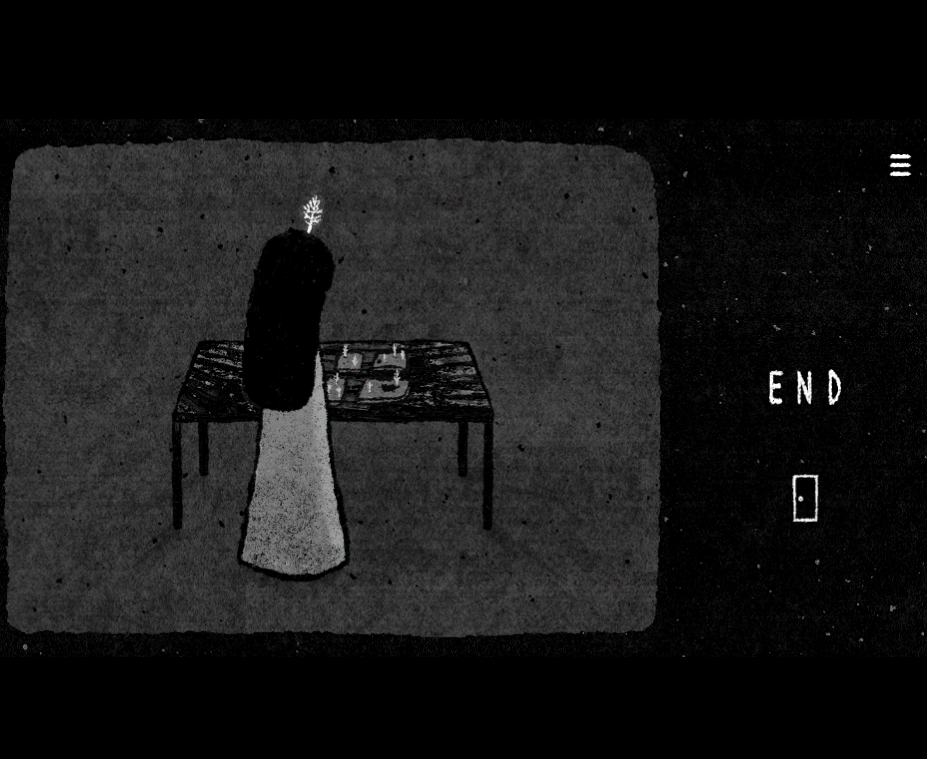
Ending
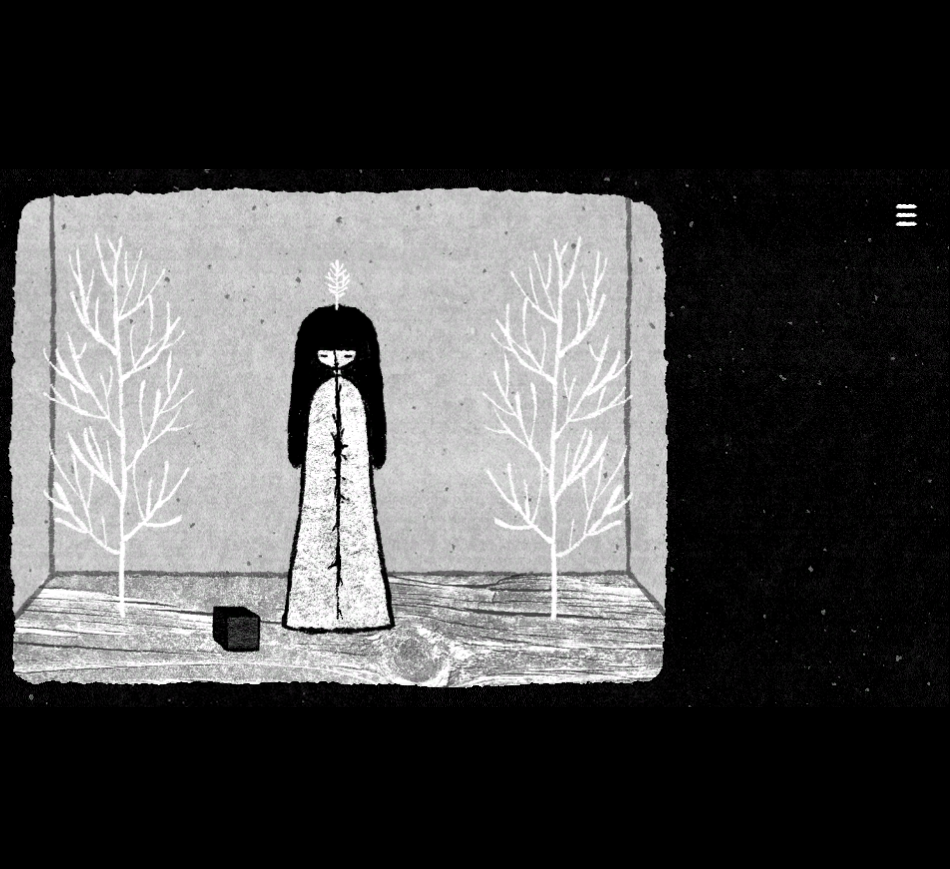
After completing all the puzzles, return to this room and click on the cracked spot on the girl’s dress.
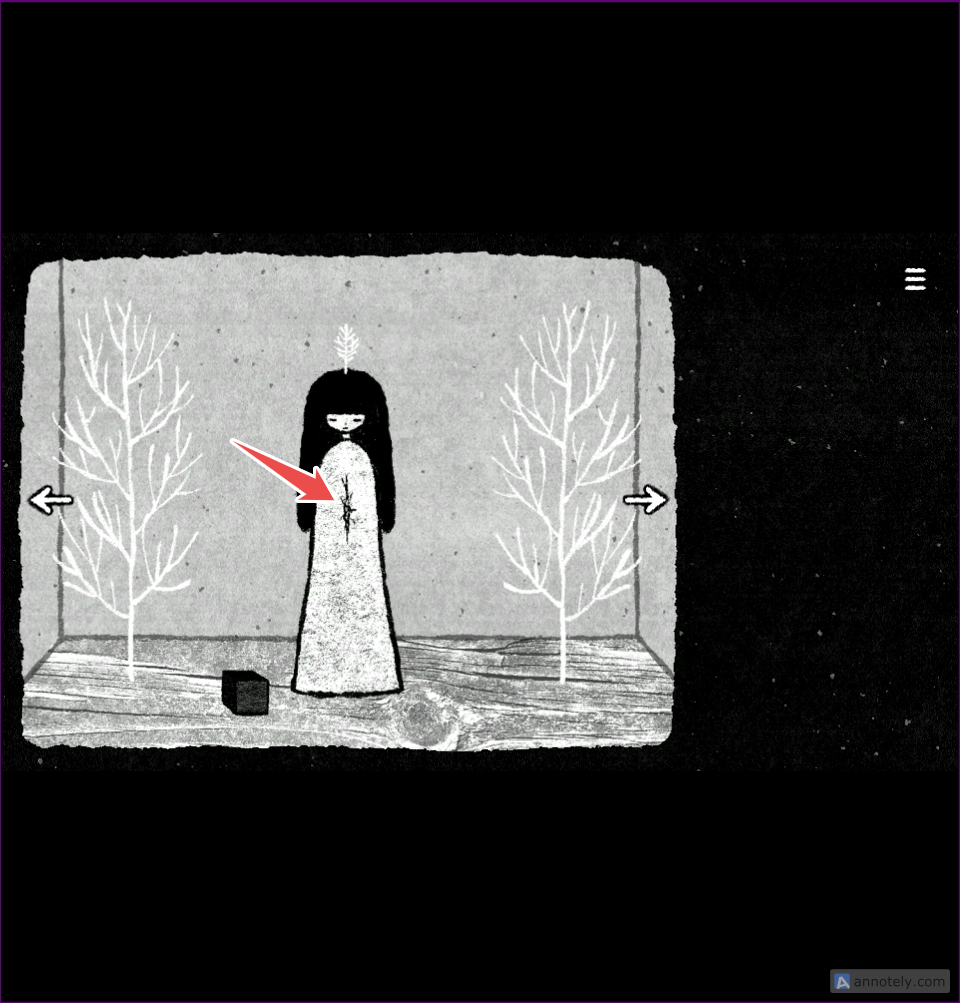
This is another clever puzzle. Some pieces in the middle of the cracked spot are movable. move them aside to find three hidden letters – D C I
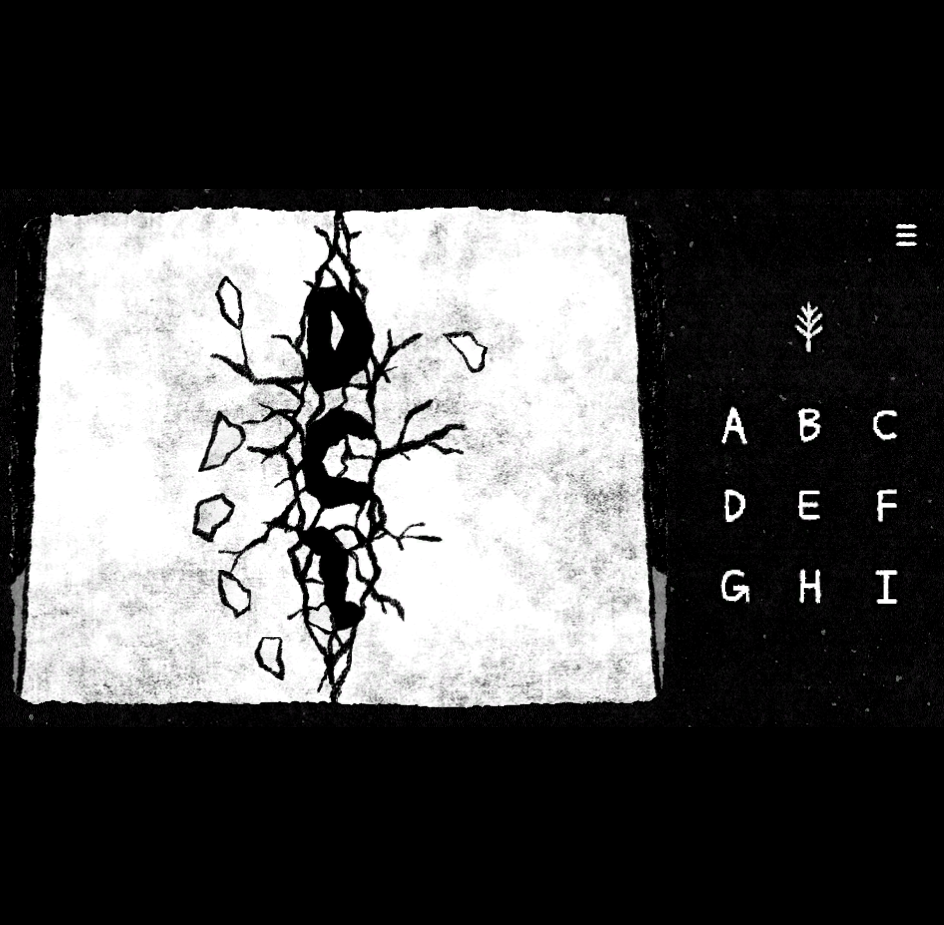
The crack widens. Click to further widen it:
Click on it repeatedly, and you will see the crack widen up to the walls:
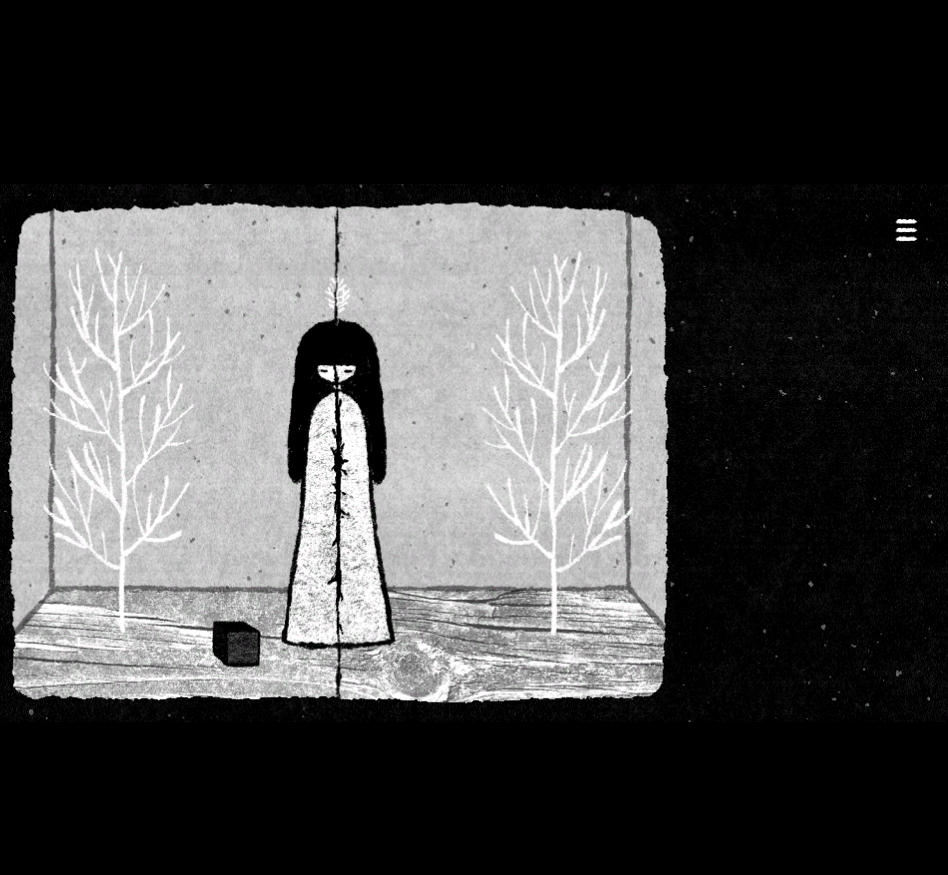
The wall cracks and splits into two.
You will see a toy house again – the one from the beginning. Click the downward-pointing arrow to end the game.